Another attempt to spray Tamiya White (TS 26), this time over automotive-grade primer/sealer, also failed and ended back in the alcohol bath. So it will be Testor's.
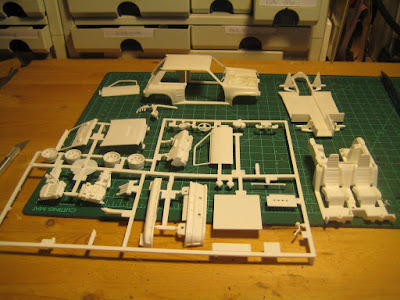
The engine is essentially complete. These kits require a lot of trial fitting, and I highly recommend drilling out any dowels and replacing with pins made of brass rod of 1/16" or less. In this case, the turbocharger, intercooler and intake manifold benefited from this approach. In spite of this the intercooler is slightly cockeyed, which deliberately does not show up in the picture.
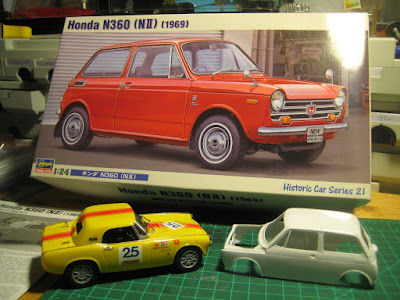
The body has been cleaned up and washed in alcohol, and the largest sinkholes (all underneath) have been filled with putty. I'll sand out the putty and primer the body tomorrow, and I am sure that will be followed by lots of sanding to smooth out rough bits. I'll get to the hobby shop for paint by Monday or Tuesday, at which point the engine can go in permanently along with the drivetrain and interior. Once I get paint to stick, we will have made more steps forward than back...
A blog devoted to sharing my adventures building 1/24 (and 1/25) scale model cars, whether styrene or resin. Enjoy!
Friday, September 30, 2016
Thursday, September 29, 2016
Audi S1: chassis and drivetrain Part 2
Now before anyone gets the idea I was dumping on resin in my last post, I wasn't. It's a great way to get highly detailed models of stuff Tamiya or AMT will never release. You just need to tackle it properly, that's all.
So I soaked the chassis in a mix of Tamiya thinner (an expensive mix of n-propanol and butyl alcohol) with pharmacy-bought iso-propanol for an hour while I ran out to get automotive primer at the local auto parts store. This took off most of the Tamiya primer as well, and required a lot of scraping in corners where the toothbrush doesn't reach. A small brass wire brush in the Dremel helped here but be careful not to dig in too deep.
Next was two coats of Dupli-Color primer/sealer, the heavier of the two Dupli-Color primers available. It fills in small scratches and pinholes, and is probably a good choice for resin even if you haven't had to scrub off some earlier problems. This is drying overnight while I decide whether to risk the Tamiya white again, or to move to an enamel from Testor's. There is a problem with pale Tamiya colors and this is unrelated to styrene versus resin. However the Testor's will be harder to fix if it goes wrong. Decisions, decisions... meanwhile I painted the engine block red using Testors in a bottle, so there is progress. Stay tuned! Pictures will come as there is something to document.
Labels:
1:24,
Profil 24,
Resin & Multi-media kits,
Stock builds
Audi S1: chassis and drivetrain Part 1
A number of acquaintances have asked about resin, so perhaps I will use the Audi S1 to illustrate challenges and solutions as I go along.
The Audi is the third Profil 24 resin kit I have tackled, the other two (Aston Martin DBR1, Renault 40 NM) being stalled. There are clearly a range of quality levels when it comes to resin, usually reflected in price.
At the top of the heap is Model Factory Hiro. The resin parts look like styrene and need little or no fiddling to get them to fit. The spun-cast white metal bits need more work, with part lines and dowels needing cleaning up, sockets needing drilling, etc. You pay the price, though, in cash, with prices in the 30,000 to 40,000 yen for the few 1/24 scale kits they still make. (That's $300 to $400 depending on currencies). Add in shipping and you've got yourself one hefty bill. Case in point: the Abarth OT 1300 went together well and is essentially complete; if you look back, you will see that my ongoing challenges with the Porsche 908/03 arise more from the white metal than the resin bits.
At the other end of the spectrum are the large number of transkits provided by Jimmy Flintstone. Poor surfaces, lots of flash and sinkholes, and thick castings that are frequently not straight make any project an exercise in hand-fitting the new body to the donor chassis. The high-quality builds you see in online forums arise as a result of many hours of primer, paint, sand, repeat, followed by (I am guessing) hand fabrication of suitable brackets and mounting braces to get the stance right. Ooof. The low price tag, in the $20 range before shipping, is long forgotten once you make it to that stage.
The Audi is probably a good first resin kit to tackle (and is the first Profil 24 kit I bought) because there is very little structural white metal, meaning you can't bend a chassis tube and have it screw up the rest of the build forever; on the other hand it requires a very different mind set than styrene. So here goes.
Washing in alcohol yielded very little in the way of the brown goobers I have seen when cleaning up other resin kits, said boogers being the residual silicone-based mold release agent used in resin. Either I already washed this kit and forgot that I did so, or Profil 24 has done something to make this step unnecessary (using no mold release agent, or one that doesn't stick to the part, or maybe they rinse before packing).
Next was a high level cleanup of flaws in the engine parts and the chassis, then a first coat of Tamiya primer. So far so good; the primer showed up a multitude of little seams and flaws that needed more work. Primer, scrape and shape, primer, repeat. Resin makes more dust than styrene and you should try not to inhale the stuff.
The Tamiya primer went on the chassis well but the Tamiya white, frustratingly, did not. So back into the alcohol bath it all went, and off I went to the auto parts store for some industrial primer. The issue of pale colours in Tamiya paints remains. I have had problems with Tamiya yellow on styrene so I am beginning to think the issue is the paint, not the material; in both cases the standard Tamiya primer went on first. And the Tamiya French blue on the Renault 40 NM worked well. Options are Testors, which is an enamel and requires thinner to remove if it doesn't work; or auto paints that will be pretty permanent.
The chassis includes a number of items that are molded in, such as gearbox, driveshaft and exhaust pipe. This leads to lots of cleanup required to get rid of ugly lumps of resin. While this is admittedly in a location where most people will never look, the door pockets are a problem and will also require lots of grinding.
So two steps forward, three back. Stay tuned...
The Audi is the third Profil 24 resin kit I have tackled, the other two (Aston Martin DBR1, Renault 40 NM) being stalled. There are clearly a range of quality levels when it comes to resin, usually reflected in price.
At the top of the heap is Model Factory Hiro. The resin parts look like styrene and need little or no fiddling to get them to fit. The spun-cast white metal bits need more work, with part lines and dowels needing cleaning up, sockets needing drilling, etc. You pay the price, though, in cash, with prices in the 30,000 to 40,000 yen for the few 1/24 scale kits they still make. (That's $300 to $400 depending on currencies). Add in shipping and you've got yourself one hefty bill. Case in point: the Abarth OT 1300 went together well and is essentially complete; if you look back, you will see that my ongoing challenges with the Porsche 908/03 arise more from the white metal than the resin bits.
The MFH Porsche 908 forward chassis. Excellent resin bits but the spun cast white metal chassis tubes are easily bent. Superb quality at a price. |
The Audi is probably a good first resin kit to tackle (and is the first Profil 24 kit I bought) because there is very little structural white metal, meaning you can't bend a chassis tube and have it screw up the rest of the build forever; on the other hand it requires a very different mind set than styrene. So here goes.
Washing in alcohol yielded very little in the way of the brown goobers I have seen when cleaning up other resin kits, said boogers being the residual silicone-based mold release agent used in resin. Either I already washed this kit and forgot that I did so, or Profil 24 has done something to make this step unnecessary (using no mold release agent, or one that doesn't stick to the part, or maybe they rinse before packing).
Next was a high level cleanup of flaws in the engine parts and the chassis, then a first coat of Tamiya primer. So far so good; the primer showed up a multitude of little seams and flaws that needed more work. Primer, scrape and shape, primer, repeat. Resin makes more dust than styrene and you should try not to inhale the stuff.
The Tamiya primer went on the chassis well but the Tamiya white, frustratingly, did not. So back into the alcohol bath it all went, and off I went to the auto parts store for some industrial primer. The issue of pale colours in Tamiya paints remains. I have had problems with Tamiya yellow on styrene so I am beginning to think the issue is the paint, not the material; in both cases the standard Tamiya primer went on first. And the Tamiya French blue on the Renault 40 NM worked well. Options are Testors, which is an enamel and requires thinner to remove if it doesn't work; or auto paints that will be pretty permanent.
The chassis includes a number of items that are molded in, such as gearbox, driveshaft and exhaust pipe. This leads to lots of cleanup required to get rid of ugly lumps of resin. While this is admittedly in a location where most people will never look, the door pockets are a problem and will also require lots of grinding.
So two steps forward, three back. Stay tuned...
Molded-in door pockets and roll cage will be difficult to clean up. |
Sunday, September 25, 2016
Rallye cars: Back to the Audi S1
With a series of stalled projects now moving again (and which will all be documented shortly), it is time to get back to the rallye world. Initially I considered the Renault R5 Turbo from Heller, but on closer inspection the kit turns out to be very poorly detailed, and hardly worth the effort to assemble -- the photo below shows the entirety of this kit. This was an unpleasant surprise, frankly, as Heller has a reputation for well-engineered and very detailed kits, in particular of the Delahaye 135 or Citroën 15 which I have, and of the Bugatti T50 which I do not.
So while waiting for a more realistic kit of this little monster (Profil 24, are you listening?) I decided to look through the more detailed stuff on the shelf for the next project. The stash includes a good selection of resin (Audi S1, Lancia Delta, MG Metro, Porsche 550, Talbot Lotus, Toyota Celica) and styrene (Ford Escort, Ford Falcon Sprint, Lancia 037, Peugeot 206 and the aforementioned R5). The Lancia 037 would be a prime candidate but I am on a waiting list for an upgrade kit, so I decided to leave this on the shelf for a while longer.
Quite some time ago I ordered the Audi S1, in resin, from Profil 24. This kit has now been re-issued, and the nice folks at Profil 24 sent me a new hood to replace the one that was just a bit narrow due to resin not completely filling the mold, as well as a radiator which also had some flaws.
I figure it is now time to make some progress here, so the first step was to head over to the local pharmacy for some more isopropyl alcohol. I discovered the importance of this for removing mold agents here, a lesson that won't be soon forgotten. Next was some initial work to remove scarf, drill out holes, sharpen up dowels, plan for the odd pinned joint, and put a coat of primer on the engine components and the chassis. Photos to follow; this is going to be a very different build from a Tamiya kit, so stay tuned.
Labels:
1:24,
Profil 24,
Resin & Multi-media kits,
Stock builds
Thursday, September 22, 2016
Honda S800: Finally something finished! (sort of)
A determined push got the S800 completed, except for fixing the clear paint that caused the decal to soften too much on the roof. But given the roof is the last thing to go on the car, and given it looks good as a roadster, I think it's fair to call it 'finished'. Time will tell when I get around to fixing the roof...
The S800 is a lovely little car, with quite decent specifications in a slightly shrunken size: it all is scaled to the 800 cc motor which is a thoroughly modern, water-cooled, aluminum twincam unit. The S600 is similar, with two exceptions. Obviously the motor is smaller at 600 cc, but there is a major difference in the rear axle. On the S800, this is a live unit, mounted on coil springs and well located with trailing arms and a Panhard rod, but in the S600 the differential sits well forward of the axle and drives each rear wheel through an enclosed motorcycle chain box that swings up and down on a coil-over system to provide suspension. A lot of space is taken up by this unusual arrangement, and the unsprung weight must have been a huge percentage of the overall weight of the car, but it obviously reflects Honda's motorcycle background and the company felt safe doing this.
The key item in getting this done was the chrome surround on the windscreen. This always petrifies me as I am afraid I'll get paint all over the place, and usually constitutes a mental block that leads to models sitting, unfinished, for months while I get up the nerve to put paint on glass. This time I tried bare metal foil and it worked well, although from close up it is not perfect. After that, all the fiddly little bits (door handles, wipers, etc.) all went on nice and clean.
Overall a nice kit, with typical Tamiya quality of fit, but with the usual Tamiya decal issues. I think in the future the trick will be to scan the decal sheet to the computer so I can print out a fresh one if I screw up, which I did on the roof. Also having to apply the metal transfer on top of the decal on the trunk lid is a big problem because the sticky backing tape wants to pull the decal off. Finally the decision to mold some bits in black is completely inexplicable. Other than that, there were a couple of minor screw-ups that were my fault and that I won't document here :). One or two are visible in the pictures, bonus points if you can spot them.
Main lesson: Bare metal foil can be a very useful tool. Just be sure to use a new blade in your knife as the instructions point out.
What's next? Maybe I'll tackle one or two of the 'almost done' kits just to clear some space on the workbench. Alternatively, there is the Hasegawa Honda N360 sedan which was probably the first Honda car; here the engine is an aircooled twin driving the front wheels. After that, other little tiddlers beckon: S600, 2CV, R4...
Labels:
1:24,
Stock builds
Saturday, September 17, 2016
Honda S800 bodywork
I occasionally get comments from readers. Apparently I have readers, who would have guessed; this is encouraging as it lets me know someone is actually interested in what I write. 'Don't encourage him', I hear some of you mumble, 'he'll only do more of it'. To these nattering nabobs of negativism, I say this: modeling is better than the alternative, which is hanging around in bars, blowing the kid's inheritance (such as it might be) on smoking, drinking and chasing women. But I digress.
So anyway one reader commented on the Big Al stories by asking if I ever built anything stock. Good question, so while I ponder how to get the Allison down in the weeds where any self-respecting rat rod belongs, I decided to get back to the Honda S800. First up was to finish the seam that runs along the fender tops in Bare Metal Foil. This went exceedingly well, to my great pleasure and relief, with only a couple of spots where I trimmed too much off. This sort of long, straight application is where the foil works particularly well.
Next I put on decals and three metal transfer scripts. The only problem here was the Honda script across the trunk lid, which was meant to go on after the decal; the plastic backing (predictably) lifted the decal off and the whole thing wound up a wadded mess in the garbage. Perhaps I should have clear coated the decal first. Anyway I got out a 3-0 brush I got from Wheels & Wings a few years ago and free-styled the missing stripe and touched up the foil, followed by a coat of clear. The clear appears to have damaged the stripe on the roof so this may need to be fixed; am I the only one that finds Tamiya decals to be fragile? The clear was Tamiya, not Testor's, although to be fair I may have laid it on a little thick.
Next I had to decide what to do with the inner fenders, which you may recall are supposed to be yellow but are molded in black. (I opened up my S600 kit which is essentially identical; this is molded entirely in white.) I decided to leave the lousy yellow paint as it was, and detail the engine bay with silver paint or by scraping off the yellow where black was needed. It's all going to sit for a few days while the clear sets good and hard, meanwhile I will have a crack at more bare metal foil on the windshield surround.
So a very nice kit marred by choices made by Tamiya as to what colour to mould different sprues, and by fragile decals. There ought to be a rule: all plastic model kits to be molded in white or light grey.
Labels:
1:24,
Stock builds
Friday, September 16, 2016
Chopped and channeled Freightliner, anyone?
Still trying to figure out what to do for a body for Big Al. The Freightliner cab and cockpit slide right down over the frame rails, and would look particularly good with a top chop, especially with the menacing-looking visor over the windshield ... bodywork below the level of the door would be cut away, and the exhaust would simply go through a right angle before dumping. I like this better than the Ford T pickup cab, but a simple T-bucket cockpit, with a gas tank on a platform over the rear axle, is probably more appropriate.
Decisions, decisions... meanwhile the chassis needs to be lengthened to fit the Allison behind the radiator, and to get that long, low look -- the Freightliner wheelbase looks to be about 124", not too far off some of the bigger American boats like the '59 Caddy. So before cutting into any bodywork, I spliced in about 15 scale inches, using Evergreen 0.060" sheet stock. I also built wedges to get the engine at the right angle.
Overall it is still looking good but for best effect, I think lowering the chassis significantly over the axles would be needed. It is sitting far too high for a proper rat rod. I'm going to stop here and ponder the major surgery that would be needed to do that.
Labels:
1:24,
Hot rods & kitbashes
Thursday, September 15, 2016
There's nothing like an Allison V12 if you want power
Some time ago I got my hands on MPC's Allison-powered Thunderbird, known as Allison Thunderland, or simply Big Al. Chassis and body are pretty poorly detailed, but the Allison V12 is well done and, apart from being entirely chromed, is a joy.
My interest in doing something with the Allison was revived by a tour of the Curtiss museum in Hammondsport, New York, in July this year. This is a great museum if you are a serious piston head. Apart from a number of oddball motorcycles and other odds and ends from the prewar era, they have many early aero piston engines, from a wide range of radial motors (several Curtiss motors among them, obviously) to the various V12 motors designed in the years leading up to WWII by Rolls Royce and Allison among others. The ultimate in this line was an example of the 3000 horsepower Allison Double Twelve, consisting of a pair of V12s on a common crankcase and last used in the B29.
All this reminded me of pictures of a monster rat rod I once saw online, using a Packard V12 out of the PT boat program. So a truck-based rat rod seemed in order. Next question was what to put it in, and coincidentally AMT's White Freightliner, in the short-cab single-drive version, turned up this week. The chassis will get highjacked for the Allison, and the cab will go on my dual-drive kit in place of the sleeper cab that it came with.
First step was to dechrome the motor, so out came the Easy-Off. This left a shiny residue behind that required additional soaking in alcohol.
The Allison gearbox, visible in the photo above in the sprue on top next to valve covers, is really just a clutch housing and maybe just a reduction gear, so first step in converting this to a rat rod was to fit the gearbox from the White. Coincidence or not, this fits right on the back of the Allison, with the same 'D' shaped doweling requiring no filing or fabrication. Further coincidence, the Allison engine mounts sit perfectly inside the White chassis rails, at just about the right height to line up with the differential while sitting high enough for the exhaust pipes to clear the chassis rails. All that is needed is to tilt the motor slightly back as with the Cummins, so the driveshaft clears the middle crossmember; I'll shim up the forward mounts for this purpose. Was the White kit designed for this motor as Plan B?
Quite the monster ... although it looks like it will be taller and shorter than I might have liked. I've got a Ford T pickup truck body that might look good on it, although a bucket would probably be more appropriate. Clearly the Freightliner radiator will be way too tall.
Note the front wheel is not attached at this point, and will sit further forward giving a lot less front overhang than the photo implies. Good progress so far; my intention will be to at least finish something in the next little while ... given I have been retired for a couple of weeks now, there should be plenty of time. Stay tuned!
Labels:
1:24,
Hot rods & kitbashes
Tuesday, September 6, 2016
Unimog, and other ugly but useful stuff
From the Cheetah to the Unimog: how's that for whiplash. For the uninitiated, the Mog is a 4X4 once built by Mercedes Benz. Actually 4X4 doesn't do it justice; it borders on the farm tractor end of the spectrum as it will go just about anywhere, just not very fast. I haven't seen one in a very long while, except about a year ago at the ferry terminal on the Vestmann Islands (an outpost off the coast of Iceland, where Iceland is an outpost off the coast of Norway, but I digress), which is where I took this picture. As you might imagine, there is quite the cult following out there for these ugly, go-anywhere ducklings, and afficionados work hard at outdoing each other in competitions for the most bizarre accessory. Hay-baler, anyone? Tall and narrow, Mog owners look down, literally, on Land Rovers.
Way back when, I did my apprenticeship at a Mercedes dealer, and they had a Mog for clearing snow and dragging cars back and forth from the mechanical shop to the body shop, a distance of a couple of blocks. It was an old one, similar to the one in the picture above but with two doors and a little pickup box, with a little 4 cylinder Diesel making something like 50 hp at its 1800 RPM redline, a gear box with six forward speeds and two reverse gears (eliminating the need for a transfer case), permanent full-time 4WD, mechanical PTOs at both ends, and, most impressively, reduction gear cases in the wheel hubs which, combined with the huge rims, allowed the differentials to be mounted substantially higher than the wheel center-line. The resulting ground clearance needs to be seen to be believed. On the flip side, all those reduction gearboxes, combined with the 1800 RPM redline, made for a maximum speed of something like 35 mph.
So in a fit of nostalgia, I built up Revell's Unimog some number of years ago, in German fire department trim. I never got around to the actual fire department equipment, leaving it as a cab with a bare chassis. A number of years later, I picked up Italeri's truck accessory package with the chassis mounted cherry picker. This has now been mounted to the back of the Mog, where it looks good if a trifle wide.
Next step was to scratch-build a small platform on the remainder of the chassis, suitable for carrying a selection of engines or other interesting bits such as a Mini which to be fair doesn't quite fit. The side panels from Hasegawa's VW pickup fit perfectly on the deck plate from the Italeri truck accessories kit. Tail lights and license plate from the Mog finish it up. No tailgate at this time as the one from the VW was too narrow.
Overall it is a quick build with a range of minor flaws, due in part to the fact that I am upgrading an older build, but still it is something unusual. The downside: While this clears a large box off the storage shelf, it wasn't technically on the 'incomplete' list, so my completion rate remains unchanged. Actually it has dropped due to new acquisitions, but that is a story for another post.
Note Revell's fire-fighting truck box, complete with accoutrements such as the rubber dinghy that goes on the roof (these Germans are always well prepared), is now surplus to requirements. The bits are all there, although the bags have been opened; nothing has been painted. I am afraid the ratty box has gone to the recycle bin. I also have Revell's curbside Mercedes-Benz 280 GE fire chief wagon. This one is (I believe) complete, again unpainted although the bags have all been opened and the chassis assembly has begun. Again the box is missing, but the instruction sheet is available. Both decal sheets are looking pretty tired and if I were to use them, I would scan and print a new sheet. See the pictures below; let me know if you want any of it, I'd be willing to trade for other obscure stuff. (I have outgrown my fire truck phase.)
Labels:
1:24,
Stock builds
Subscribe to:
Posts (Atom)