Sunday, December 8, 2019

Lotus Eleven: Complete (#13 for 2019)

Finally another one done! The Lotus Seven/Eleven is complete.


Dashboard and cockpit detail includes the regulator for the generator.


It may be meant to reproduce a road car, but I kept the Le Mans windshield and tonneau cover provided in the Profil 24 kit.


The fabricated hood hinge uses brass tubes inserted one inside the other.


Intake horns are longer ones from Scale Productions, and are bordering on too big for this set of Webers.


The full Lotus complement. Seven and Eleven have the same license number plate, something I should probably fix... The Elan chassis is complete but the body is not; the Europa is an older build.


So what's next? Perhaps there is another WIP that's close. Stay tuned!

Friday, December 6, 2019

Lotus Eleven: final assembly has begun

So I am taking a break from the De Havilland Mosquito (two-seater, with twin Rolls Royce Merlins, 27 litres each and a combined 2900 horsepower) to finish up the Lotus Eleven, coincidentally also a two-seater, but with a Lotus-modified Ford Cortina engine, 1430 cc, maybe 110 hp, 115 tops. Ringy dingy ding.


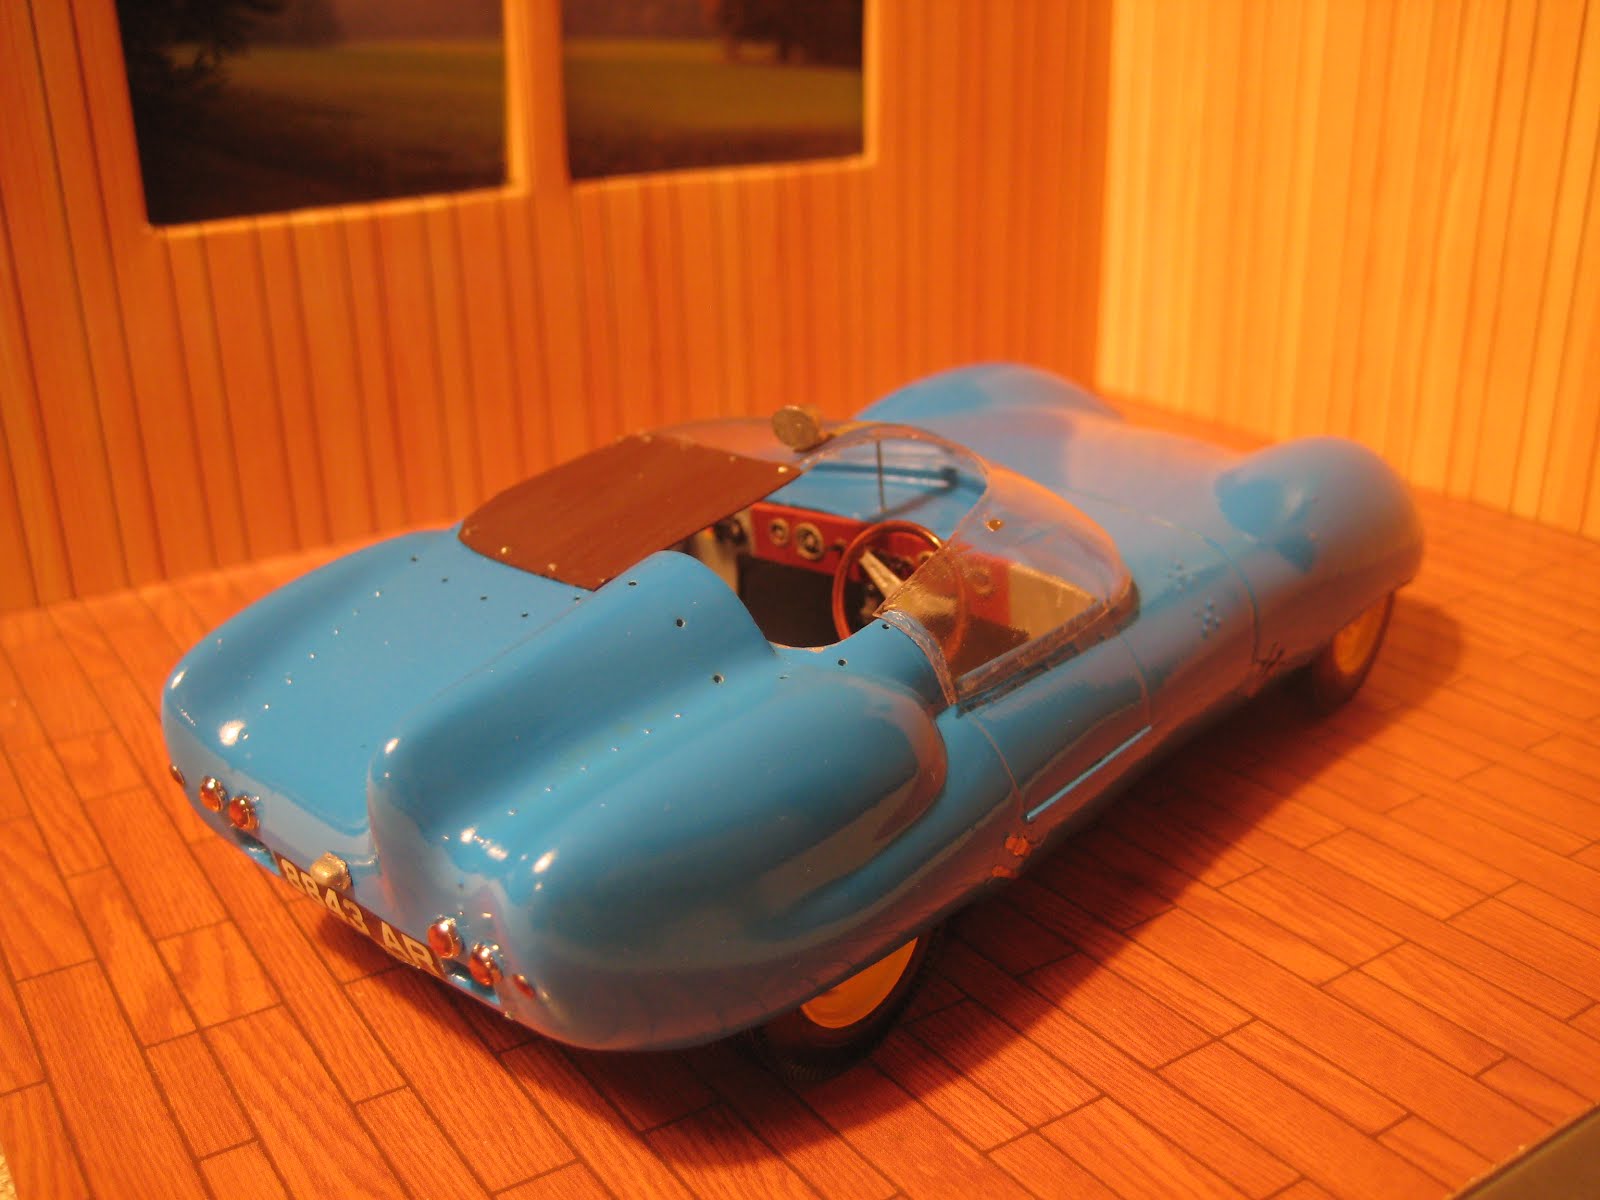
So this isn't really an Eleven, as I have matched the Profil 24 Eleven resin slot car body to Tamiya's Seven chassis and mechanical bits. The Eleven never had the hot-rodded Cortina engine, or the double A-arm front end, or the solid rear axle. A Seven Eleven, maybe? 


So anyway I decided not to deck it out in 1957 Le Mans livery (British Racing Green with a thin yellow stripe down each side) as it is not a Le Mans racer. That left me room to be creative with the colours. 


Work in Progress but I am getting there. I particularly like this angle. What a basic little ride!


Stay tuned!

Mosquito: modified build sequence


For anyone considering tackling the Airfix 1/24 Mosquito: After carefully pondering the 56-page instruction book, I decided to change the assembly order, mainly because Step 5 involves a structure that will be easily damaged. Here is the order I built it in (numbers refer to the Airfix assembly step): 

1-4, 
6-8, 
9 (except part 37L), 
11 (except part 39L), 
12-15, 
17-24, 
16, 
25-27, 
10 (including parts 37L and 39L), 
5, 
28-33, 
35-37, 
34, 
38-42. 


For Steps 42 to 143 I have followed sequence in the instructions; I am presently stopped at 144 but have done 220-225. So far this has worked out, and there were no points where I realised afterwards that changing the order was a mistake. 


Stay tuned! Progress is being made. 

Tuesday, December 3, 2019

Mosquito: Airframe complete

So the Port nacelle is well underway; the starboard one still needs to be started.


Meanwhile the wing and fuselage is pretty well complete. Paint includes the red and white stripe as used by Ottawa's Spartan Air Services on the tail fin.


With the wing inserted, the navigational bits can go into the back of the cockpit which is also now essentially complete.


View through the access door.


It's a monster! The 27" wingspan means it won't fit in any of my display cabinets.


Next is to finish the port nacelle and build up the starboard nacelle.


Looking for decals for the civilian high-altitude reconnaissance version with pressurised cabin as flown by Spartan Air Services in Ottawa, Canada, from about 1955 to about 1065. Seems they had 15 Mossies,,, the sheet I want is below but is too low resolution to print. Any help is appreciated!


Given I am going to skip all the armaments, the end is near. Stay tuned!

Monday, December 2, 2019

Mosquito: landing gear and cowling, test fit

Well, if I thought the cockpit and engines were going to be the most challenging parts of this build, I was wrong. Building the landing gear and fitting it, along with the Merlins, into the cowlings were not easy steps.


Along the way I found advice on the Interweb to the effect that the landing gear is fragile and should be replaced with aftermarket bits from Scale Aircraft Conversions. I acquired the bits and while the assembly so far uses the styrene bits, the white metal bits will come in handy as I have already broken a couple of styrene struts.


The aftermarket bits include relatively sturdy items such as the hydraulic cylinders, but also the finer structural bits. Sadly these are mostly bent, so best to go with the styrene initially, using the aftermarket bits only when needed.


For the purposes of test fitting everything, I have taped the landing gear in the retracted position so as to minimise breakage. I will pose it with gear down, however.


The Merlin is a tight fit, and the green structural tubing appears to not line up very well. Test fitting the second half of the cowling helps identify where everything is supposed to fit.


Landing gear won't fit through the opening, for some reason, so I'll have to be sure to put the gear down before gluing the second cowling half in place.


Fit to the wing is a challenge as well!


All coming along now. Next is final assembly which requires disassembling first as there is a bunch of piping, struts and other items to go in before closing up the cowling. The second engine and landing gear assembly should go together more easily. (Of course I have now jinxed myself...)


It's starting to look like an airplane! Stay tuned.

Tuesday, November 19, 2019

Mosquito: Twin Merlins complete

What a lovely pair of engines! Very detailed.

Engine block with supercharger and carburettor housing facing downwards at the front. The aluminum box at the back of the head is the magneto for the exhaust-side spark plugs. There is another mag on the other side; additional mags for the intake side plugs are not modeled.


Second block in preparation.


The tubular engine support structure is very delicate, and looks a bit thin given there is 1460 horsepower on tap. However there was no record of these engines ripping themselves from their mounts, so presumably it all worked out.


Some of the piping. Oil and water pipes are external in many cases.


Completed engines on their tubular supports. The first photo is the left side, which I gather is the port side. The builds diverge from here on as the radiators are built into the wing between the engine nacelles and the fuselage, so piping goes either left or right from here on. 


Starboard side. The unit to the far right is the propeller unit on its reduction gearbox. The carburettor intake is on the left side at the bottom.


The "back" end of the engines where the supercharger drive is taken off. Some piping gets connected once the engines are slipped into their nacelles. 


Water header and propeller drives at the forward end of the engine.


Bits of paint touchups are needed, but it's pretty well done by now. Lovely builds and it is too bad you can't get these for scratch building hot rods. Stay tuned!

Sunday, November 17, 2019

Mosquito: Basic wing assembly complete

Last time I posted on the de Havilland Mosquito was back in June 2017, when I completed the cockpit and glued the fuselage halves together. I dug the enormous box off the Shelf of Doom and dusted it off.


The wing was made as a single unit back in the day. In the Airfix kit, the upper surface is also a single piece and comes as part of the largest sprue I've ever seen.


Three lower sections required clamping. I will build this one as a civilian plane from the 1950's, reproducing a version flown by Spartan Air Services out of Ottawa. So there will be extra fuel tanks on the wings instead of the more usual machine guns.


What a monster ...


Next: flaps and other bits associated with the wing, then on to the twin Rolls-Royce Merlins.


Stay tuned!