Thursday, January 10, 2019

Ferrari 166 MM Berlinetta: Grille

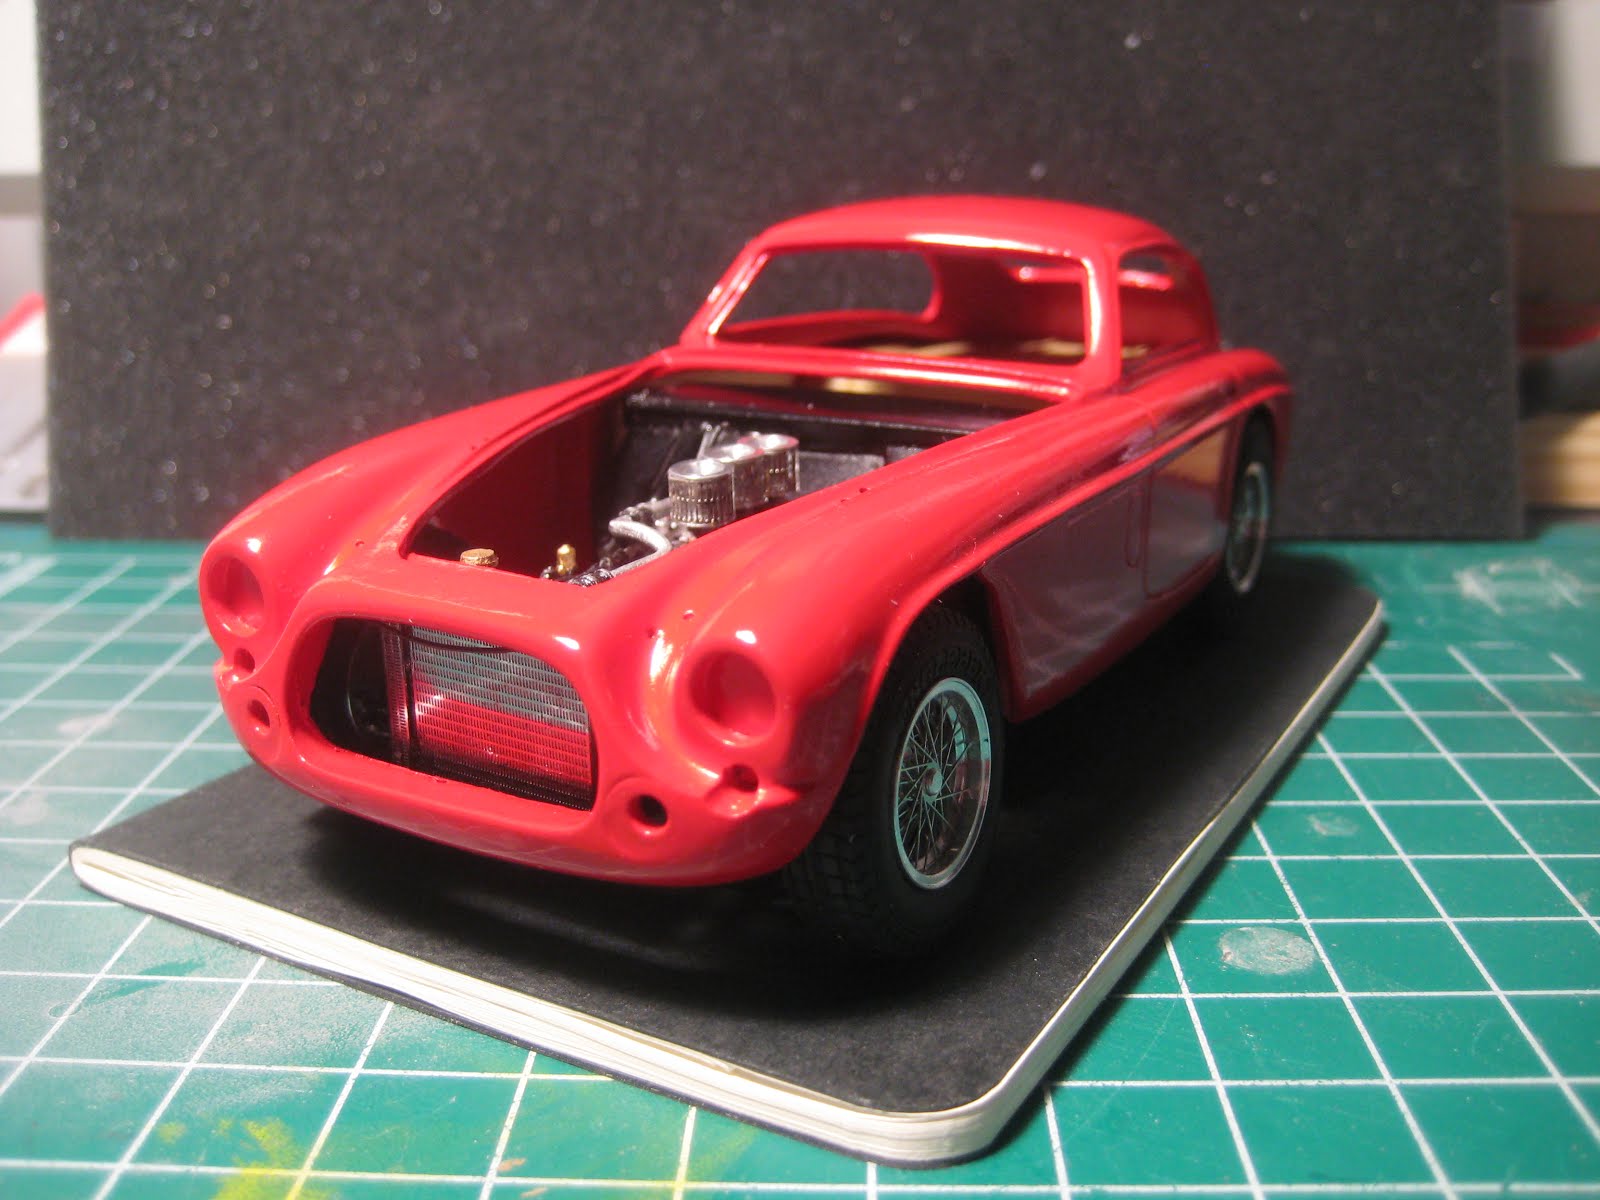
Yes, this topic is worth a post all it's own, because I spent a quiet afternoon focused essentially just on this component. Basically the classic Ferrari eggcrate grille is assembled from 8 horizontal bars and 10 vertical bars, each set of bars with slots that intersect with slots in the other set. The trick is to get the first vertical bar into the right slots in all 8 horizontal bars; once that's done it's relatively straightforward, the keyword being 'relatively'.


This required making a jig with 8 parallel slots cut with a jewellers saw, in order to hold the 8 horizontal bars steady. Clamping everything is critical as I discovered when a clamp slipped off and all 8 bars fell out.


Clearly, though, I got the horizontal bars mixed up following the spill; the third and fourth bars have been interchanged. However as is frequently the case, this is a case of 'no one is going to look that closely...I hope".


Forcing it all into the grille surround took some fearless prying, and again there are a couple of bars that are a tad too long.


It's all coming together, with the level of detail paying off in appearance compared to a molded styrene grille of the same type.


The jig will get set aside for use on the 166 MM Barchetta. Stay tuned!

Wednesday, January 9, 2019

Ferrari 166 MM Berlinetta: Chassis

Progress continues at a slow pace. Like all Model Factory Hiro kits, especially older ones like this one, there is a shortage of positive joints or connections between parts. Most dowel and socket joints require drilling out the socket, and filing the dowel which is often slightly conical. The time and expense of #75 and #61 drill bits is worth it, however, to build up models of the early Ferraris that I drooled over as a kid in Road & Track.

The engine is in place, and while it is missing a couple of little details (round black knurled knobs on the valve covers, wing nuts on the air filters), it's looking good. I decided against plumbing in the carbs and fuel pumps but will revise that decision when I get around to the Barchetta.


Interesting that the upper radiator hose takeoff is in the middle of the block above the clutch housing. The kit doesn't include a lower hose, which would appear to connect to a flange on the front cover.


Also interesting is the exhaust manifold, made up of three pairs of two pipes; when I worked on Jags and Austin Healeys, it was clear that two sets of three pipes was best from the point of view of the typical firing order for a six: 1-5-3-6-2-4. With cylinders 1, 2, and 3 on a common exhaust branch, you get even pulses (1, then a pause for 5; 3, then a pause for 6; 2, then a pause for 4). With sets of 2, you get 1, then pauses for 5, 3 and 6; then 2 and a pause for 4. By the time the 250 Lusso came around they had understood the issue and had changed to three-into-one groups of pipes.


Of course, triple carbs have the same problem. SU and Stromberg carbs, with their variable venturi system driven by engine vacuum, really didn't like this, and Jags and big Healeys ran better on a pair of big SUs than on three smaller ones. Fitting triple carbs only made sense if they were double barrel Webers, with each cylinder getting it's own barrel. The 166 engine here has three carbs, with each barrel feeding two adjoining cylinders. It's hard to tell from the kit, but it looks like the Lusso, which also had three carbs, had a series of plenum chambers so that no carb barrel ever gets solicited twice in a row. Of course the 3-litre racers all had a full complement of six double-barrel Webers, solving any carburation imbalance problems with lots of lovely aluminum bits.


On to the chassis. Nothing unusual for 1950: transverse leaf and A-arms at the front, solid axle on leafs at the rear with no lateral location such as a Watts linkage or Panhard rod. Shocks are lever type units, probably friction rather than hydraulic. Steering is probably worm and sector or worm and gear, with the rack and pinion being some years in the future. All this mounted on a ladder frame, whose major advantage over conventional ladder frames would appear to be the fabrication from hollow tubes rather than C or H channels. I'm guessing it would be fairly truck-like by modern standards, although miles better than, say, a 1950 Chevy, due largely to significantly lower weight.


Of course, having a completed chassis meant I was very tempted to get wheels on it and verify the stance. Easier said than done, however, as each wheel consists of six photoetched spoke sets, three turned aluminum rings, a turned aluminum hub, a white metal spinner, and a drum brake made up of a white metal backing plate and a turned drum.


What a gorgeous little car!


The body, by Carrozzeria Touring, is absolute perfection.


Shades of a certain British sports car which later fell into the hands of a guy named Carroll ...


Sadly I'll never have the $30 to $50 million needed in the unlikely event one of the six cars made in 1949 through 1951 ever turns up at auction.


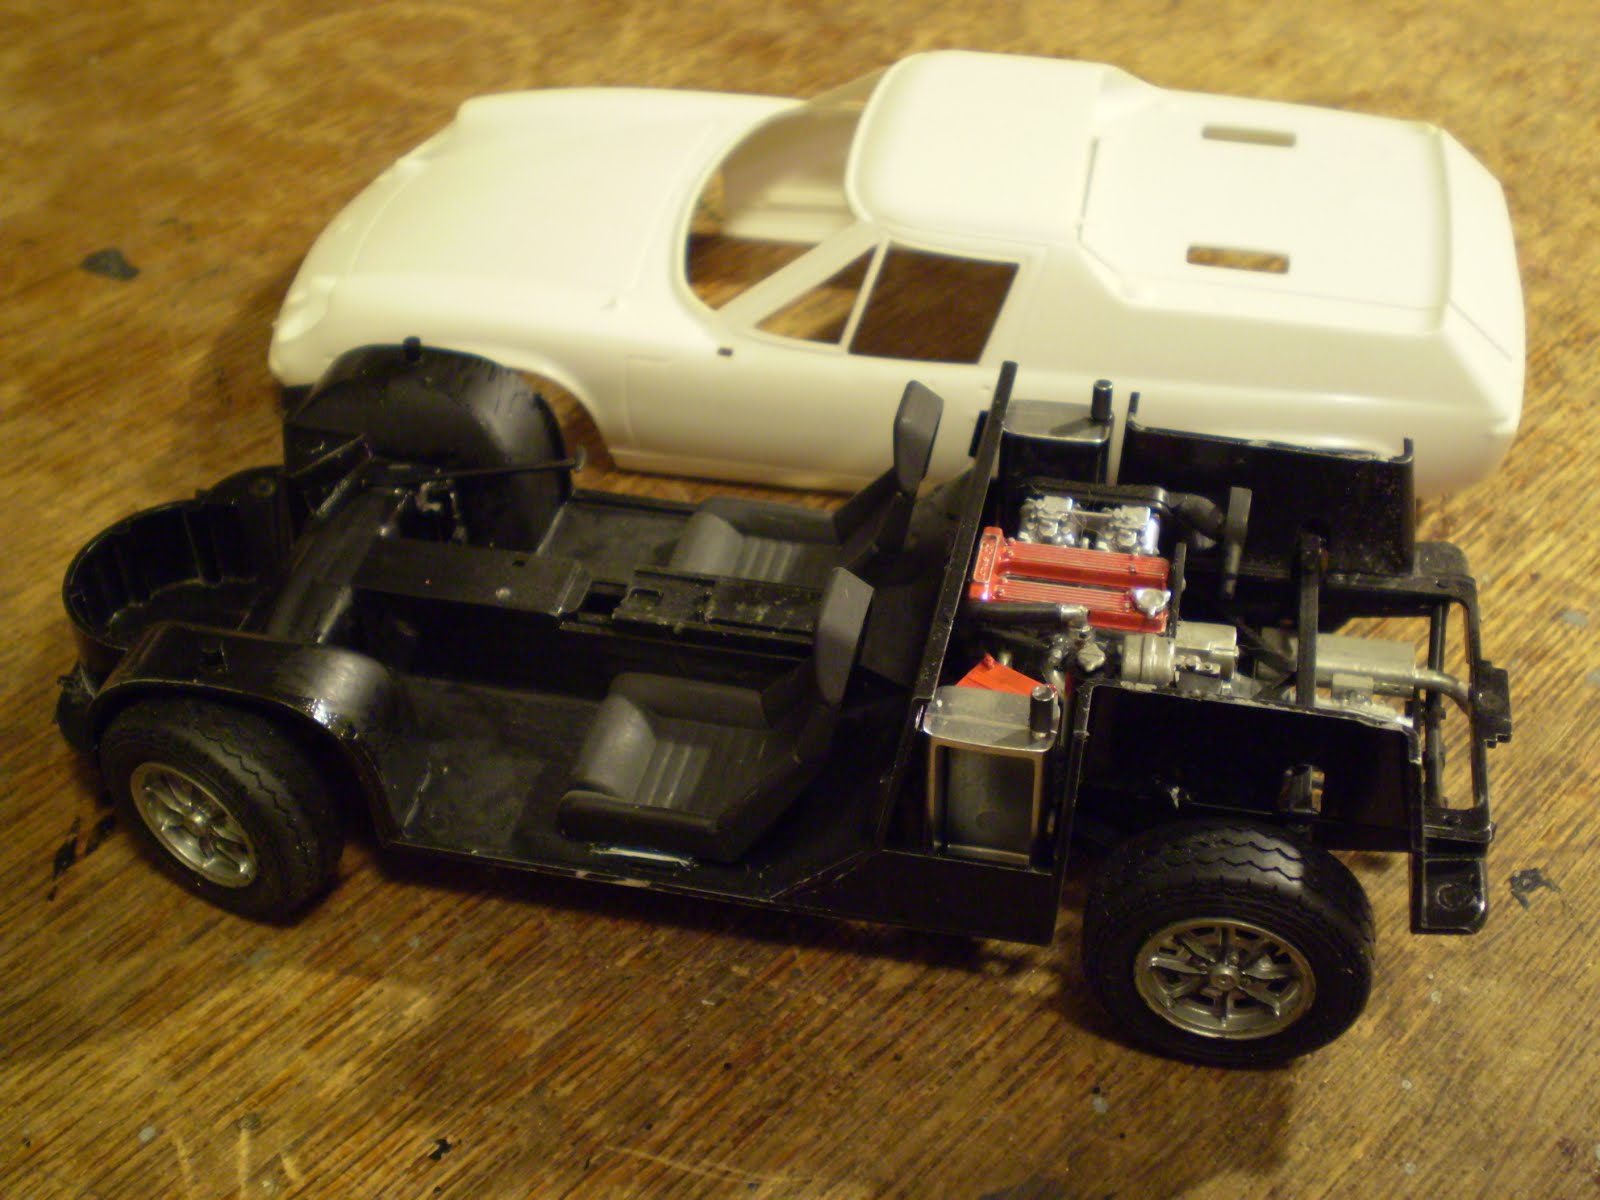
What a tiny little car! It makes the Europa look enormous, and if you've ever tried squeezing yourself into a Europa, you'll know what that means.


Interior and body are next next. The interior will be straightforward, but I usually have to psych myself up for final assembly on these kits, because of the very high probability of a major screw-up. Stay tuned!

Tuesday, January 8, 2019

Five year anniversary part 2

After 5 years at this blog, a few items have become clear from the statistics provided by Google, which hosts the blog.

First, only two or three posts really got any serious attention. Of roughly 15,600 pageviews so far (say 3000 per year, 250 per month), a full 1422, or over 9%, were of my scratchbuilt distributor, which I didn't even invent (I got it from the well-known contributor to various magazines, Tim Kriner). Click here if you want to see it. A couple of photos follow and illustrate the approach. Another 219 views were related to my initial review of Model Factory Hiro's monstrous little Porsche 908/03, here. After that it was double or single digit reads.

Second, the readership is worldwide, with 4700 pageviews from the US, 2600 from Canada, 2100 from Russia and 1100 from France. While these represent 68% of pageviews, there are readers in many other countries. I don't look at the stats all that often, but occasionally there will be a sudden burst of pageviews from a specific source. Russian pageviews, in particular, seem to come in waves; there are months where Russia is the single biggest source of pageviews by a long shot, then none for a long time. Or there will suddenly be a wave of pageviews from some small country that I have never seen in the stats before, like one guy discovered the blog and told all his friends, and they all looked. Once.

Finally, I have had maybe two or three comments in five years. So all those pageviews from Russia are either all from the same introvert who keeps coming back, or there are lots of introverts in Russia! I once wrote a post in French hoping to get some response from the French contingent, but nothing happened.

So tell me, if you will: what interests bring you here, and what should I focus on? I use the blog to record, for my own benefit, how I built stuff (what paint I used, etc.) but also to document unexpected challenges. This has been especially useful as I move to multi-media kits and resin bits of extremely variable quality. Let me know what is on your mind, confidentially if you so desire; I also post a lot of this on Facebook where all I get is Likes, but no real conversation.

Stay tuned, there is more to come!


Monday, January 7, 2019

Five-year anniversary

I started this blog on February 27, 2014. Looking back to that first post, I see that the links to older builds are no longer working as I have since rearranged my Dropbox files and accidentally deleted the files. So for the record here are some of my pre-2014 builds. The interesting thing is the extent to which my skill level has increased through continued practice. So if you are feeling beat by the challenges, all I have to say is keep at it! Practice, practice, practice.


Tamiya's Lotus 7. A very nice build and I will build it again.


Scratch-built 4WD and a stake bed from the parts bin. This was an opportunity to put all the various tools in a single spot, and to use the lovely Sinclair Oil decals with the dinosaur.


Vicky body shortened to a two-seater and moved rearwards to make room for the Revell Parts Packs version of the 283 with Potvin blower. An early rat rod.


Another Tamiya Lotus. I had a hard time with the decals of the gold stripes on the JPS black paint, so I simply didn't bother with them.


Honda 1.5 V12. Transverse engine. Fat lot of good it did them too. The level of detail in this Hasegawa kit is only fair.


Nissan Group C. Not Le Mans but the rules are close. Twin-turbo V8 and Tamiya's usual level of detail. This is unpainted and dusty.


Jag XJR-9R with the 7-litre V12. Chassis a lot like the Nissan. I decided to skip the eye-popping purple paint on the racer and go for a traditional BRG and yellow scheme.


Success on the decals on this one! Compared to the Nissan and Jag, the chassis has less aggressive undertrays due to rules, not aerodynamics.


Monte Carlo: Mini and Peugeot 205. The starting point may be the same (FWD, transverse engine econobox) but the end-result is quite different.


El Caprice and El Nomad. The Caprice is the Alternomad kit, with the rear roof hacked off and the top chopped; mechanically the chassis and pickup bed came from the Chevy 454 SS pickup truck underneath. The Nomad was a similarly crude approach with a blown V8 of some description taken from the parts bin.


Ford F150 6X4 transport and a '32 coupe with a Dodge Stealth engine transplanted to the rear.


The '32 body features an aggressive top chop and a sloped section. I probably cut up four or five of the Stealth kits for the drive train.


Another, cleaner, '32 with the Stealth drivetrain. No top chop on this one.


Cruisers: box-stock '59 Impala and my Project Starliner. Take her to warp, Mr. Sulu! The 390 Tripower fits nicely under the rear deck of the Starliner, and one hopes the Nissan Skyline rear axle can take the torque. I love the long deck and clean lines of the Starliner, in contrast to the clumsy fins of the Impala, and wanted to accentuate the line from the top of the front fender clear back to the tail lights.


So some straight rally and Le Mans builds, and a bunch of cut-and-paste scratchbuilt what-ifs. Shortly after I started this blog, I discovered resin and multi-media kits of obscure little racers that only true gearheads know of, at which point the hobby bug bit pretty hard.


Stay tuned, there are 190 more kits in the stash!

Ferrari 166 MM Berlinetta: engine

Progress has been made on the engine which is, as always, a gorgeous little casting, even if the 2-litre motors had their share of flaws.


The plug wire supplied is correct at 0.016" (0.4 mm, or about 0.4" at scale) but is challenging to work with as it really isn't stiff enough to push through a 0.018" hole without folding over. It is also impossible to squeeze all 6 wires from each of the two magnetos into one of the little white metal tubes supplied, which I replaced with 1/32" brass tube that was first flared a bit to allow to wires to thread in, then flattened to mimic the flat duct used for the wires (and incidentally trap the wires with no need for glue).


I will work at the little fuel distribution manifold to see if I can run a fuel line, but I suspect this will be a challenge due to the manifold being made of white metal instead of something stiff, like brass wire. Maybe I'll work out other approaches for the matching 166 MM Barchetta which is in the stash.


The other V12, by way of comparison, is a 9-litre unit made by adding 4 cylinders to a 368 cubic inch Chevy LS3 small block. The kit, which is probably 1/25 and so 4.2% smaller than the equivalent motor at 1/24, is a 3D printed unit from Ron Olsen's Shapeway store.  This is an older kit and I believe Ron has fixed the reversed Chevy emblem on the valve covers in newer releases ... the advantage of on-demand 3D printing is of course that you can just go back and edit the computer file. 


Finally there were three leaf springs to be built (one front transverse unit, and two rears), all made up from little photoetched strips. It is almost a shame to paint them black...

More to come. Stay tuned!

Sunday, January 6, 2019

Chevy Ambulance: Complete (#2 for 2019, #19 for 2018)

This was mostly complete in 2018, but I didn't have the time for final touches which were completed in 2019. These included making decals using the inkjet printer.


Decals on the inkjet are a bit hit and miss. It is important to use the photographic setting on the printer to ensure highest quality printing, and let the printed sheet dry for a few days before doing anything more.


Once the ink was dry, I sprayed the decals with Testor's Decal Bonder Spray #9200, but I am told that lacquer clear would work as well.


The decal sheet I used here was clear; the inkjet won't print white so any white on the decal will show through the colour below. It is my experience that the white decal paper also shows through when the contrast is high enough, so that, for instance, white on red paint becomes pink.


Next was to cut and soak the decals. Cutting as close to the image as possible is key. I used decal set, then quickly put on a coat of clear, as they were in some cases trying to curl.


This is a gift for a friend, a retired paramedic who spent close to 40 years on the night shift in a major metropolitan area without going crazy. It's going to a house full of dogs and grandchildren, hence the glass case and the big bolt through the chassis holding it all firmly to the base.


Overall a fun build, which forced me to develop some new skills around scratch-building. Look for more of this sort of thing in the future.

Friday, January 4, 2019

Ferrari 166 MM Berlinetta: First steps

What lovely little cars these 166 MMs were! I have the Barchetta as well as this Berlinetta, both from Model Factory Hiro. I fell in love with these cars after seeing them in Road & Track as a kid, and finally saw them in the metal at the Ferrari museum in Maranello in 2007.


The size is hard to understand until you park it next to other similar cars. It is the same length and wheelbase, roughly, as the 908/03 or the Lotus 7, being a bit wider than the Lotus but a lot narrower than the Porsche. Think MG Midget, but with a 2-litre, 160 hp V12. And if 160 hp, or 80 hp/litre, doesn't sound like much, it works out to a very impressive, for the period, 1.3 hp per cubic inch.


I thought I should tackle one of these as a way of 'getting back on the horse', so to speak, after the struggles with the 908/03. The chassis is a single casting reproducing the ladder frame used by Ferrari well into the '60s, and involves none of the little tubes found in the 908 or the TZ1. Like the 250 Lusso, the chassis will be relatively straightforward. That being said, the engine is very detailed and requires some work.


The early Ferrari motors, designed by Gioacchino Colombo, while modern in terms of bore and stroke, involved a couple of odd decisions around the cylinder heads. The valve springs were large hairpin-type things that sat next to the valve and consequently took up a lot of real estate under the valve cover; as a result the heads only had three studs per cylinder rather than the more usual four. The result was relatively frequent cylinder head gasket failures, maybe less so in the smaller bore 1.5 and 2.0 litre engines (models 125 and 166), but certainly this was a problem in the 2.3 and 2.6 litre engines, with their bigger bores, as found in the 195 and 212 models.


The spark plugs were located inside the V, next to the inlet manifold, also possibly due to the valve spring design. In any case, when Lampredi redesigned the venerable Colombo motor for the 3 litre 250 models, four studs were used along with conventional valve springs, and the plugs were moved to the hot side of the cylinder head next to the exhaust manifold. The 250 thus became the engine to beat in road racing, being both powerful and reliable.


The front cover is a very busy place, with two magnetos, a generator and assorted fuel and water pumps all driven off the camshaft drive system. The kit does not include a radiator fan, so I assume one is not supposed to idle about in traffic in one of these! This lack of a belt is a benefit from a maintenance perspective; on the other hand any repairs will involve gaskets and seals into the oil system, and I assume there is the potential, as with Lotus Twincam heads, for the water pump seal to leak into the sump.

The wiring for the plugs in this 166 MM is a challenge as the wires need to be fed into the head prior to the inlet manifold going in. In fact, it is easiest to get this started before assembling the heads to the block.


Wiring cord supplied by MFH is both thin (a scale-accurate 0.016") and flexible, making it a challenge to push into holes which I drilled out to 0.018". I found some craft wire some time back, that is also 0.016" but too stiff. Here is the right side cylinder head essentially complete. I used the MFH cord in the wires going to the magneto, but the craft wire for the short bits to the plugs. The left side will get done off the engine, the head will be installed, then the wires will get fed to the second magneto.


Primer started with Duplicolor CDAP-1699 Gray Primer Sealer. On the can it states that this is suitable for metal, fiberglass and wood. I followed this with Tamiya white primer to serve as a base coat for the Tamiya TS-8 Italian Red. Yes, I am still using rattle cans.


This particular kit (MFH K051, Version B) is set up as it ran in the Mille Miglia in 1950, and comes with decals for car #343 (21st overall) or #351 (retired). I will likely build it in road trim without the numbers, and will skip the third spot lamp mounted in the grille as used in car #351. Stay tuned!