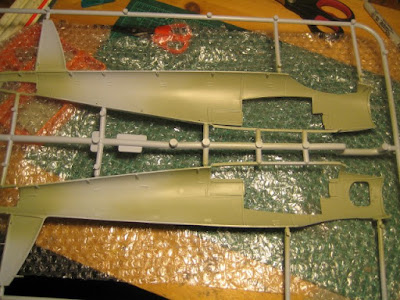
With the exception of the fin and rear section, which were added later at 1:1, the 1/24 fuselage shows how the plane was made in two halves which were then glued longitudinally once all the cabling, wiring and hydraulics had been put in place. This sped up assembly significantly, as crawling through bulkheads to do all this after gluing the fuselage halves together would have been much more time-consuming. A whole lot of innovation was going on here!

One concern flagged in the IPMS article is that some of these bits essentially are butted together, then glued, with instructions to hold them at 90 degrees. This is a recipe for disaster, in my view, especially since these subassemblies get a lot of other bits glued to them before they get fitted to the cabin. The probability the joints will be weakened is quite high. I will see if I can assemble all the little platforms separately, then glue them into their slots in the fuselage at the same time as I glue them together, rather than completing step 5 (shown below) first.

It is also worth ensuring all bits actually fit in the little slots, as I found one that doesn't quite work. Some careful pruning with an X-Acto knife will be needed. The photos show the cockpit floor, with the leather-covered slot for the rudder, fitting into the front of the fuselage.


Of course all this wood means that very few airframes have survived intact, and those that are intact probably can't be made airworthy due to rot in places where you can't go in and have a look, or cut out and replace a piece. Fortunately there is a fellow in New Zealand who has made new molds from scratch, and is now in a position to make you a Mossie fuselage, wing and other wooden bits such as the tailplane and fin.
This is relevant because there is some uncertainty around colour for the interior. Humbrol specifies #78, cockpit green, which looks dark compared to pictures of new fuselages from New Zealand. (Of course period pictures are largely black and white and so don't help much). In the end I settled for Tamiya's AS 29, Gray Green, as a starting point, and sprayed a range of bits. A couple of small subassemblies also got glued up, such as the pilot's seat.

I also sprayed the fuselage interior where it will be visible after assembly.

The colour looks pale but I like it and I think I'll stick with it. Separately the instrument panel, which is very detailed and includes a clear piece that pokes through the instruments (what a great idea! let's see this from the Round 2 and Tamiya people) will be flat black.

Progress is being made. And the Haynes manual is a fascinating reference summary.
No comments:
Post a Comment