Tuesday, July 14, 2020

BMW 2002 tii Estate: Overview

The Hasegawa kit of the 2002 and variants is superb, except it is a curbside. So I bought the Hasegawa kit when I saw the USCP engine bay kit. Along the way I added the Scale Productions fender flares and air dam, Renaissance photo-etched sheet and  Alpina wheels (which may get replaced with something a little bigger), and the estate body by Damien Lision of ARM (Anjou RĂ©sine Modeling). ARM also offers a Touring body, but the phantom wagon is neat and unique.


First step was to carefully cut the hood off the body, using a fine saw blade and the back of a new #11 blade. After some cleanup of the relatively small amount of flash, it all went into an isopropanol bath followed by a warm wash in Dawn soap.


The ARM resin is decent if not of the same quality as Model Factory Hiro: minimal flash, no large pinholes, and a relatively smooth surface.


As for the USCP bits, they are excellent.


With the body washed, the underhood panel has been glued in with 5 minute epoxy. Cuts to the Hasegawa floor pan and firewall have been made as requested by the USCP instructions (click here to see these instructions).


Test fitting required a bit more filing; perhaps the USCP panel should have sat a little higher in the resin body, but nothing that requires any serious correction.


Stay tuned!

Monday, July 13, 2020

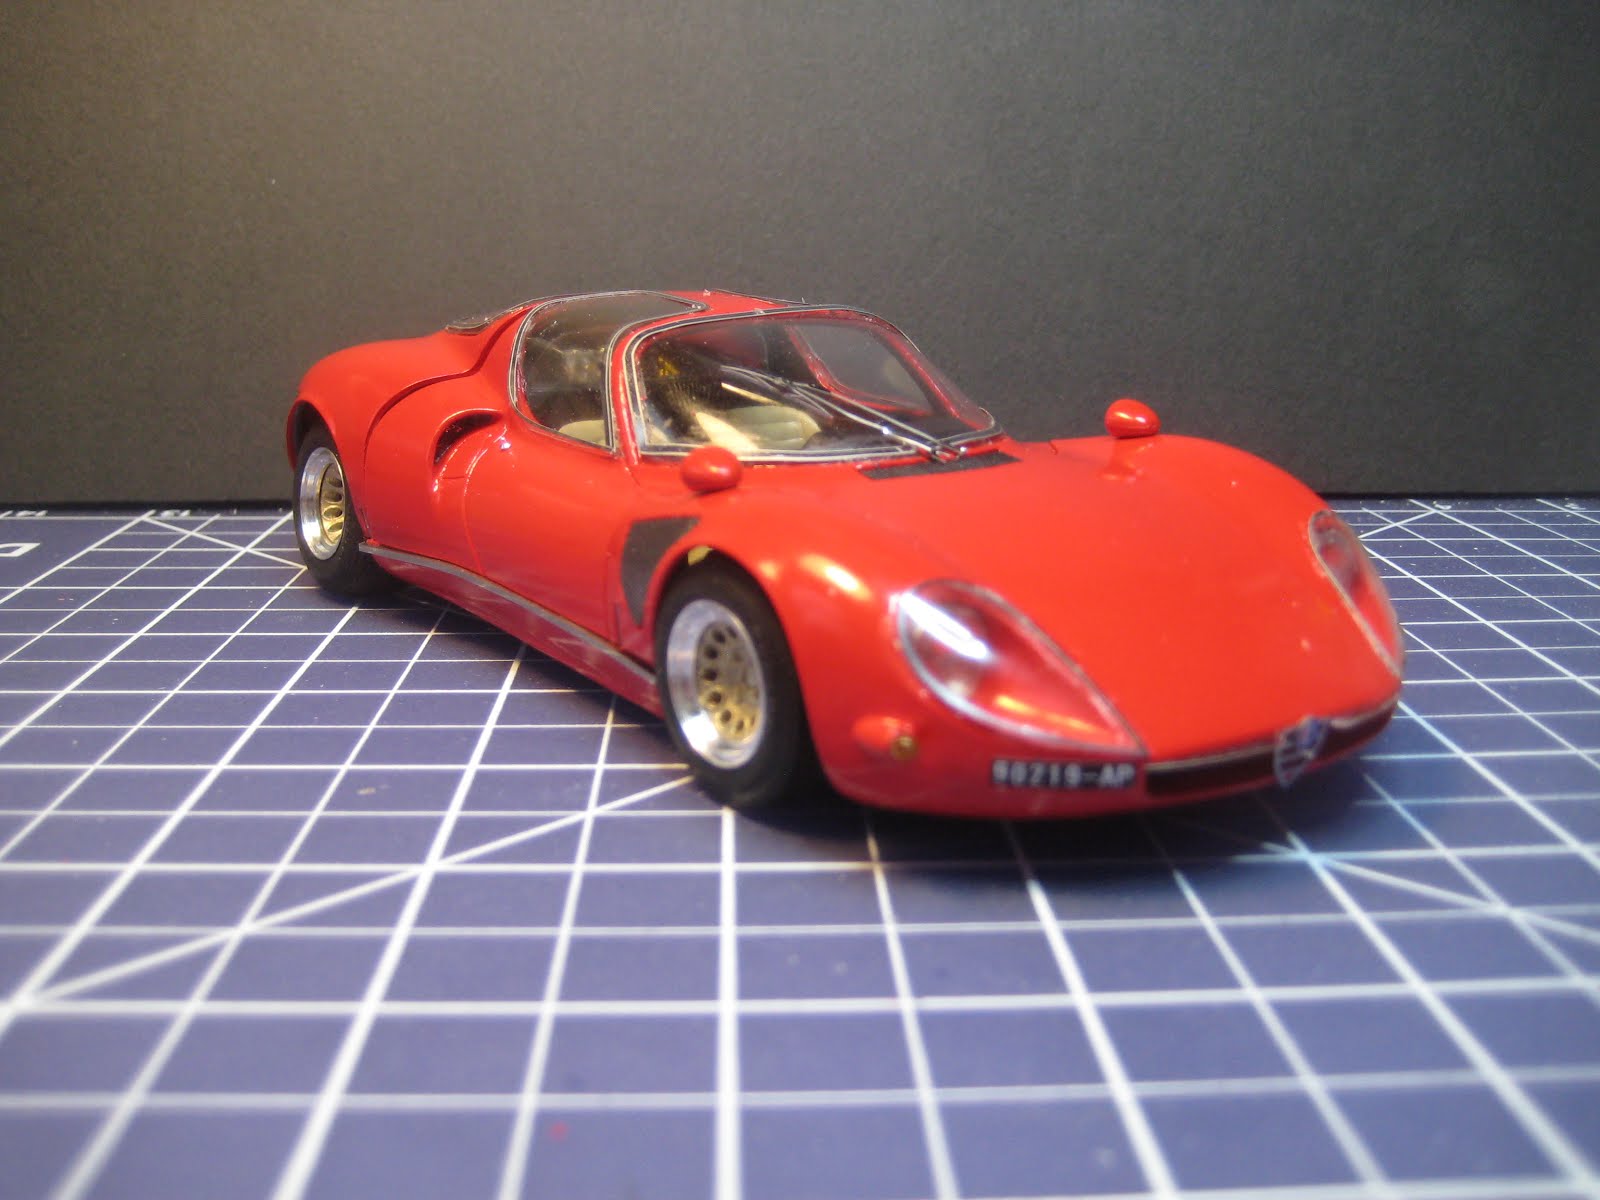
Alfa Romeo Tipo 33 Stradale: Complete! (#17 for 2020)

Complete! What a nerve-wracking experience, knowing the kit is essentially unavailable and ridiculously expensive when one does surface -- I felt the weight of the world on my shoulders, telling me not to screw it up. Sort of like the poor guy who's been asked to clean up the Mona Lisa.


As MFH kits go, this one wasn't too bad for getting things to line up, and I think I am getting to the stage of being psychically able to tackle, once again, one of the horrendous tube frame things such as the 908/03 or the 917K.


The paint consists of the usual Tamiya TS-8, Italian Red, but over the pink primer instead of the usual white. I like the depth of this and will likely continue using the pink primer in the future. For the record, I started with two coats of Duplicolor Primer Sealer (I prefer Primer Filler but couldn't find any), followed by two of Tamiya white (to cover the grey of the Duplicolor, two or three of Tamiya pink, then four mist coats and a flood coat of TS-8.


There were some scares as the paint tends to flake off the resin, a problem I have encountered in the past; the alcohol bath prior to all this doesn't seem to have made a huge difference.


No polishing or sanding was done, because I always worry about cutting through, and because I am sure new cars weren't that shiny to start with.


I cut off and hinged the front cover, making the hinge with a brass rod inside a brass tube which in turn was epoxied to the chassis underside. It all works reasonably well.


I fabricated a new grille for the rear cover. This was made of strips of 0.020" X 0.125" styrene strip, and replaces the white metal slab provided. I also skipped a number of bits of engine bay ductwork bringing fresh air from the shoulder vents to the stacks, just on the basis of them being clumsy and clunky.


Other details are documented in prior posts on this blog. So what's next? Well, a stiff drink, first! Then we'll see. Stay tuned.

Friday, July 10, 2020

Cobra 427 S/C: Complete (#16 for 2020)

This kit was relatively easy; some detail was needed to bring it up to par. I recall there might have been an Historic Racing Miniatures upgrade kit for the engine, which would do wonders if one could be tracked down.


The box art and instructions imply this is the car that ran at Laguna Seca in 1965, but I can find no evidence online that this is so; it did run in later races that year, usually finishing third behind the Shelby American team with Ken Miles as lead driver in #98. Nonetheless it is an historically interesting car.


The dashboard turned out better than I had expected


The engine required a proper Holley. According to some references, the carb was hidden in a well with a filter on top; the item provided was not at all accurate and hid the distributor. Other cars had Webers, and the kit came with a set and a manifold which have been relegated to the parts bin.


So having taken a break from some of the trickier works in progress, I should get back to something more challenging. Stay tuned!


Thursday, July 9, 2020

Cobra 427 S/C: Chassis

With the poorly detailed engine now looking a little better following a trip to the parts bin, it is time to move on to the chassis, which comes with one of those lower engine blanking pieces in case you want to build this without an engine. The Japanese market doesn't demand that level of detail, and sadly many kits don't provide it.


Next decision was be to use the kit's disc brakes, which are crude, or go back to the bin for photo-etched units. I have a lot of discs, mostly too modern for this application (cross-drilled and grooved in particular), and I have a shortage of calipers; plus the wheels really don't allow a lot of visibility, so I decided to go the cheap route.


Next is the body which wasn't quite good enough to get away with just polish, so I put on a couple of coats of Tamiya TS-26 Pure White. Stay tuned!

Monday, July 6, 2020

HAL 9000: Complete (#15 for 2020)

With only 8 pieces, this kit turned out to be a lot simpler than expected -- no room full of memory cards, for instance. But I won't have to enlarge the workshop (the scale is 1:1) to build the whole thing. Next I'll have to see if there is a kit of the Monolith.


I can imagine the dialog:

"Open the pod bay doors, HAL."
"I can't do that, Tom."
"Why not, HAL? What's the problem?"
"You know what the problem is, Tom. You got ticked off about all the fiddly little bits in the door hinges and decided to just glue the darned things shut."
"Oh. Yeah. Right. I forgot about that."
"Shall I get out the acetone?"
"Yes, please, HAL."


Thursday, July 2, 2020

Cobra 427 S/C: Engine woes

The 427 engine in the Fujimi Cobra kit is very disappointing. I seem to recall a Historic Racing Miniatures engine kit for this, but of course HRM is no longer in business ... left and right banks not offset; intake manifold for two carbs when the Cobra had a single 4 bbl; carb, air filter and tray all molded in one piece and it's too big (covers up the distributor). I could go on.


I have a lovely white metal cast Holley from Scale Productions which I will use, and I'll rummage around in the parts bin for a decent manifold; however many kits with 390s through 427s ('60 Starliner, '62 Thunderbird) have manifolds designed for a pair of 4 barrels, a Tri-Power setup, or a blower. Worst case is to steal the carb out of the Revell Cobra or one of the Ford GT-40s, but that's just kicking the problem down the road a ways. Ironically the kit comes with a manifold and 4 Webers which would be very cool but not period correct.


This is sad because the body moulding is superb.

Wednesday, July 1, 2020

Cobra 427 S/C: Polish versus paint

The engines in the last three kits I've completed, combined, add up to 7.5 litres displacement. Enough little tiddlers, time for a 7-litre, ground-pounding, pavement-ripping big block motor as installed in the iconic and much copied Cobra.


The quality of the body in this Fujimi kit is superb: no sinkholes, and only minor mould separation lines. I was able to take the mould lines down with fine sanding sticks, and to polish it all out with Tamiya Fine and Finish pastes (the Coarse paste is very coarse), followed by these two L&M polishes which I am about to run out of.


Photos below were taken after using the L&M Micro Finish Haze and Swirl Remover but before the Micro Gloss Polish. The very fine pattern of scratches on the cowl and rear deck are now essentially gone; these will be covered in black decals in any case. The fender tops, where the mould separation lines were removed, all look fine.


So essentially I am going to save myself the hassle of primer and paint, and go straight to clear once the decals are on. I've done this once or twice in the past (Fujimi kit of the 356; Tamiya kit of the Giulia Sprint GTA) with excellent results. It might not be 2020-vintage show-stopping paint, but then the original paint in 1965 would not have been 2020 show-stopping either.


Stay tuned!