Ha ha. 709 rivets used, with an unknown number broken or lost along the way.


On to paint.
Ha ha. 709 rivets used, with an unknown number broken or lost along the way.
On to paint.
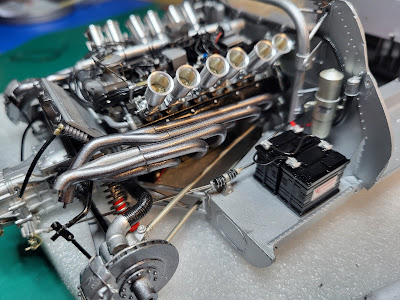
The chassis is now complete, mainly with the addition of various bits attached to the monocoque either side of the engine.


The opening oil filler cap is neat even though it will not be easily visible.


Next: Bodywork and paint. This will begin with approximately 700 3D-printed rivets in 0.028" holes. Fun. Stay tuned!
The monocoque and front suspension is complete and the engine installed. Surprisingly this didn't involve too much drama, but it did require playing around with the assembly order.


Front suspension and the forward compartment are relatively simple. A lack of online detail photos make it hard to determine what should have been modelled here.


This beast weighs in at 1258 grams so far; the little support legs underneath the chassis will be critical in keeping the white metal suspension parts from sagging from the weight as was the case with the Alfa P2.

Next is the dashboard and more detail around the engine compartment. Stay tuned!
The transmission, unlike the engine, is pretty simple. But there are two outriggers that connect to the monocoque, and two motor mounts towards the front of the block that carry the radius rods for the rear suspension.


The engine is complete, except for the exhaust manifolds that go on once the transmission and rear suspension is assembled. This represents the first four steps (of 25) in the MFH instruction manual. A whopping 327 grams, and there is a fair bit of metal to come.

The fuel injection alone involved a huge number of bits:
Pump body (4 pieces) and 12 banjo fittings = 16 bits
12 trumpets, butterflies, injectors, throttle bodies, intake tubes = 60 bits
8 bellcrank mechanisms, 2 throttle rod support support legs, 1 return spring, 1 support plate per side = 24 pieces
Throttle cable rotating bit (4 pieces), 3 push/pull links = 7 pieces
Cut-to-length bits: 5 pieces of brass rod, 0.5 mm diameter, and 12 fuel lines = 17 pieces
Total (assuming I haven't missed anything) = 124 pieces


Fresh off finishing my first Model Factory Hiro 1/12 kit, the Ferrari 156 Sharknose, in December 2020, I tackled assembly of MFH's Jaguar XJ13 engine block and cylinder heads, including the camshaft drives which are now hidden (click here for the post).


After posting, I completed the distributor and wiring, then it got shelved as I realised I was in over my head. Since then, I have completed four additional 1/12 kits, three from MFH (Alfa P2 in July 2022, Auto Union Type C in January 2023, Abarth 1000 in August 2024) and one from Italeri (Alfa Monza in January 2023). So with that added experience under my belt, it's time to tackle it again.
And the first step was to build up the heat sink for the electronic ignition module, consisting of 17 photoetched bits on a 5.5 mm square platform.


I realise I didn't write up the initial building and planning on this.


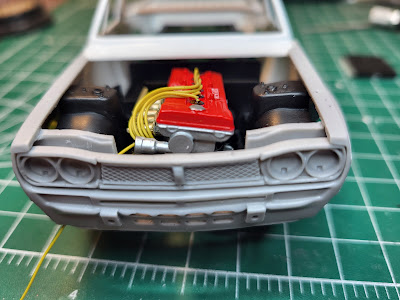
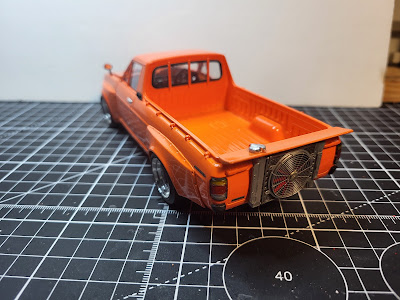
As the Sunny had a four, the standard upgrade is to a twin-cam, 16V Nissan 4, but I chose to stuff in the six from one of the Fujimi assortment kits. This in turn entailed moving the radiator to the tailgate as I did with my Subaru Brat WRX.

Other bits came from the boneyard and parts shelves. The fan and shroud is a nice photetched set from Detail Master, for instance.