Wednesday, October 30, 2019

Lotus Eleven: Chassis mods II

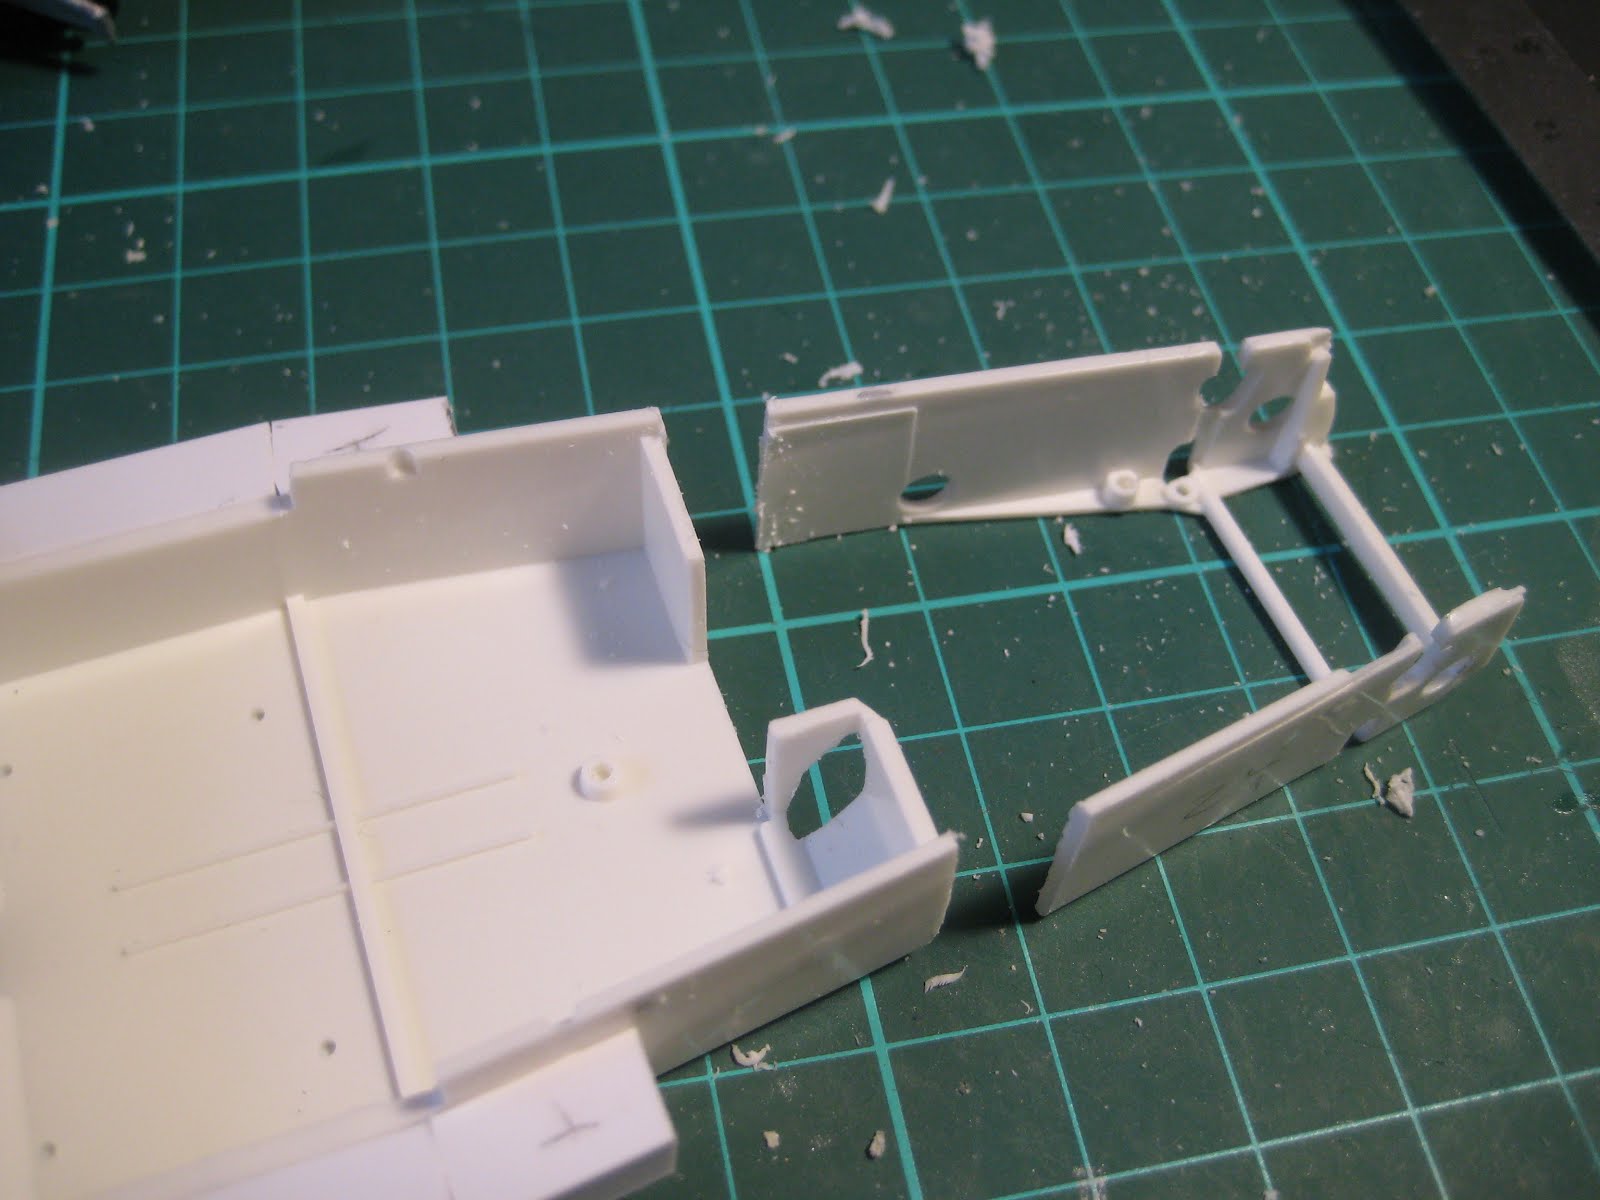
The donor chassis from Tamiya's Seven having been shortened the required 5 mm, next was to build up the chassis forward of the radiator to support the hood from the Eleven and mimic the radiator ducting needed. The Seven has a short little nose cone which will be discarded.


Styrene sheet in 0.030" thickness along with some angle iron served to rough it out. The picture shows added structure along the sides of the cockpit to mimic the full floor pan that extends, in the 1:1 Eleven, up to the door sills.


Test fits show it all lining up nicely. Other bits that have been fabricated, but not shown in the photos, include a new firewall and floor pan components from the front fender well rearwards.


The air intake is pretty small and I can imagine that, like early E-Types, it is likely to overheat in traffic or on hot days. Being British, it isn't designed for either of these conditions.


The hood will hinge on a piece of brass rod, 1/32" diameter, inserted into two short lengths of 1/16" tube. The issue will be that once the lengths of tube are glued to the hood, it's all permanent and there won't be any opportunity to remove it to fiddle.


So progress is being made and it will soon be time to start thinking about painting the chassis. Stay tuned!

Thursday, October 10, 2019

Lotus Eleven: Chassis mods

Given the inaccuracies in the Tamiya and Profil 24 kits added rather than cancelling, I had to take about 5 mm out of the Seven chassis to get it to line up under the Eleven body.


First step was to carve out the footwell to clear the starter motor Bendix and a slice of the bell housing. In real life this would interfere with the clutch pedal in a footwell that is already pretty cramped, but hey, this is 1:24, not real life. And the firewall thickness works out to over an inch at scale, where we all know it would have been 16 gauge aluminum sheet (1/16") in real life. But 16 gauge, at 1:24, is 0.0026", so there.


The next photo shows the engine sitting on its mounts, and the one after shows it shifted back 5 mm.


Next was to slice off the forward chassis structure, including the entire suspension structure and the forward engine mounts.


The next picture shows the fit with the existing chassis after cutting out about 4.5 mm (the saw kerf is about 0.3 mm, so this was a total wheelbase reduction of about 5 mm.)


Some 3/16" styrene angle, suitable cut and bent, served to glue it all up. Hopefully it all sits square once I get it on its wheels...


It's not obvious here, but the front wheels are much better lined up with the fender cutout.


Just one little strut to fix; then the pedal assemblies will need to be fitted, which may require trimming the angle iron used to line it all up.


Stay tuned!

Friday, October 4, 2019

Lotus Eleven: Getting started

The Lotus Eleven was an iconic little racer, and the only kit I have found of it is a resin body, suitable for use as a slot car, made by Profil 24. So I decided to use a spare Tamiya Lotus Seven kit as a base for a what-if Eleven.


The cars had similar wheelbases but there were a range of differences. The biggest, of course, is the engine; the Seven Series 2 modelled by Tamiya had a lightly hot-rodded version of the 1340 cc Cortina engine while the Eleven had the real deal: the lovely Coventry Climax motor in 1098 cc form. Sadly there are no Coventry Climax motors available in 1/24, as far as I know, so the Cortina will have to do. (The Sport version of the Eleven was offered with the 1172 cc flathead out of the Ford Popular, but I would guess that few were made that way, and that any survivors are likely to have had a Climax motor retrofitted).

First step was to cut out the three big lugs molded inside the Eleven body, which were meant to serve as mounts for the slot car chassis. Out came the Dremel with a cutoff wheel; if you do this, beware the dust generated as I gather breathing resin dust is not a good idea. A mask is highly recommended.


Second step was to start cutting up the Seven chassis so it will fit under the Eleven body. Fenders were the first to go. The Eleven needed some tweaking as well.


Other differences include suspension and brakes. The Sport version (which was the cheapest version) of the Eleven had a solid axle, much like the Seven, and drums; the Le Mans version had a de Dion with discs (inboard at the rear). As well it appears the Eleven still had the swing axle at the front, consisting of a solid axle cut in half, each mounted on a bushing. The Seven will donate its solid axle in back and double A-arms in front, with a disc/drum mix. In the absence of aluminum wobblies, I am waiting for proper wire wheels and tires from Profil 24 as on the first generation cars.


The front fenders came right off, and the rears had to be trimmed substantially. Next door sills were made from 0.250" square tube, and a new dashboard from 0.020" stock.


After cutting off the hood, this is where things stand. The chassis will sit nice and square under the doors, and the main future issue will be to extend the chassis forward to support a hood hinge. The floors will need to be extended to the sills as this was likely one single sheet of aluminum that curves up to meet the doors. The cutout for the exhaust on the left side will also need to be fabricated.


A better firewall will be needed, and the gas filler cap will have to be moved. The Eleven had the battery in back, next to the axle, where the Seven has its gas tank; I will probably leave the battery where it is and assume the gas tank remains mounted above the exhaust pipe inside the cockpit.


Giles seems to find the cockpit a little cramped, which matches my recollection of Loti from my days as a car mechanic: I could get into an Elan, barely, if the top was down; but I couldn't fold my 6'0" frame into the cockpit of a Europa. As well, my size 9 boots were a problem in the footwell. The stories of Colin designing cars that fit him are true. Doris, however, likes it and seems to be impressed with Giles' skills with the non-synchro box.


Stay tuned! For one thing, what will Fred think when he sees Doris's admiring gaze? The plot thickens...

Monday, September 30, 2019

BMW 320i Group 5: Complete (#12 for 2019)

First complete build since May: this was a quick build, since the kit, which is intended as a slot car, is pretty simple.


The orange styrene was good enough to allow for a quick polishing, followed by decals and clear. It would have been much slower if I had needed to paint it. Overall the build is good but not competition level; however I might show it anyway at some of the shows this fall.


The kit came with Studio 27 decals and photo-etched detail sheet to convert the European version driven by Hans Stuck, to the North American version driven by Gilles Villeneuve. I added BBS wheels from Scale Productions and front discs from Model Car Garage. The BBS wheels are very nice, and Scale Production has little centre wheel nuts that are a nice snug fir on a 2 mm thinwall brass tube.


Decals were a pain and I forgot to scan the sheet before cutting them up. I am missing a #27 for the right side door, which blew up into a million little fragments. Sadly I am guessing this is long obsolete and will not be reissued unless Tamiya reissues the kit.


The 2-litre Formula 2 engine is a lovely little thing, and I added spark plug wires and fuel injection tubing. The exhaust manifold is lovely and it is too bad it doesn't connect to anything.


Sadly the engine compartment has very little detail beyond the engine, with no firewall or plumbing. Again most builders are going to leave the engine out and glue the hood shut for slot car racing where weight matters. I suppose I could have scratch-built a lot of stuff but decided to get it done rather than obsess over perfection.


So a quick build of an iconic car, as driven by Gilles Villeneuve to a Group 5 win (second overall to a 935) at Mosport in 1977. I am assuming he hadn't quite signed on to F1 at the time as I can't imagine any sensible F1 team leader allowing him to risk his life in sedan racing...


Friday, September 27, 2019

BMW 320i Group 5, part 2

The 320i having been designed initially as a slot car, the chassis detail was pretty poor, so I scratch built front hubs to take a better quality set of wheels (from Scale Production) and disc brakes (from Model Car Garage).


The brakes peek through the BBS wheels quite nicely.


Stance looks good, even if the rear wheels don't fill the wheel wells the way I might like. Final assembly looms large. In the rear I didn't bother as it all rests on a solid steel axle. (Yes, ethanol is a useful tool in getting these projects built).


Sadly Fred has been pretty obstinate about refusing to wear the appropriate gear for a test driver, and so has been relegated to cruising around in old barges. He's been replaced by Gerhard who has a much more serious approach to his Occupational Health and Safety responsibilities, even if the helmet does ruin his hairdo. I must say Fred could have gotten away with the tux and loafers, but the helmet was non-negotiable.


The header is wild! 300 hp from a 2-litre. Stay tuned.

Monday, September 23, 2019

BMW 320i Group 5

With the fall contest season coming up (Quebec on October 20, Ottawa on October 27), I figured I should finish one of the dozen Works In Progress (WIP) currently marooned on the Shelf Of Doom (SOD). On the other hand, I could start something new, and hope to finish it in time! What could possibly go wrong! So being an eternal optimist, here's the 1977 Group 5 BMW 320i with decals and other aftermarket bits to reproduce the car as driven by one G. Villeneuve (maybe you've heard of him) to 2nd overall, 1st in class at Mosport. 


The sponsor was Jagermeister, except in Canada where it was forbidden by rules against advertising booze. The kit, which I bought at a model car meet some time ago, came with a range of aftermarket bits, including Studio 27 decals for the Canadian version of Gilles' car.


I figured the orange plastic was good enough to allow for polishing without going through the hassle of painting. Decals went on after polishing, and were a major pain. Most cracked as they came off the sheet, and while very thin decals are nice, they are also fragile. Most could be moved around to get the pieces to line up, but a couple exploded into a fog of little shreds and had to be thrown away. The left side looks OK but the right side is missing a #23 and a Goodyear decal. 


So I am looking for another copy of this decal set which is discontinued. 

The photoetched sheet includes hood pins and window surrounds, also flimsy, but no major issues so far. A coat of  clear has locked it all in. 


Turns out the kit is meant to be a slot car, and chassis detail is poor as a result. I have aftermarket BBS wheels from Scale Productions and disc brakes from Model Car Garage that will look good. 


As for the engine compartment, the kit does have the 2.0 Formula 2 motor, so there is room to build this up nicely. 


The exhaust system is lovely but a real pain to assemble as the four individual pipes are very loose inside the head; I had to make sleeves by putting a 1/16" drill up a 3/32" styrene tube. 


Stay tuned! 

Sunday, September 15, 2019

MAZ 537: Payload III

A quick survey of Facebook modeling groups led to a decision to expand the cab for the Hitachi to something closer to 1/24, rather than use the Suzuki cab (which I have now cut up to see how it looked).


The main objection to the Suzuki is that the profile of the Hitachi cab, surprisingly, mimics that of the White truck cab quite well.


So the main issue was to widen the cab to fit a Recaro seat from the bin. This was done using 3/16" X 1/16" styrene stock along the roof, floor and back of the cab.


This was sufficient to clear the second joystick.


The clear portion was cut from sheet stock to fit, backed with Scale Productions radiator mesh as a rock guard. It's a bit fine but will do. I did not increase the cab dimensions in other directions (height or length) because it would have been a lot of work, and I just want to get it finished.


So it's still a squeeze but for a burly contruction worker, 5'6" and 225 lbs, it will fit fine.


I also decided to use the platform the MAZ V12 motor would have gone into as the basis for the supporting the diggers. That required a bit of cutting to get it to fit on the rear of the chassis instead of the middle section where the Freightliner engine is now located.


In parallel I have been working on the truck cab, but this will be reported separately. I'll also need a front bumper and a structure to support the rebar nipper and rubble gripper when parked over the cab in order to drive to the next disaster.


Finally it will need extendable legs off the rear to prevent the whole thing from toppling over, such as on the Italeri truck accessory kit. This will be scratch built from square styrene tubing once I get to a hobby shop and see what's available. Stay tuned!