Sunday, July 31, 2022

Porsche 962C: Door hinges (cont.)

The right side hinge is now attached and seems to work, sort of. The full opening range is substantially less than in real life, perhaps because the lower hinge is mounted inside the body rather than out; but there was no obvious way to rectify that. 


The M0.6 screws for hinge pins were a life-saver and the proposed MFH route (of using little rivets) would not have worked. Slop in the hinges is crucial as the pins aren't on the same line, as they should be for a functional hinge.


With that challenge out of the way, the left side door, with the broken window frame, will get glued into place.


Back to our regularly scheduled activities, namely decals and finishing touches. The zoomed-in photos show some paint flaws needing work. Stay tuned!

Wednesday, July 27, 2022

Porsche 962C: Door hinges

Having been distracted by other builds, it's back to this MFH kit. The objective is to complete it in time for a Porsche Challenge issued through a local Facebook group last winter, with a deadline of 9/11. 911, get it? Ha ha. Right, moving right along.

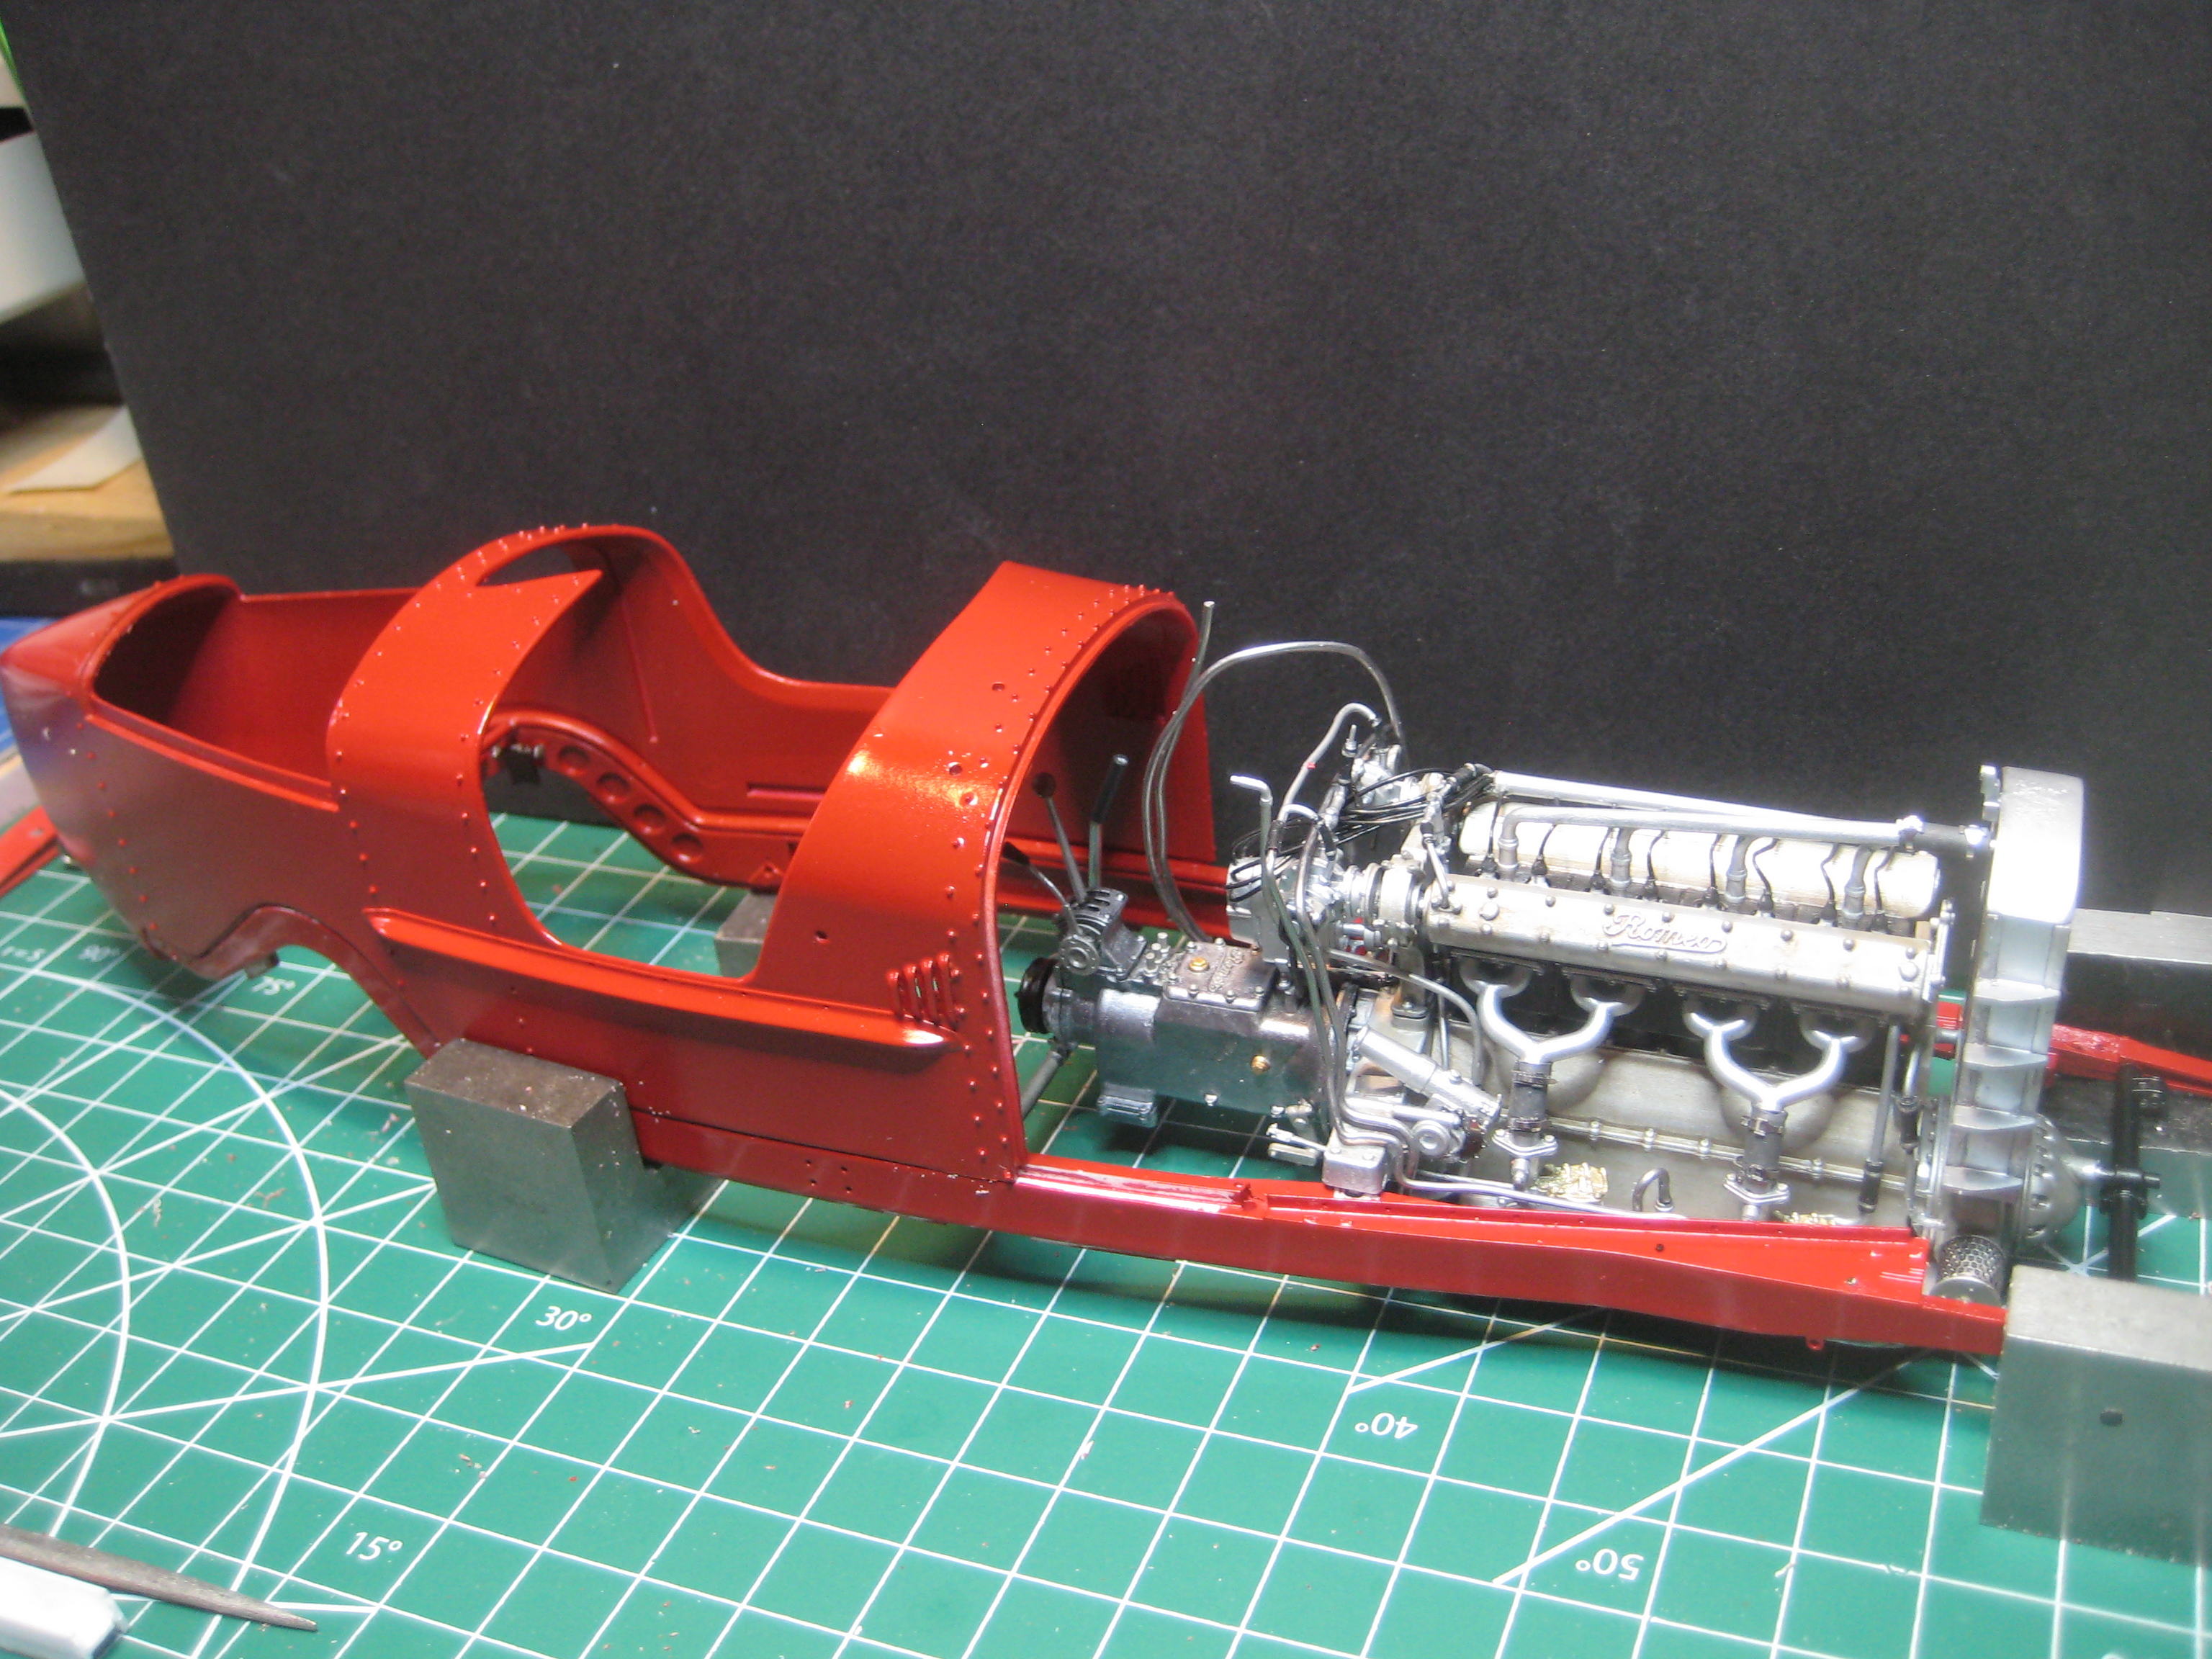
The chassis is complete but pictures never got posted here.


The main issue was the flimsy door hinges which I felt could be improved to better take the weight of the white metal doors. This required ordering M0.6 screws, nuts and washers to replace the rivets provided by MFH. The main issue is the upper hinge that sits on the windshield surround, as the inner one inside the body just needed a bolt. 


M0.6 bolts may be only 0.024" in diameter, but correspond to 0.600", or just about 5/8", at full scale, and this is likely twice the size of a proper real-world hinge pin -- 5/16" or 3/8" Grade 8 bolts would make more sense. However, I'm not sure M0.3 bolts can be found outside watchmaker's supplies, and I surely would have trouble handling them.


The pictures show the MFH bracket glued on to the door window frame with a couple of strips of 0.003" brass sheet to strengthen it, and the M0.6 bolt through it. I am hoping this will not be obvious once painted. You can also see the hinge bolt that will be trimmed once it's all painted and ready for final assembly. 

I broke one of the window frames due to excessive manipulation, and have glued it back together with more brass strip on the inside; nonetheless this door (left side) may get glued into place. 

Paint and decals are next. Stay tuned!

Saturday, July 23, 2022

Alfa Romeo P2: Complete (#10 for 2022)

 Another one done! And the flaws are obvious to me, but all told it's pretty good. 


The biggest issue is the grille, which depends on the flimsiest piece of photo-etch I have ever seen. It is not glued in; I can remove it and replace with another piece of mesh should something suitable come up. 


Lining up of all the panels is a bit off as well, traceable to the sloppy fit between the engine block and the two frame rails. A better jig would have been a good idea.


Lovely comparison with the Ferrari 156, also with a Jano-designed motor. It's worth pointing out that both are painted with Tamiya TS-8, Italian Red; but the Alfa benefited from Tamiya's dark red primer versus the white primer for the Ferrari. In both cases metal pieces also benefitted from Tamiya's metal etch primer, which is clear.


Six week's intense focus here, with no other parallel builds to complicate things; there are a number of projects to come. I have a couple of Italeri 1/12 kits (Fiat 806, Alfa 8C 2300 Monza), and a Tamiya 1/12 kit of the Honda RA 300, but I think I'm going back to projects of more reasonable size.

So stay tuned! 

Saturday, July 16, 2022

Alfa Romeo P2: Chassis and body (Part I)

The gluing of the chassis rails to the engine was not without challenges but hopefully it is all straight enough at this point. 


Got the front and rear axles installed along with the engine and gearbox. Some repairs to the paint became necessary along the way. The main issue, with a kit this big, is ensuring equal paint across all the various bits; as it is some are darker due to more red primer and/or less TS-8. 


Friction shocks were a nuisance and won't be visible once it's all together. 

I verified that the hood would open on its pins made of 0.50 mm wire. A challenge but it worked out.

The dashboard uses a peel-off sticker to mimic the engine-turned original. with poor results in my view. I dulled it all with some grey panel line paint from Tamiya. The two largest gauges, however, involve a decal and an actual pointer mounted on a rivet, very neat if time consuming.


The body is now glued into place after a fair bit of work with the Dremel to get it to sit on the frame properly. (This explains any dust you can see in the photos). As it is there are some gaps that will need to be filled with panel line paint. Also the fuel filler cap had to be moved as the hole in the tank didn't line up with the body; it is likely that the tank (which gave me a bit of a fight) is mounted too far forward.


It's not over yet! Lots of bits still to be attached, and then there are the 48-spoke wheels, of which the best I can say is they aren't 72-spoke wheels as with the 156. Stay tuned!

Tuesday, July 5, 2022

Alfa Romeo P2: Chassis test fit and lining up

The chassis rails are nice and flexible, as in the real world no doubt; and the major crossmember, at least as far as the kit is concerned, is the engine. So getting it all straight at the start is going to be critical. 


Assembly order and clamping jigs are going to be a big part of getting it all straight.And once it's time to glue, I think it will be 5 minute epoxy for strength and in order to have a couple of minutes to move things around a bit before it all sets.

Stay tuned!

Monday, July 4, 2022

Alfa Romeo P2: Engine

A lovely kit of a lovely engine.The inlet side includes a pair of updraft, pressurised carburetors supplied by a pair of Roots blowers in a common housing at the front of the crankcase.

The finned manifold from the blower to the carb inlets is flat at the level of the oil pan.

Plenty of piping, some of it involving solder wire. The completed engine from the intake side.

This shot shows the blower housing with its two air filters mounted below the radiator.

Spark plugs and ignition by magneto is all very detailed. 


Not as much to see on the exhaust side at this point, except for the water pump and drive system. 

Finally the transmission includes a range of controls for brakes and gears. On to the chassis.

Stay tuned!