Saturday, January 30, 2021

Abarth 1000 TCR: Complete (#2 for 2021)

The engine in this particular Abarth is a bored and stroked 600 motor, complete with pushrods; adding Webers and high compression gives 112 hp at 8200 rpm, compared to the stock 22 hp. 

Of course it was probably completely gutless below 5000 rpm. 

The kit is decent and includes little Abarth PE emblems for the valve cover and oil pan. 


Moving on to the body, paint is AS-5, Luftwaffe Light Blue (actually more of a grey-green to my eyes) and TS-10, French Blue. Some cleaning up of seams followed, then decals and PE trim before a coat of clear.  


The windows include PE frames that are a very nice fit. The time required to cut the windows out of the sheet of clear provided and get them all to stay put is quite high, however.


So what's next? Stay tuned!

Sunday, January 24, 2021

Abarth 1000 TCR: Overview

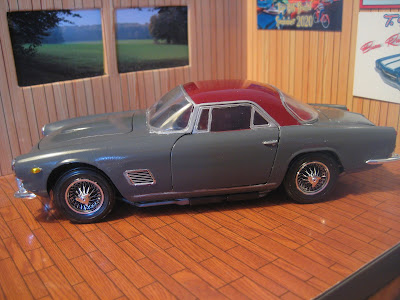
Continuing with my passion for outrageous little upstarts, anything Abarth did to the Fiat 500 or 600 platforms is of interest. This resin kit from a company I had never heard of fits the bill. 

Arena Modelli is an Italian outfit, making 1/43 kits in resin. They make a couple of 1/24 kits, among them this Abarth 1000 TCR, which I found on the website of the Spanish vendor Spot Model (click here). (They also offer an Opel Kadett 1900 as driven by Walter Röhrl at Monte Carlo in 1976.)

The kit claims to represent the car driven by Maurizio Campanini in the 1970 Trento-Bondone hillclimb event. Online records for these sorts of obscure outings are sparse; the only record I could find for this race (click here) shows 5 of these 1000 TCRs entered, finishing from 11th to 32nd (1st to 5th in the 1000 cc Group 2 class); but none with number 202, and none driven by Campanini. Campanini DNFed in 1971 in car #390; the kit comes with decals for #384, which was also driven to a DNF in 1971 by Dante Gargan. Sadly the site does not include data for this race other than for the years 1970-72, which is unfortunate as the car could have been built as early as 1965 or 1966.

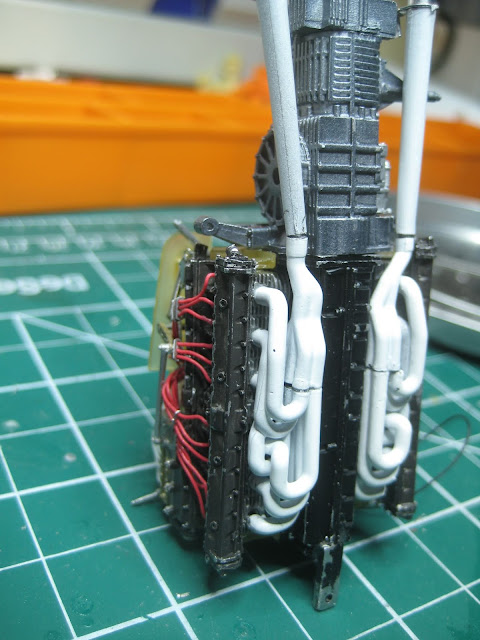
The 1000 TCR was, as it's name implies, a 1000 cc derivative on the Fiat 600 platform. The engine appears to be a pushrod unit, rather than the twin-cam Abarth engine in the 1300 OT Periscopio I built some time ago, so it is likely a hot-rodded 600 motor. Online info confirms the pushrods, although the head is said to be a hemispherical design of Abarth's sitting on a 600 block. There are claims online (click here) of 112 hp at 8200 rpm. This was meant to be a less expensive version of the various twin-cam cars, but it wasn't enough; Abarth was bought out by Fiat in 1971, and passed away in 1979

In any case the resin is well made, the PE sheets are comprehensive, and there are a handful of white metal bits and a very nice decal sheet. I might replace the resin wheels and tires with these Scale Production Minilites. Getting the checkered roof pattern to sit flat over the curved roof may take some time, but otherwise this looks like a reasonable build. So with everything washed, it'll be time for some primer just as soon as the weather outside eases up a bit -- minus 16 C is not conducive to opening up a window to vent my spray booth exhaust outside. Stay tuned! 

Saturday, January 23, 2021

Maserati 3500 GT: Complete (#1 for 2021)

This antique kit offered some challenges but nothing horrible. The biggest challenge was the fact that at some point since 1964, the tires rested against the glass and left some deep chemical gouges. A lot of sanding, from 600 up to 12,000, followed by all three Tamiya compounds and the two finest NOVUS products. 


Getting all the hinges straightened out was probably the biggest challenge.


Overall I've done better; the paint took a beating in the final assembly and should have turned out better. 

What's next? Not sure, stay tuned! But it was good to take a break from the killer 917K.

Tuesday, January 12, 2021

Porsche 917K (MFH): Engine Part 2

The engine is now as far along as necessary prior to inserting into the chassis. 


The throttle linkage, including the connection to the injection pump, was a particular headache in large part because, as with the 908/03 I finished a couple of years ago, the return spring is too long. And given it is a real spring made of spring steel, you might be able to cut it, but you won't be able to bend a new eye-hook into the end.

Little venturi ends and injectors will be hidden in the final installation.


Belt drives for the alternator and injection pump are not likely to be visible, either.


The exhaust of the 917 (above), along with the separate distributors, shows the crank is set up as a pair of inline six-cylinder motors on a common crank. The 908 (below), on the other hand, is clearly a pair of flat fours end to end.


On to the chassis now; stay tuned!

Sunday, January 10, 2021

Porsche 917K (MFH): Engine Part 1

 Wiring this up was a real challenge. Thank heavens for the Panavise and the 4X desk lamp.


First step was the right side distributor and its 12 plugs. This is the side away from the injection pump. After consulting lots of online photos, which show the bundles of wires running variously under or over the throttle slides, I went for under in order to keep it all as tidy as possible. 

Then I put on the fan shroud and venturi tubes, and ran the injection tubing to the right side venturis, as it is clamped to the shroud. 


Finally I put in left side plug wiring (half of which had to run over the throttle slides, but no one will ever notice this) and injection tubing. Excess tubing pokes through the venturi stack structures and will get snipped and inserted into injector ports. Of course this won't be visible either once the little shields are installed over the stacks. I hesitate to call them air filters as I suspect there is nothing in the way of a filter here; it's more of a rock shield than anything.

Now the white tubing is a challenge. It is very small and soft, about 0.020" OD; I can just get a piece of 0.010" wire up inside it. But I don't have any way to drill out smaller than about 0.014", so connecting this wire to the injectors (which are huge at well over 0.020") won't fly. I embedded bits of 0.010" wire into the injection pump outlets with some extra-strength (20-45 sec.) CA glue from Bob Smith.


The soft white piping could then be pushed on over the 0.010" wires once the glue had set. 

I'm quite happy with this and while the "injectors" are the least accurate bit here, I think it'll do. 

Next: still more engine bits & pieces. Stay tuned!

Tuesday, January 5, 2021

Porsche 917K (MFH): Initial triage

The first Model Factory Hiro (hereinafter MFH) kit I purchased was the Porsche 908/03 as driven by Jo Siffert and Brian Redman to a win in the 1970 Targa Florio. What a lovely car! What a monster of a kit! I was in no way up to the skill level required, and while it looks good, the body panels don't really fit well even though it took me about 5 years to build it (purchased August 2013, started October 2014, completed January 2019). The biggest issue was getting the tubular chassis straight; all the itsy bitsy teensie weensie liddle widdle spun-cast white metal struts were bent and/or I hadn't appreciated how thoroughly you have to drill out all the dowel and socket joints.

Probably my second MFH purchase was the similar 917K driven by Siffert and Redman at Le Mans that year. The car failed to finish, but that's OK; the two make a lovely pair. (Jerry Seinfeld apparently agrees with me as he has both these cars at 1:1 scale). Here the chassis is essentially the same as the 908/03; in the 908 the final drive is behind the transmission but in the 917K it is between the engine and transmission, thus allowing for two more pairs of cylinders and another 1.5 litres of displacement. So I have been putting off starting this kit as I expect it to be as challenging as the 908.

Since starting the 908/03, I've built almost a dozen other MFH kits. Given what I've learned since 2014, maybe it's time to take the leap. So here goes! Everyone into the (acetone) bath! 

Let's see if I can complete this faster than the 52 months I spent, on and off, on the 908/03. Stay tuned!

Friday, January 1, 2021

Maserati 3500 GT: Paint, chassis and interior

The exterior was finished with TS-67 IJN Grey, then polished and clearcoated to compensate partly for the fact the grey is matte.

Overall I quite like the restrained look.


The interior was done with Tamiya TS-33 Dull Brown, topped with TS-74 Clear Red. I am happy with this, it's not as red as some online photos show, but any of the Tamiya Reds clashed with the darker red of the roof.

Chassis bits are going together. The front spindles and A-arms are very poorly located, so each part got glued and centered, then left alone to dry before monkeying with it. 


The tricky bits, getting the doors and lids to line up before inserting the chassis into the body, is next. Stay tuned for #1 in 2021!