Wednesday, January 25, 2023

Auto Union Type C, MFH version: Complete (#1 for 2023)

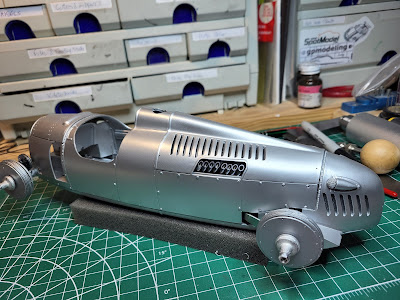
It's just over 5 weeks between opening the box and completing it; this included Christmas but there were no other competing builds. I worked on it most days, though, at least an hour or more, a total of 60 to 75 hours or more. Overall I am quite pleased with the outcome. 


I love the little tie-downs for the engine lid and front cover, made from 5 pieces of photoetch and a little rubber band. I also like the detail of the grille. 


The Model Factory Hiro kits keep getting better; this one went together with minimal fuss or major screwups. Or maybe I'm getting more experience... this is the third one at 1/12 scale.


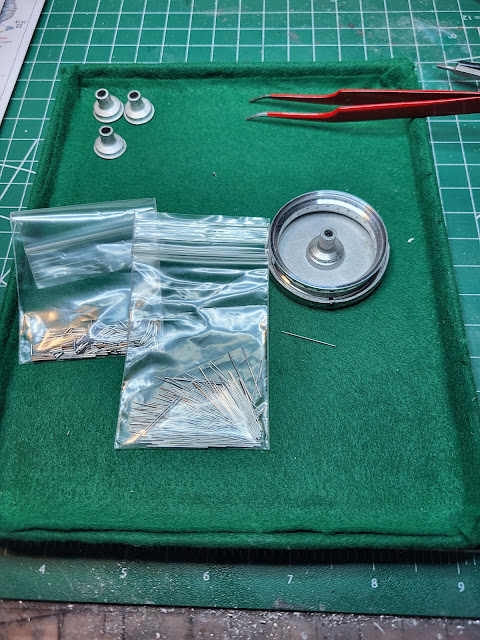
And maybe you've noticed the three all have wire wheels... as does the 1/12 scale Honda RC 166  motorcycle. That's a lot of spokes... 

Alfa P2: 4 rows of 12 spokes = 48 per wheel, 192 total

Type C: 4 rows of 14 spokes = 56 per wheel, 224 spokes

Sharknose: 6 rows of 12 spokes = 72 per wheel, 288 spokes

RC 166: 2 rows of 18 spokes = 36 per wheel, 72 spokes

Total: 776 spokes. Gack.

So what's next? Styrene most likely! And no spokes.

Tuesday, January 24, 2023

Auto Union Type C, MFH version: Interlude with spokes (II)

The wheels were the expected grind with the usual occasional frustration getting the spoke to line up with the hole drilled in the hub, but in the end it all worked out and the car sits nice and square on its four wheels. 


Next was the grille in the nose cone. This is made of 27 interlocking pieces of photoetch. I made a jig of styrene sheet and square rod to hold the three horizontal pieces (E13, E14 and E15 in the instruction sheet). Then I inserted the 24 horizontal pieces, starting with the middle (E12) and edge (E6) strips to ensure it's all square, then filling in from there. Each joint got a drop of slow CA glue dispensed on the end of a pin.


Anyone decides to build this, I've got a jig for the grille for sale, cheap. Just saying.


And it all seems to fit!


There remain a few opportunities to screw it up, but the skill-testing stuff is now mostly behind me and the major remaining risk is me getting sloppy or, say, dropping it on the floor. Ugh. Nonetheless (and I realise this is tempting Murphy) I couldn't resist posing it next to my 1924 Alfa Romeo P2. The P3 would have competed against the Type C in 1935 and 1936.


Stay tuned! The end is near.

Friday, January 20, 2023

Auto Union Type C, MFH version: Interlude with spokes (I)

Time to move on to the wheels. 


With 4 rows of 14 spokes per wheel, this adds up to 224 spokes, compared to the 288 spokes on the Borranis used on the 156, with 6 rows of 12 each. 


Nonetheless I got some green felt and glued it into the inside of a cookie tin cover. This should keep stuff from bouncing too far, as well as making it more visible. Stay tuned for a full report on this innovation.


Meanwhile the process of spoking wheels requires a Zen approach with some added fortitude. Just starting on the second row and it is clear I am going to need a better 1/64" drill bit, hopefully the local hardware store has at least one.


Stay tuned!

Sunday, January 15, 2023

Auto Union Type C, MFH version: Body installation (I)

Got up this morning, had a couple of cups of coffee to work up the bravery, and glued the body onto the chassis. Only one minor glue glob needed fixing, but of course the fix made things worse. Next is to let the new paint (don't ask) harden for 24 to 48 hours, then work it back with sandpaper and polishing compound. I'll probably start with the 4000 grit. One step forward, two back... hopefully there won't need to be more paint.


Otherwise it looks pretty good and all the other panels still seem to line up reasonably well. Stay tuned!

Friday, January 13, 2023

Auto Union Type C, MFH version: Chassis complete

Compared to the engine, the chassis is dead simple. 


One neat trick is the use of an actual tachometer needle (photoetched) on a 0.5 mm pin. Not sure how visible this will be once it's all together. 


The body has paint by now, since it was necessary to get the floorpan attached to the chassis. 


A lot of test fitting took place as the chassis went together to ensure it all still lines up, with some last-minute issues caught this way. So onwards!

Sunday, January 8, 2023

Auto Union Type C, MFH version: chassis and body panels

Brakes on these monsters were thoroughly inadequate, although to be fair they are hydraulic. I painted the shoe material to look like a proper brake shoe, sort of. Perhaps a bit of weathering inside the drums will be appropriate. 


Herr Porsche replicated the front suspension, with torsion bars and parallel trailing arms, on the Beetle, minus the friction shocks.  

In the back the swing arms and torsion bars also turned up on the Beetle. Swing arms with 520+ hp! 


The chassis is complete and (miracle of miracles) it all seems to sit square on its four axles. 


Next was to fit the floor pan temporarily thanks to the two or three screws involved. This allowed the body, engine cover and the rear nose cone to be trial fitted. I also trial-fit the front cover and nose cone. Some bending, filing and grinding was required to get it all "pretty close".  The final assembly involves several M1.4 screws so it should be reasonably straight and stiff, something I am guessing the 1:1 car was not.


As always at this stage the potential for a major screw-up looms large, as any mistake will be immediately obvious, unlike stuff I can hide inside the engine bay. The metal bits have all had a good coat of metal etch primer, then metal and resin bits have had a coat of Tamiya grey primer in order to start with the same colour base. Finally a couple of coats of AS-12 Bare Metal Silver have gone on, followed by one coat of TS-30 Silver Leaf.

Next the dash board and interior will get done while the paint dries. Stay tuned!

Wednesday, January 4, 2023

Auto Union Type C, MFH version: Engine (II)

The engine is now complete with minimal issues. 


There remains a bit of work still to get the sixteen pipes straight but otherwise looking good. Sadly I had to close up the cam and valve covers because it won't be easy to make them removable. In particular oil and fuel pump drives poke through the cam cover.


Next was the compressor and a large number of external oil lines, and the associated carburettor. The throttle linkage is well defined but sadly sits underneath the two-barrel carb. Fuel lines are in place from the pump to the carb, with the feed from the tank to come once the engine is in the frame.


At the other end of the motor, there is a belt drive to the water pump and a manifold pressure relief valve that appears to dump through the floor pan.


A test fit in the body looks good, so it's on to the chassis. 

Size comparison with the 1/24 kit by FPP Modelos is interesting. Stay tuned!