Tuesday, January 29, 2019

'55 Vette: Test fitting the phantom Speedster body

The little cut-down windshield has turned out well, I think. The window frame will likely get stripped and painted a bright aluminum colour.


Stance on the big Polyglas tires is excellent, with the suspension lowered front and rear.


The 283 with Webers fits well under the hood and doesn't need a scoop for clearance.


The blue stripes probably should have been wider, with a narrower white stripe up the middle; also the white paint probably should have been Tamiya Pure White instead of the creamier Racing White. Of course I am influenced in this by the '60 Vette run by Briggs Cunningham at Le Mans. In any case it looks good in my opinion.

Next: final assembly after a couple of fixes to the paint. I will also need to arrange exhaust pipes, probably lakers if I can find something suitable from the parts bin. Stay tuned!

Thursday, January 24, 2019

'55 Vette: Fitting headers to engine and chassis

Surprise! The headers wrap around the engine mounts, which is a very nice approach to getting them to fit, but means that the engine won't fit in the frame rails if the headers have already been installed, and the headers won't fit between the block and frame if the engine has been installed in the frame rails. Catch 22! A lot of fumbling and fiddling required. The trick was to drill and pin the headers, 0.020" wire into the headers and 0.030" holes in the head so you've got some fiddle room. Then dry fit the engine; wiggle the headers in; and once all in place dribble in some CA glue to fix the headers to the heads and the block to the chassis. 

Here the mount fits between the first two pipes.


On the left side, the mount is between the second and third pipe.


Separately the stance with the big NASCAR tires is fine but the tires are too big for the fenderwells. A set of Goodyear Polyglas GT tires from the parts bin, on steel rims, will be substituted.


Bonus: It appears the hood will fit over the Webers with no holes needed.


A classic shape. The white is Tamiya TS-7 Racing White, which is creamier than the TS-26 Pure White; I am still of two minds about switching to Pure White. The contrasting Tamiya TS-15 Blue stripe (matching the interior) should look fine either way. Stay tuned!

Tuesday, January 22, 2019

'55 Vette: Intro

Having assembled the Corvette engine in the Cheetah, I figured I should rummage through the stash for more Vettes, of which I have far too few, the Blazer-powered LT1 being the most notable. (The LT1 chassis went into the chopped and sectioned Blazer.)


The Accurate Miniatures Grand Sport is a real project, plus the instruction sheet is about an acre and a half in size, with the paint instructions on the back side. Then I discovered a couple of C1s, a '53 and a '55.


The '53 will get built box stock as it has a tri-carb Blue Flame (aka Stovebolt) motor; the 283 in the '55 now has 4 Webers courtesy of an HRM carburettor kit originally meant for the GT350. It remains to be seen if the hood needs to be cut up for this.


I think the objective is going to be a road racer, sort of a precursor to the Cheetah. I've removed all the trim, the little finlets on the rear fenders, and the turn signal bumps on the front and rear pans. I figure a classic paint job, white with blue stripes, will be just right; and I plan to cut the windscreen down.


The custom grille from the '53 will look good here. Fat tires from the parts bin ('60s NASCAR tires from the aftermarket, perhaps) and steelies will look good. Stay tuned!

Friday, January 18, 2019

Cheetah: Complete (#4 for 2019)

Four builds completed already! it's worth pointing out that three were started prior to the New Year, one as far back as 2013, and that two really only involved a few final touches in 2019. Nonetheless the pace has been torrid.


The Cheetah was painted in the fall of 2018, then sat in the WIP pile until last week when a bout of the flu meant I had a lot of bench time. 


The kit is a typical small-volume resin kit. Historic Racing Miniature's resin is always absolutely superb; you'd think it was styrene. And most everything fits very well once you puzzle it all out.


The instructions, a three-page typed affair, are vague and require a lot of deciphering, but the way that HRM puts bits in numbered baggies, with a list of the contents of each baggie on the 4th page of the instructions, means you can easily identify stuff, some of which is very small indeed.


Some minor bits were missing, as far as I could tell; and the kit came with a resin anti-roll bar as well as one made of three brass rods and two resin connectors. I used the brass bits and put the spare in the parts bin.


This has always been one of those gotta-have-it cars, and in the absence of a real one, this one will do just fine.


This is probably the best shot of it, highlighting the haunches and the extended hood.


If anything it looks as if the rear axle sits too far back. I'm not sure how that happened, given the nice positive location of the axle to the floor pan, and of the floor pan to the body; but it would also explain why the hood hinges didn't quite line up with the chassis bracket meant to take them. 


There were several intake systems used at the time. Car #64 had a standard Rochester injection system. Other options common at the time were a pair of carbs (included in the kit); a Rochester system with two intakes poking through the hood instead of the single side intake as here; and a set of 4 side-draft Webers as used in the Corvette Gran Sport.


What's next? Hard to tell; the WIP stash is down to only 7 kits, so maybe I'll work on clearing out some of that stash before tackling something new. Alternatively there are a lot of period road racers just waiting to keep the Cheetah company. Maybe a Cobra? Stay tuned!

Wednesday, January 16, 2019

Cheetah: engine and front suspension

Getting the engine in was a challenge, as it must have been at 1:1. The footboxes are tiny, hard to see how you would get both feet into one, with the small block shoved so far back.


Plug wires are poked through into the space between the footboxes and heads, but there was no way I was going to get them into the plug holes in the head, especially given the headers include a flange the length of the head. Again I am assuming that plug changes at 1:1 were a bit of a bear.


The instruction sheet mentions a few bits that I couldn't find in the well-numbered baggies provided by HRM. So the coil, for instance, came from the parts bin.


I am hoping the Rochester fuel injection unit is assembled correctly. There are no pictures in the instructions, which merely state that the engine assembly should be fairly straightforward. I used photos from the Interweb to guide me.


The 'driveshaft' consists of a U-joint. The engine simply can't go any further back without replacing gearbox and final drive with a transaxle, at which point the driver would have to move to the front.


Front suspension is a pair of short A-arms. The rod ends are all threaded allowing quick alignment changes.


Lots of space ahead of the radiator.


Later versions of the same car have the radiator located well forward, in the empty space between the front wheels. This makes a lot of sense, and would have allowed hot air to be ducted out the holes in the hood.


Stance looks good! And the hood fits well. Given the flexibility of resin, and the usual vagueness about where stuff locates in these small production kits, this is very pleasant.


Slight differences in the wheelbase left to right, due to a slight error in assembly of the chassis on my part, are not obvious with the large wheel wells in the hood.


Details remain, including the radiator overflow tank, but it's looking good.


Stay tuned!

Monday, January 14, 2019

Cheetah: when a brand's life is nasty, brutish and short

The story of the Cheetah has been told elsewhere; suffice it to say that this brutal little device didn't provide as much competition for the Cobra as its founder Bill Thomas had hoped; but it did capture the imagination of a generation of car-crazy kids with its testosterone-infused shape. Plenty of other failed sports racers have sunk without a trace, but not the Cheetah. Other sports racers may have been prettier (GTO, Daytona Coupe), or more pragmatic (Corvette Grand Sport), or more traditional (Cobra), but the Cheetah stood out with its outrageous proportions.


The Historic Racing Miniatures resin model is similar to HRM's Miller 91, in that it is very detailed, relatively easy to assemble compared to the MFH kits but with some traps here and there, and not assisted by the typed instruction sheet. But we will forgive HRM's founder, Harold Bradford, because where else are you going to find stuff like this?


Paint went on it a while back, and it has been sitting hardening while I worked on a couple of other projects. The approach of two or three mist coats, 20 minutes apart, before a flood coat is illustrated.


Done carefully, this provides a nice smooth surface with minimal orange peel. If I were building a show car, I'd still be wet sanding in increments from 2400 to 12,000 grit, then polishing; but I suspect that leads to a finish which is better than the car was in 1964.


The decals are from Vintage Racing Miniatures and are excellent. They take a long while to soak off the paper backing, but once off are strong and very opaque. The clear coat went on like the red: two or three mist coats 20 minutes apart, then a flood coat.


Decals are provided for nine different versions, including the Cro-Sal roadster which would have required cutting off the roof. Of the 9, only one is definitely known to have finished a race (second in class, Willow Springs, 1964); the others either DNFed, or period photos don't provide enough info to identify the race and date.


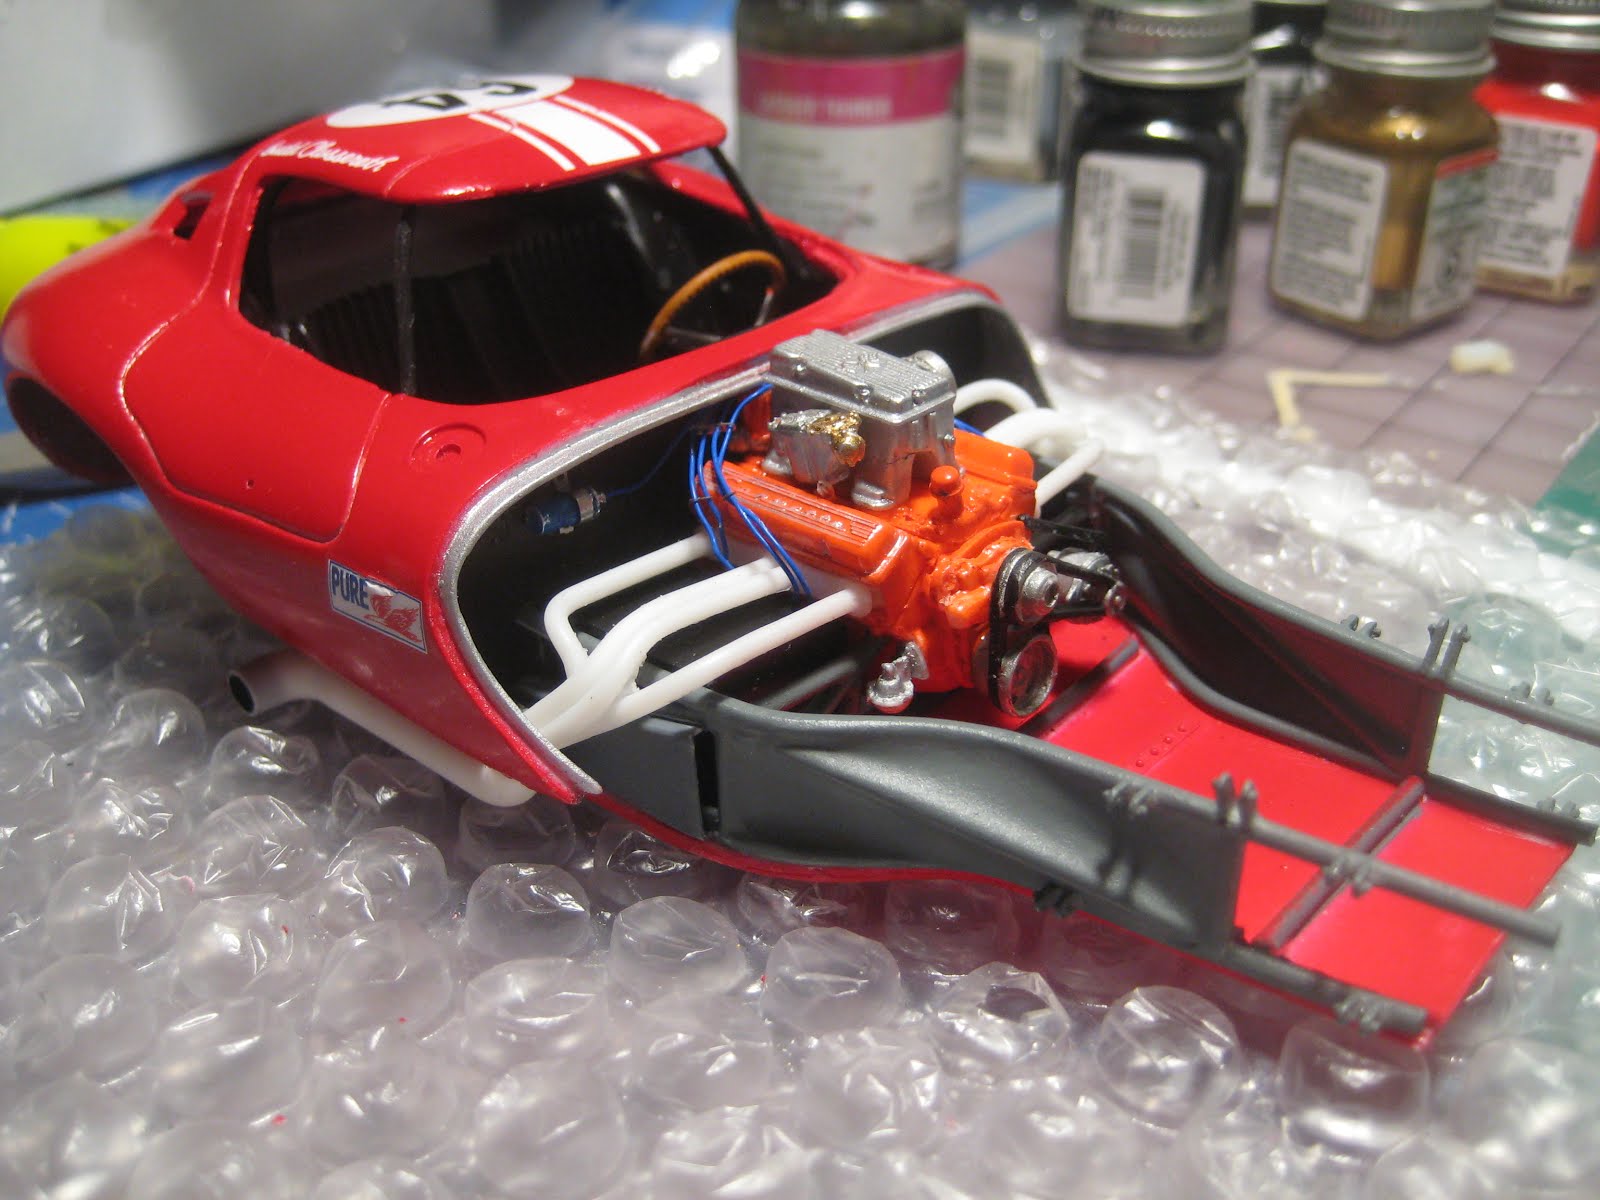
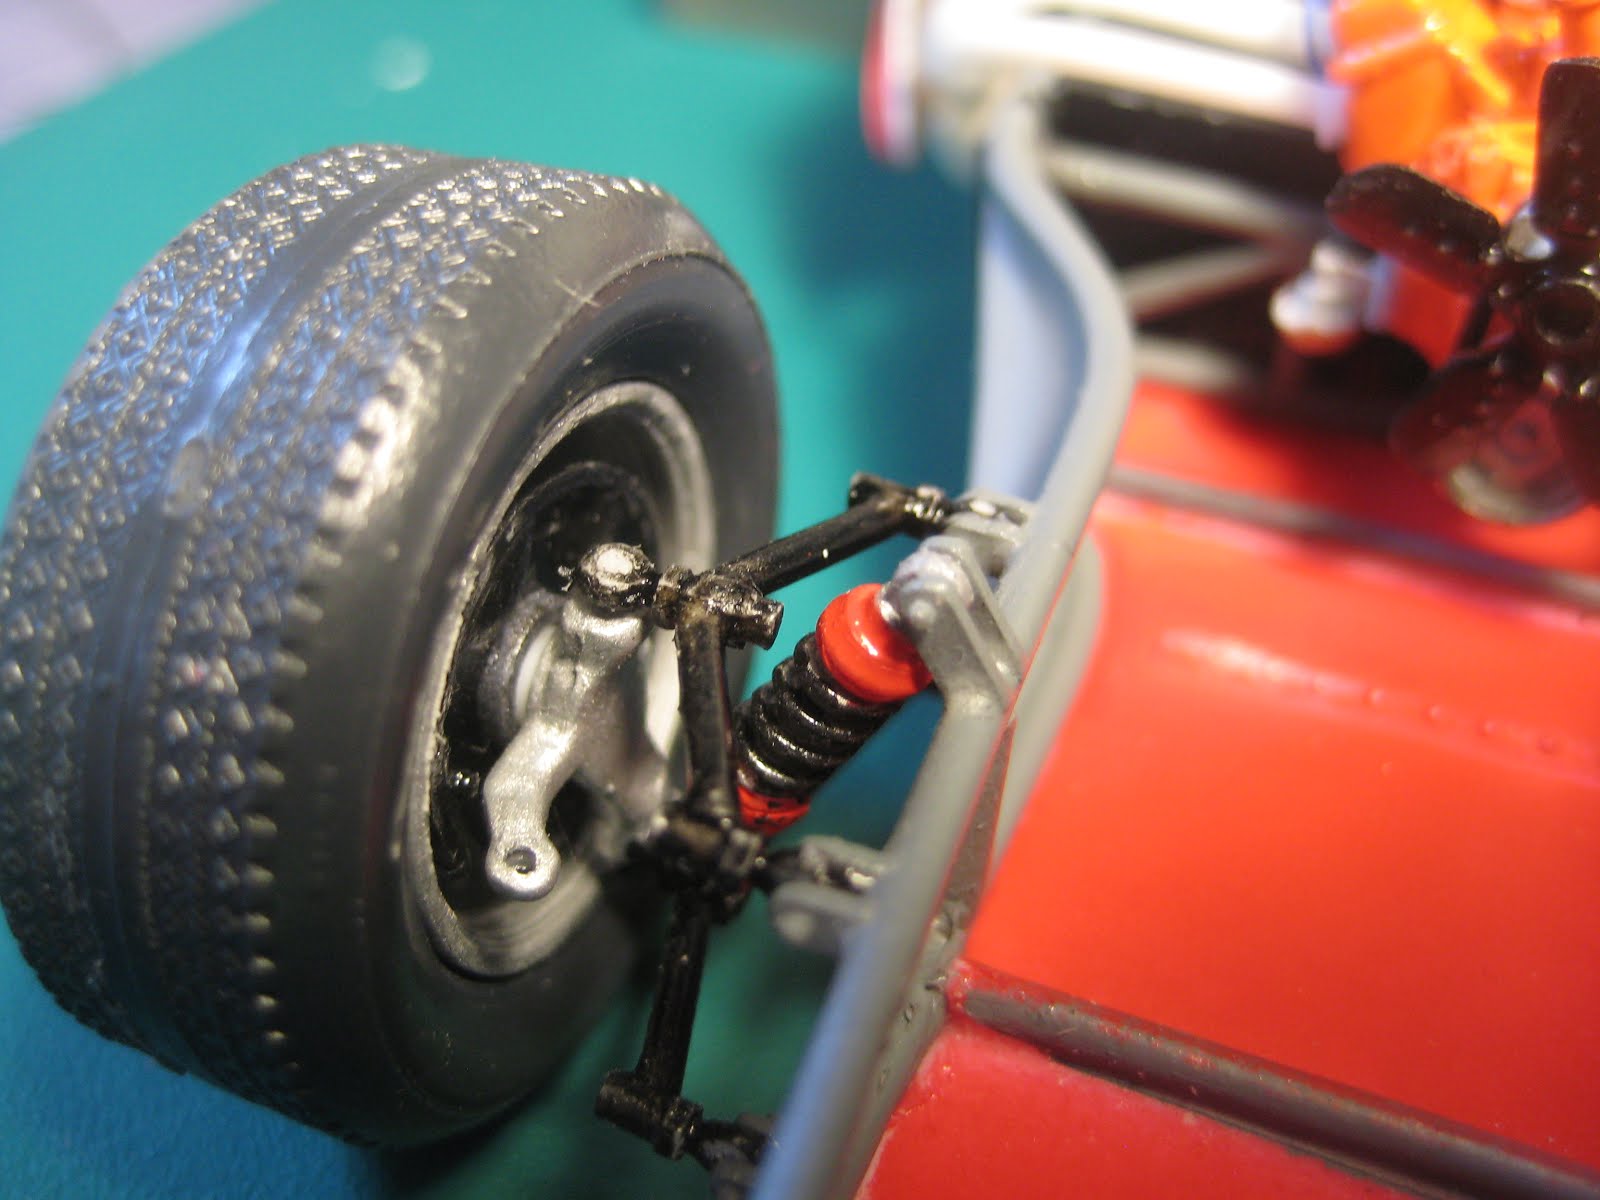
Car 64, as in the version here, DNFed at Road America in 1964. (In retrospect I should have blocked most of the holes in the hood to accurately model this particular car at this particular race.) The car ran on white steel wheels in that race, rather than mags, due to needing tires for the race which was run in the rain. The Bill Thomas website has more on this car and its driver, Budd Clusereth. 

Rear axle is an independent Corvette unit with coil-overs replacing the transverse leaf spring, a good thing as the driveshaft is about 6" long and wouldn't allow a solid axle to move around much.


Once you understand which way is up, or front, on the various bits, it all goes together fine.


Interior and floor pan have been installed, along with the firewall and belly pan.


What a cramped cockpit!


Historical photos show the gauge layout was completely random and varied from car to car. With one large dial, to the right, and four little ones clustered around the steering wheel, the tach had to be well out of the driver's line of sight.


Next I am trying to figure out the footwells which don't seem to fit very well. After that will be the engine and front chassis bits. Stay tuned!

Friday, January 11, 2019

Ferrari 166 MM Berlinetta: Complete (#3 for 2019)

Yes, yes, I've said it before, but I'll say it again: What a pretty little car! And for a car it's pretty little, too.


Windows are the big issue as always, and especially here where they have to be cut from a vacuum-formed sheet. You are screwed if you cut too deep. Fortunately the vacuum-formed side windows worked out, and the others are cut from flat acetate (although the template for the front window was significantly too small -- fortunately there was excess acetate included in the kit).


Still not perfect but a lot better than the 908/03 just completed. The only real challenge remaining is the windshield wipers, which are made from 6 photo-etched bits each. I need to take a breath before tackling that job. Also missing is the Ferrari emblem on the hood, and the tie-down brackets for the leather hood strap, both of which will be rectified shortly.


The photo below shows what a part of my garage might look like if I were a gazillionnaire. What they have in common is an Italian approach to race cars: lots of little cylinders, big bores and short strokes, lots of camshafts and Weber carburettors, lots of aluminum castings, and a sense of passion. Alfa has been around for close to 100 years now and was mass-producing sedans by the time the TZ1 was built, but the Ferrari was made in the company's first decade when no two cars were ever really the same, and everything Abarth built was essentially a one-off.


I suspect that none of these (166 MM, Alfa TZ1, Abarth OT 1300) turn up at auction very often, so it's hard to say what they might go for, but a 166 MM Berlinetta of any description is surely going to fetch in the $30M to $40M range. I am saving a bundle here!


So what's next? Hard to say, but I've built a string of Model Factory Hiro kits lately and maybe it's time to get back to styrene, whether out of box or kitbashed. There is also a large stash of resin, ranging from a 1960 Ford Starliner wagon to a 1926 Renault 40 Land Speed Record car. Decisions, decisions. Stay tuned!

Ferrari 166 MM Berlinetta: Interior and body

The interior is relatively poorly detailed, with no switch gear and no inner door panels. I didn't bother with switchgear but I did fabricate two plain inner door panels. The cars originally had a little release lever to open the door, and that was it; plexiglass side windows were held in with thumbscrews. Road versions had a little string or leather map pocket.


Decent gauges and steering wheel.


A very cosy cabin, with seats jammed up in between the rear wheels, all contributing to the minuscule 86.6" wheelbase. This is almost three and a half inches shorter than a Cobra and only 6.6" longer than a Mini.


The 'parcel' shelf is dominated by the spare wheel, which can be removed through a 'trunk' lid as the doors are pretty small. These are tall and narrow 15" rims with high profile, 5.50 X 15 tires.


On to the body. All the various decals and photo-etched emblems, for Carozzeria Touring's Superleggera brand and the Ferrari name and logo, are on, along with all the lights and door handles.


It's all sitting under a nice wet coat of clear for the next couple of days; there is a minor fix needed around the rear license plate. Sadly the Ferrari emblem is partly hidden by the hood; I misread the instructions which clearly say it goes on the hood... I have made a new decal from a scan of the decal sheet in the Barchetta kit and will fix this later.


Then it will be on to the scary part: windows, which are a mix of make-your-own and vacuum formed bits, and the associated photo-etched window trim. There is a very high potential for a screw up here, as always.


Lastly I'll have a go at the PE windshield wipers, but as I have almost never managed to successfully build this type of wiper in the past, and as the ones in this kit involve 5 pieces each, I'll probably wind up rummaging in the parts bin for something of styrene.


Just about done; the glass is always stressful. Stay tuned!