Monday, March 16, 2020

Rondeau M379B: Chassis progress

Like many resin kits, this one includes lots of stuff cast as a single big lump. Case in point is the entire engine and transmission unit which is cast in place with the floor pan, making it a bit hard to get into little corners with a paint brush.


Same goes for the fire extinguishers and battery in the cockpit. That being said the DFV is well modelled. I've added spark plug wires.


You can see the levels of flash on the exhaust manifolds. There has been a lot of cleanup required.


Starting to look pretty good. But there are some support frames for radiators that are not at all clear as to position, and the rear suspension mounts are not at all obvious. Some trial fitting will be needed. 
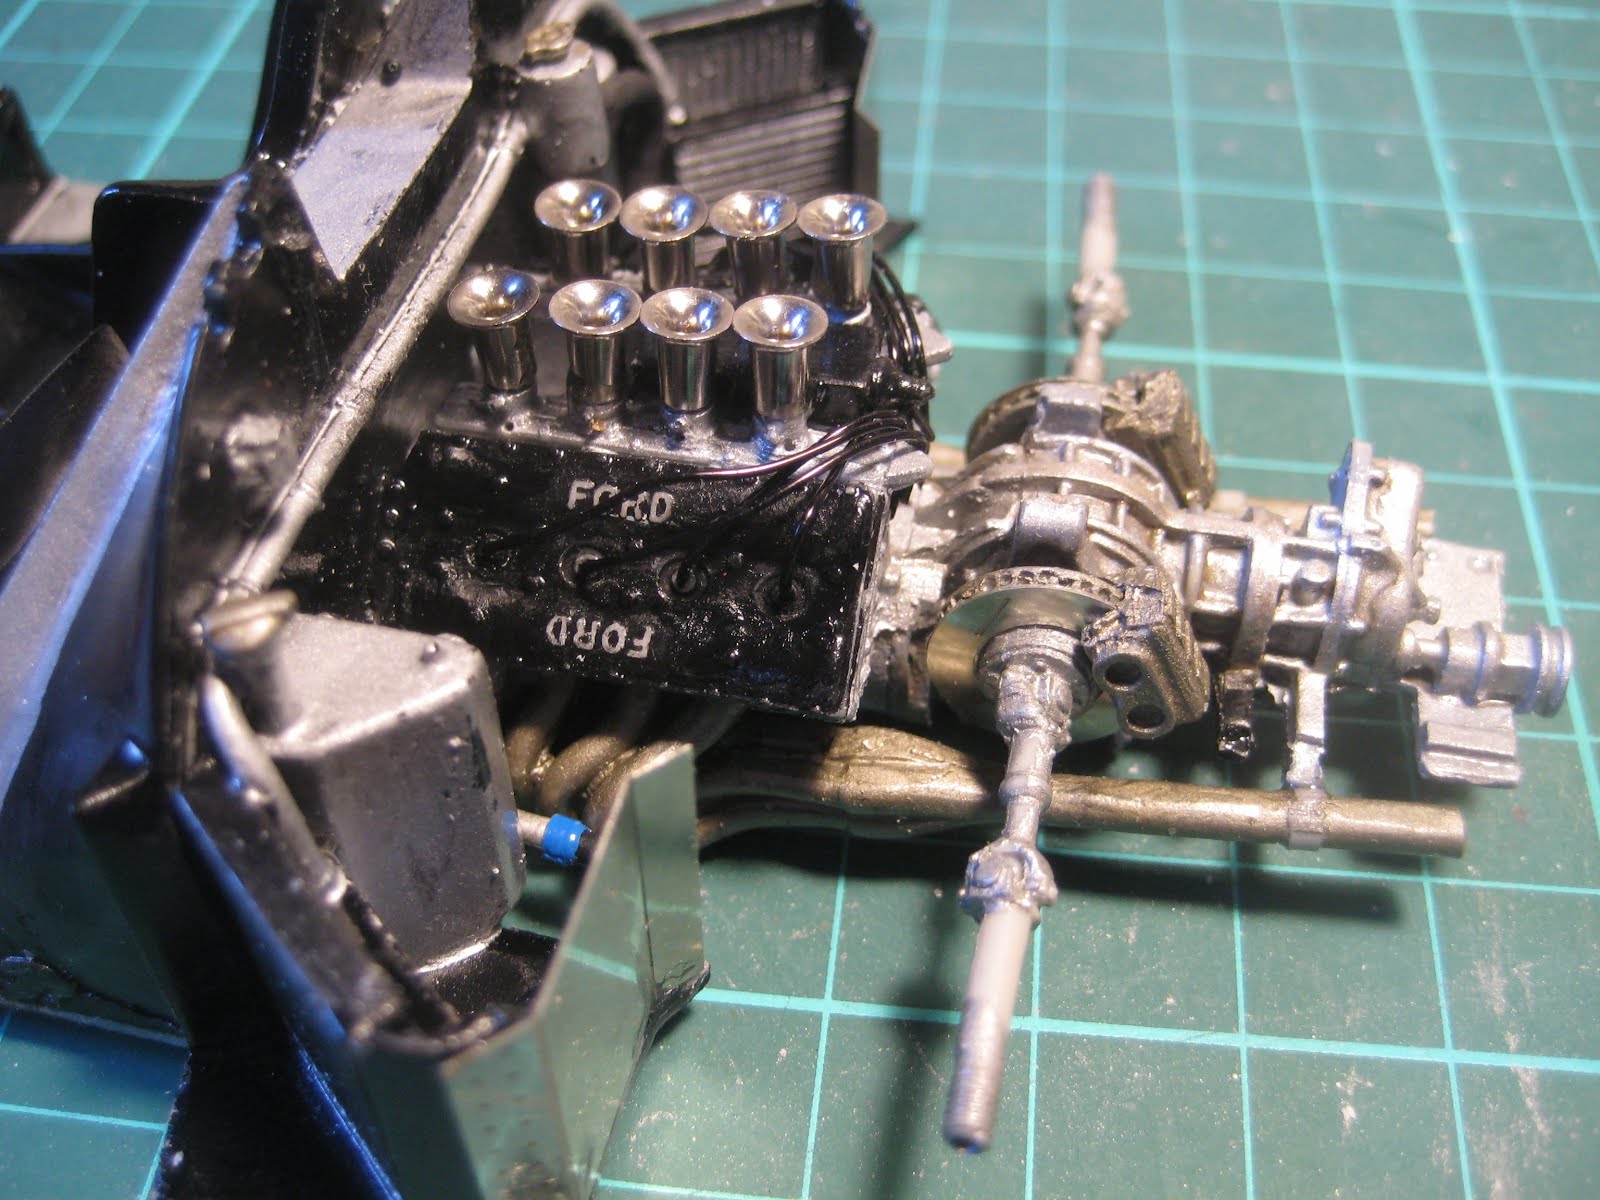


One minor nitpick: the yokes on the universal joints on the inner driveshaft segments are not lined up properly, which would lead to a pretty major vibration at speed. Not a good thing at 250+ km/h.... I have seen this on other kits as well.


Moving right along; stay tuned!

Wednesday, March 11, 2020

1980 Rondeau M379B: Overview

Having recently completed three trucks, two Barge-Class American station wagons and a '50s lead sled, I decided to move on to something more exotic.The 1980 Le Mans-winning Rondeau M379B certainly fits the bill. Jean Rondeau was the only driver to win Le Mans driving a car of his own design and manufacture, and thus the story is an interesting one. It ends poorly, however: Rondeau was killed in 1985, aged 39, when he tried to beat a train at a level crossing. Sadly, the train won, as they tend to do.


The kit is from Le Mans Miniatures and has been on the shelf for some time now. I have another LMM kit, of the 1994 Dauer 962, but this is the first kit of theirs that I've started. The decal sheet is for car #15, which blew a head gasket and retired after 124 laps; I will contact Le Mans Miniatures to see if I can get the decals for the winning #16 car.


The instruction sheet includes a full-color, two-page guide to painting. The Cosworth DFV is well-moulded as part of the chassis floor pan.


I started by sorting all the little bits into a tackle box to keep track of everything and to avoid losing stuff. Next was to scrape flash and excess structure off the main body moulding and the single resin sprue. The amount of flash is significant and will require lots of filing and trimming.


The instruction sheet says to wash (but not soak) resin parts in acetone. I've ruined resin parts with acetone in the past, but I've also fought with mould release agent interfering with paint; I'll get brave and offer it all a quick scrubbing in acetone before rinsing in warm water and Dawn. Wish me luck!

Tuesday, March 10, 2020

'65 Chevelle Wagon: Complete (#6 for 2020)

I'm calling this one done. The biggest issue, apart from the fact it is an older kit with limited chassis detail, was paint, and getting it to stick in spite of what appeared to be some form of mould release agent.


Paint has been better in the past. But the chrome strip along the fenders and doors worked out well.


Love the six. The air filter doesn't quite clear the hood but it will do.


Barges unite!


A full-size wagon has its charms.


The '51 has the nicer version of the Stovebolt 6, with period cross-flow head and Hillborn injection.


So what's next? I think it's time to get off the Detroit Iron and on to something sexier. Stay tuned!

Sunday, March 8, 2020

'65 Chevelle Wagon: Background

One of the Facebook model car groups decided to run a build-off, and the topic selected was Chevelles. Having a Chevelle wagon in the stash, I decided to give it a go.


The kit is a repop of one of the older AMT kits, with single-piece chassis and interior, and steel axles front and rear. Figuring most other builders were going to do the SS 396 thing, I decided to go the Plain Jane route.


The stove bolt 6 is stolen from one of several '51 Chevies that I have cut up in the past. I am sure that by 1965 there had been revisions to it, but online images of Chevelles didn't show up anything major.


I used some of the Tamiya weathering liquid to make it look greasy.


Steel wheels and dog dish hubcaps came from the parts bin. Stance is deliberately a bit low in the front to make the rear appear high. (That's the coil wire sticking out of the hood area).


The interior is pretty simple too, although there is decent detail moulded in to the panel.


The biggest issue was the paint. It seems there was some sort of mould release agent on it, because the paint just would not take to certain areas. The spot in the middle of the driver's door is a perfect example, as is the difficulty getting it to lay on smooth anywhere. 


It's been stripped (twice) and soaked in isopropyl alcohol (once), and the latest coat (not shown as it is still drying) seems to be holding. Stay tuned!

Sunday, March 1, 2020

'51 Lead sled: Complete (#5 for 2020)

The TS-60 Pearl Green went on with only minor screwups which were fixed with moderate difficulty, and fortunately it was not necessary to strip it and start over. Ooof.


Next was a tape job to make the chrome strip between the two colours.


Marks due to tape need to be taken out with fine sandpaper and polish.


I took a different tack on the other side.


Next, the interior involved stealing bits from the already cannibalised '51 Belair. Scratchbuilding sure leads to a messy bench...


Colours include the Pearl Green used on the outside, decanted and put on with a brush, and XF-26 Deep Green.


A lot of measurement was required to get it all to line up. Dark colours ensure gaps won't be visible through the slits of the windows.


A lot more fiddling with glass and trim led to the final product, which looks pretty good in my opinion. Overall this is a testimony to what you can accomplish with a large parts bin, especially if it is relatively well sorted and managed.


Grille and bumperettes from a sprue of bumpers and grilles that I picked up somewhere.


Low and clean in the back to contrast with the brutal front.


Rear bumper came from the parts bin, taillamps from a '56 Vette turned horizontal.


Lead sleds rule!


Stay tuned for more!

Thursday, February 27, 2020

Sixth anniversary stats

Six years and 424 posts later:

Two posts covered 1:20 topics (the 1:20 MFH Lancia D50 that I sold).
Nine posts covered 1:1 topics (mostly auto shows or seen on the street).
Ten posts covered 1:12 topics (mainly the ongoing MFH Ferrari 156 Sharknose).
Nineteen posts covered 1:43 topics (the MFH BRM and the K&R Rover 200 TC).
And fully 380 posts covered builds at 1:24 (or 1:25).

Two hundred and three described resin and multimedia kits. Among these, a couple of brands were highlighted: 4 posts on DDP kits, 48 on Profil 24 kits, and 62 on MFH kits. There were a few other resin kits that I didn't tag.

Eighteen aircraft posts (the monstrous 1:24 De Havilland Mosquito from Airfix).

One hundred a twenty six hot rod and kitbash posts.
Two hundred and seventy five stock builds.

And thirty seven tools & tips posts.

The search bar should help isolate the various categories. Enjoy!

Monday, February 24, 2020

'51 Lead sled: Front roll pan, grille and bumpers, paint

The Grille chosen is apparently from a '55 Chev so we are staying within the GM family. Bumpers involve Wagnerian battering rams, probably also from the GM parts department (Buick perhaps?).


Fabrication started with cutting out the grille opening to fit the '55 grille, and reshaping the nose of the hood which had an excessively pronounced peak.


Then a sheet of 0.030" styrene was glued into the back of the fenders to support the grille, using lots of 5-minute epoxy. Finally the roll pan was scratch built from a selection of square and quarter-round stock. More 5-minute epoxy and some slabs of styrene helped strengthen it all prior to a coat of primer and some shaping.


Trial fit looks good, just needing a bit more cleaning up.


Top coat is Tamiya TS-7, Racing White, which is a lovely creamy colour. The coves from the Corvette will likely be AS 19, Intermediate Blue; this is a semigloss or flat paint and may need a gloss coat to improve things.


Next step is to let the paint harden for a few days before taping it up for the coves. Stay tuned!