Wednesday, August 18, 2021

24h du Mans: 24h build challenge (1951 Aston Martin DB2, #13 for 2021)

With Le Mans delayed by COVID to the weekend of August 21-22, I had time to resurrect an old concept from one of the FB modelling groups: build a model of a car having run at Le Mans in 24 hours, starting at on Saturday at 16:00 CET (10:00 EST) when the flag drops, and downing tools 24 hours later. Anything that was running at the start of any edition of  Le Mans is OK, although obviously finishers or even winners are more interesting.

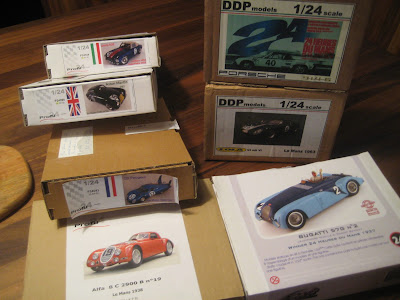
So the first issue was what kit to choose. I have unbuilt kits of close to 40 Le Mans cars on the shelf. And with only 24 hours to build, Model Factory Hiro (6 kits) and the various Japanese brands (12) are out of the running as being too detailed and finicky. In fact anything with any decent level of engine detail is out. So what's left is resin curbside kits from DDP (2), Le Mans Miniatures (1), Fernando Pinto (1) and Profil 24 (4). The Pinto kit is of the 1952 Mercedes 300 SL, but judging by my experience with the Auto Union Type C, is likely to involve a lot of cleanup and fiddling, so I am unwilling to tackle it for a short build; but the others are decent kits that won't be too bad to build up. 

The seven options remaining come from the thirties (1936 Bugatti 57 G and 1938 Alfa 8C 2900 B), fifties (1951 Aston DB2 and 1953 Lancia D20) and sixties (1963 Lola Mark VI, 1967 CD Peugeot SP 66 C and 1970 Porsche 914/6). 

The objective will be to move as quickly as possible without sacrificing a reasonable level of accuracy or detailing, and if it isn't complete by 10:00 on Sunday, so be it. 

What follows is an hour-by hour recounting of the exercise. I'll update here Saturday at 10:00 with the pick! 

Update, Saturday, August 21, 2021, 16:00 CET:

The kit I picked is the 1951 Aston Martin DB2, driven to third overall and first in the 3-litre class by Lance Macklin and Eric Thompson 70 years ago. (Walker and Whitehead won in an XK-120C, predecessor to the C-Type). The kit, by Profil 24, is curbside with a relatively low parts count; and the solid paint scheme doesn't require any masking and taping, thus increasing my odds of making decent progress by tonight.


Aston Martin team cars also took 5th and 7th, while privately-entered DB2s took 10th and 13th. Anyway, enough reminiscing, having paid my 10 euros for the live feed, it's time to get building.

Update, 17:00 CET:

Major parts are washed and the first coat of primer is on; and the first wheel assembled. No crises yet! 


The body will need some sanding and more primer if I am to do it right. 

Update, 18:00 CET:

The Profil 24 instructions call for British Racing Green but the Aston Martin website (click here) shows the #24 car (which finished 7th) in a very dark blue, so that's what I am going for. Tamiya TS-55 looks good, and hopefully one can will be enough as I don't have a spare. But with the paint on it, I can now relax and go have lunch.


The main problem at this point is getting the wire wheels out of the photoetched sheet -- the connections are very thick and require a lot of filing to get it all to go into the rim. Next update may not be until 20:00 CET. 

Update, 20:00 CET:

After a 20 minute break for lunch, the body appears to have a few specks of dust in it, and has a bit of mild orange peel. So not catastrophic but it will need light sanding and a respray before going to bed tonight. 
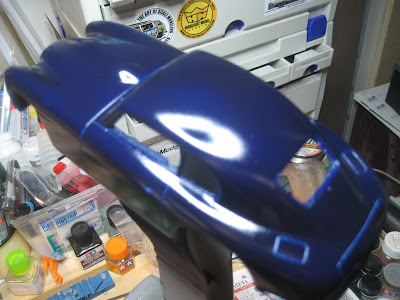

Meanwhile a range of small bits and pieces are painted and ready, and all the wheels are assembled. Stay tuned for the next update.

Update, 22:00 CET:

After 6 hours, the sun is setting in Le Mans and the race is settling into the usual grind following some excitement due to rain in the first few laps. Meanwhile the build seems to be moving along relatively well. Some added painting and assembly has the chassis almost complete. 

I also decided that the body was going to need sanding and a respray as soon as possible to give it time to dry overnight before decals and clearcoat; there will be a lot of finishing touches to get to before 16:00 CET Sunday. Of course I went and damaged the paint in trying to ensure the track and stance are OK; so there will be another coat later tonight. This will just about use up my paint can.


Update, 23:30 CET:

Track is a bit wide and the steel axles will need to be trimmed a millimetre or two. It's all going to require 5 minute epoxy. I had to fabricate supports for the rear axle which really had no obvious way to keep it from flopping about.


To be honest my interest is flagging. Time for dinner. Good thing there are leftovers.

Update, Sunday 02:00 CET:

Ten hours into the race. The in-car clips taken on the Mulsanne in the dark at close to 300 kph are frightening. Here at home, the decals and lights are on the Aston. A few PE bits are left to put on the body before clear coat first thing in the morning. The vacuum-formed windows also need to get cut out.


The photos show dust that will get washed off before clearing it. That's it for tonight, after ten hours it is time to knock off. Whether I get it complete by 16:00 CET Sunday remains to be seen, especially since the clear coat will have to dry before excessive levels of handling. But all in all it's coming along. 

Update, 14:40 CET:

Having slept in (I am retired after all) it won't get done by 10:00 when the flag drops, mainly because I need to put on the clear coat and let it dry. Not much else to do, though. As for the race, Toyota has led from the start and looks to continue. 

Final pics to come once it's done. 

Update, Sunday 21:00 EST:

Complete finally (#13 for 2021). The real issue is letting time for paint to set, and this includes primer, top coat (perhaps repeated or fixed), and clear coat. This can easily take a full 24 hours alone. Then in the case of a multi-media kit like this, there are the vacuum-formed windows that need to be carefully trimmed, then put in with white glue which also needs lots of drying time.


Is it one of my better ones? Hard to say. The kit is very simple and needed supports fabricated for the rear axle, then getting it to sit square was a challenge. The paint shows every little flaw, including specks of dust that aren't even embedded in it, just sitting on the surface. And taking my time might have made all that easier; but on the other hand the problems all surfaced after I gave up trying to meet the 24 hour time limit. 

It's a really good looking car, and it is nice that Aston Martin, in its new road cars and racers, has retained the DNA of this first production car under David Brown. The 2021 Le Mans Aston Martin Vantage that finished second in this weekend's GTE AM class is clearly descended from the DB2, as the Porsches are clearly 911 descendants.

Posed here with its spiritual successors, the DBR1 that won Le Mans outright in 1959 driven by some guy named Shelby and some other guy named Salvadori; and the DB4 GT Zagato which didn't finish in 1961. 


Overall the issue with short build times is allowing time for paint to dry so you don't get your fat thumb well embedded in slightly soft paint on the roof where everyone can see it. 


What's next? Hard to say, stay tuned! 


Sunday, August 15, 2021

Cobra 289: Complete (#12 for 2021)

This AMT kit turned out to have a few challenges which caught me off guard -- it is not smart to go into these things thinking it will be "easy", just because one has completed some MFH kits without making too big a mess. But it still turned out OK. 


The box includes a Ford F100 and a trailer, still to come.


Also of interest is the comparison between this AMT kit, at 1/25, and the Fujimi kit at 1/24.

Fujimi 427 Cobra at 1/24: wheelbase of the kit is 95.5 mm which scales to 90.25” +/- 0.47” 

AMT 289 Cobra at 1/25: wheelbase of the kit is 90.5 mm which scales to 89.0” +/- 0.49”

Actual wheelbase was 90”, so the Fujimi is accurate to within 0.5 mm (accuracy of my ruler), while the AMT is 1 mm short. Still the difference is striking. 

Finally I see from the photos that I have lost a wheel knockoff. Gah! Nowhere to be found in the cleanup of the bench. 

What's next? Hard to say! Perhaps converting the F100 to COE crew cab configuration. Stay tuned.

Tuesday, August 10, 2021

Cobra 289: two builds, ~30 years apart

When I got back into modeling many years ago, one of my early builds was AMT's Cobra 289. It was disappointing because the tires were too big, and the track too wide, but hey! it was a Cobra. 


A while back I picked up AMT's Grand Prix d'Amerique kit, with a Cobra, a well-equipped F100 and a trailer. The new Cobra kit is similar to the old one, but it includes better tires and a set of Halibrands as an added option to the wires and Cragar mags. I dug out the dusty older build (in yellow) for comparison with the new one (in black).


The Halibrands turned out to be a bit of a problem as there is no inner rim deep enough in the kit to hold them onto the tires. But the parts bin came to the rescue; and I lowered the chassis a bit so it looks better in my view. Some modifications to the A-arms were necessary to get the tires, which are still a bit wide, tucked under the fenders more effectively, and this isn't quite obvious in the pictures where everything is just mocked up for stance.


The engine is the same, with the same poorly molded and chromed carbs. I replaced these with 3D printed ones from Scale Production which look very nice. (Yes, the fuel lines ought to run up between the banks of carbs instead of outside, but it all doesn't fit otherwise.) 


Next will be the interior and some sanding to get a couple of dust specks out of the paint. Stay tuned!

Wednesday, July 28, 2021

Jaguar XJ13: Engine Part 1

 Yes, yes, I swore off 1/12 scale kits some time ago. They are expensive and take up a lot of real estate in the display cabinet. But then Model Factory Hiro issued the glorious XJ13, and I was hooked. 

Jag (and Aston Martin) dominated Le Mans in the '50s, beating Ferrari 6 times in spite of significant power deficits due to antiquated long-stroke, small-bore engine designs. Ferrari engines were best in class, with thoroughly modern big-bore, short-stroke designs. The 1957 contenders both had 3.8 litre engines, but the Ferrari made 360 hp to the Jag's 306. (See my separate description of the reasons for this by clicking here.) The reason for the wins was, in my opinion, disk brakes: Ferrari was extremely reluctant to adopt these, as he would later be reluctant to adopt monocoque chassis design; but once he did, Jaguar's run at Le Mans was over, and even the Lightweight E-Type, with IRS and inboard rear discs, was uncompetitive. Back in Blighty, Jaguar came up with the XJ13, driven by a modern 5-litre V12 that should have beaten Ferrari if Ford hadn't turned up with the even more powerful 427 Galaxie motor (that's 7 litres for the metric crowd). So while thoroughly gorgeous and likely as competitive as a Ferrari 5-litre 4-cam V12, the Jag was not going to beat the Ford GT and so the prototype was parked. (Some years later it was wrecked in an advertising stunt; the wreck was eventually rebuilt. And you can find today replicas with the SOHC V12 out of the XJS if you have the cash lying around). 

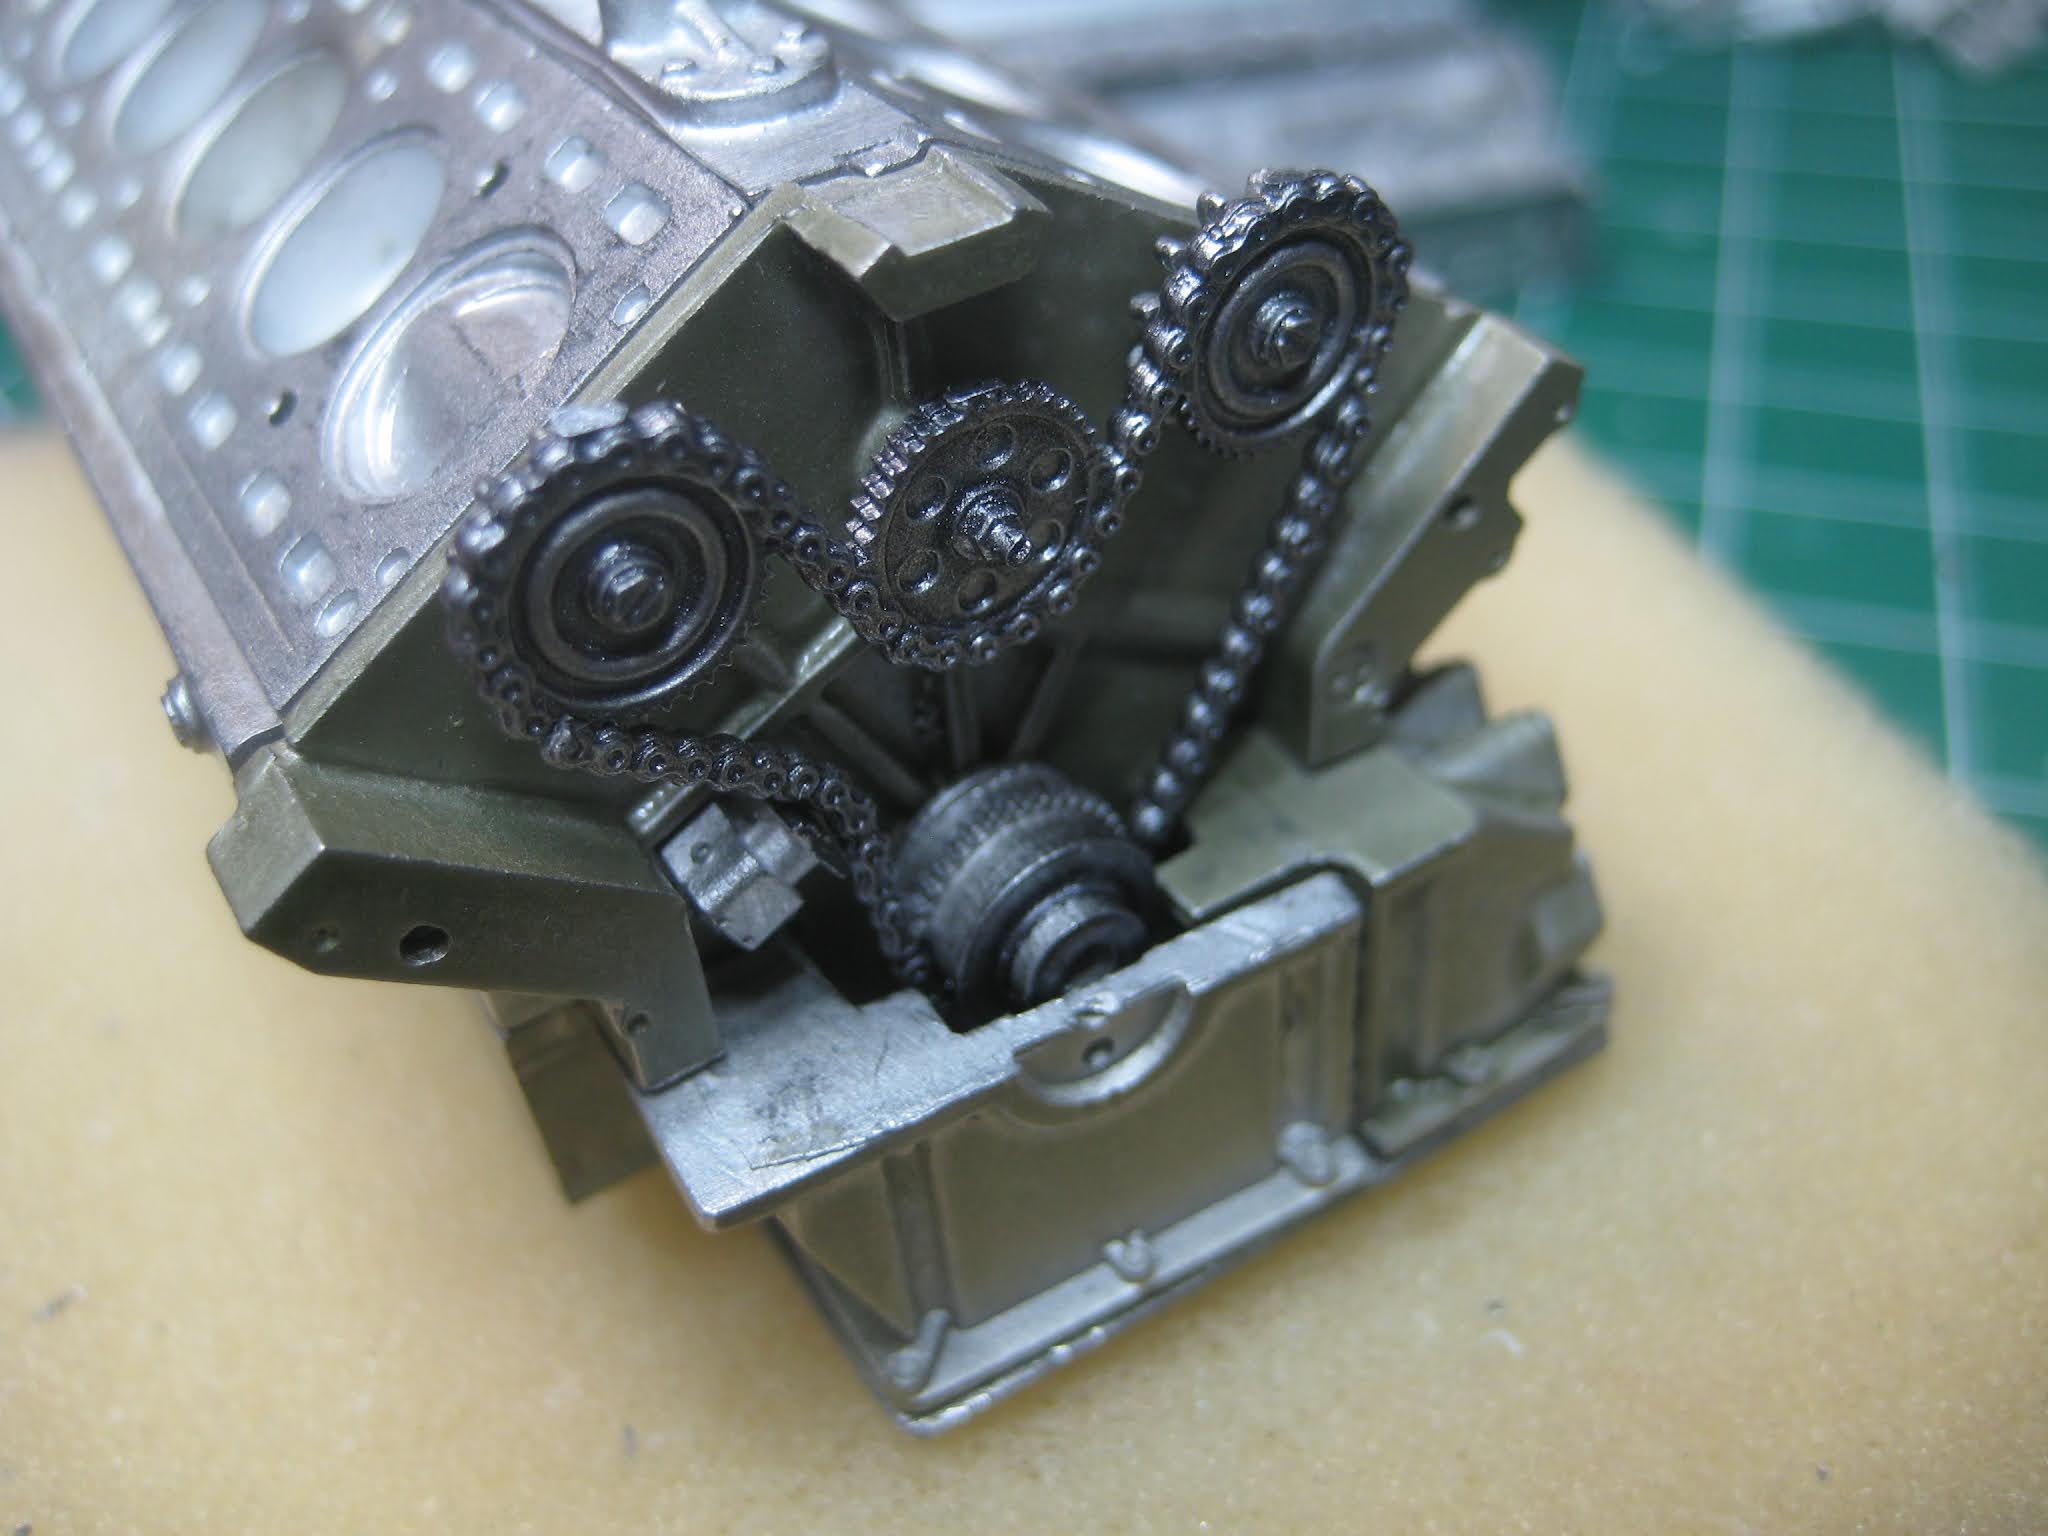
So being a Model Factory Hiro kit, the detail is astounding. I'll let the pictures do the talking from here on.


Sadly the detail around camshaft drives is now hidden forever. Such is life. On to ignition and injection systems. Stay tuned!

Things I have learned about building models

Losing stuff

One of the biggest issues modellers face is dropping itsy bitsy teensy weensy widdle parts as we fumble with them in our fat clumsy fingers, only to see them swallowed up by the Carpet Monster; or having them ping out of our tweezers and whizz past our ear as they head into orbit. Here are some tricks and tips I have learned the hard way.

  • You might think stuff would be easier to find on a hardwood floor than in a deep pile carpet. But stuff can bounce more times and hide further away from your chair on hardwood -- it will only bounce once, if that, on carpet. Personally, I ditched the carpet, and don't regret it.
  • Work well away from the edge of your bench, ideally with elbows on the bench and your belly pressed up against the edge. I have seen guys using aprons spread under the model building area, but if you have to get up in a hurry, you risk spilling everything on the floor unless you carefully remove the apron first. 
  • The back of the bench should have a backstop so stuff can't disappear between the bench and the wall. 
  • For really small bits, I work over a low metal tin, like a pie tin. Not the cheap disposable aluminum ones, because the bottoms are not flat, but a decent metal one. Stuff may bounce and roll a bit but it will tend to stay in the tin. Even better: line it with green felt stuck to the inside bottom of the tin with white glue.
  • The tips of tweezers can become bent with time. The tweezers then basically act just like squeezing a wet watermelon seed between your fingers, helping to propel whatever is in them clear across the room or even into Outer Space. Bend them straight, or get better tweezers. (See the photo below for a mangled pair of tweezers).
  • If the tips of your tweezers get contaminated with glue or paint, clean them up. Acetone followed by a quick touch-up with a diamond file and a check for straightness is a good tune-up.
  • Sort through the assorted debris and detritus on your bench (scarf, shavings, bits of sprue, etc.) on a regular basis. Small bits have been known to hide here; I have found lost bits days or weeks after I have cursed and scratch built a substitute for a missing bit. 
  • You can lose bigger stuff, too, by tipping over a whole box left open on the edge of the bench. Put projects in plastic boxes with partitions and keep them closed; use small metal loaf pans to take stuff to the sink for washing or to the garage for painting. Current sub-assemblies can go in the flat tin as above. And keep it all well away from the edge of the bench.
  • Keep completed subassemblies on a shelf or in a box for when you are ready for them, not lying around on the bench. 
  • Washing stuff works better with a fine mesh sieve. You can lose stuff down the drain, especially light plastic or resin parts that float easily. 
These tweezers will fire little bits into orbit.

 Not making a mess

In building models, we work with liquids. Sadly liquids are subject to gravity, and will spread all over your bench (and maybe your pants, too) given the slightest opportunity. Here are some pointers. 

  • Never leave anything uncapped once done with it. For one thing, many liquids (paints and glues) will dry up on you if you don't; but they also spill when knocked over if open. Getting enamel flat black paint all over that lovely engine you've just painstakingly detailed is a major PITA. And thinners and solvents will damage your benchtop (and maybe your hardwood flooring) as well as your project. 
  • Keep open bottles of paint as far away from the edge of the bench (and thus away from your clumsy elbows) as possible. 
  • There are ways of making spill-proof stands for all the common paint bottle sizes, but this, in my view, falls under the heading of making something idiot-proof, which in turn encourages the universe come up with better idiots. 
  • Keep the bench tidy. Regularly put all your tools away into a tool storage system with well-labeled drawers or sections. (You do have a well-organised tool storage system, don't you? If not, see below, and get one now.)
  • When you get paint or glue all over your fingers or tweezers or recently painted parts like the roof of your prized model or whatever, stop to clean up. Maybe it's time to take a break; mistakes happen when you are tired and in a hurry to see some progress.

Staying organised

The concept of "staying organised" scares a lot of people, but it's really just a matter of getting in the habit of putting stuff back where it came from. In turn stuff you use frequently should always be close at hand. I love small hand tools and buy whatever turns up in my Facebook feed; most of them get used very rarely, so keeping the useful stuff close at hand requires some effort. Some pointers and photos follow below.

  • Identify your key tools. If it is commonly on the bench at the end of a modelling session, it is a key tool. Place it in a drawer right in front of you along with similar stuff. 
  • Anything you don't use frequently should be a little further away. 
  • Stuff you almost never use should be far enough away that you have to get up to get it.  
  • Based on frequently used tools and your budget, acquire a storage unit with drawers or compartments of the appropriate size. Don't be a perfectionist or you will never find anything: There Is No Perfect Storage Unit. 
  • When you move on to a new activity, tidy up first. For example, removing parts from sprues, cleaning up mold seams or flash and sanding requires cutters, knives, files and sandpaper, and these activities generate dust, scarf and shavings. Clean up and put everything away before moving to paint. 
  • If something doesn't work (broken X-acto blade, pen out of ink), throw it away. In fact, Throw It Away Right Now. Don't wait. 
  • Cutting mats, lots of light, and (if you're an old f**t like me) a desk magnifier with LED lighting are critical. 
  • If you have multiple projects on the go, put one away in its box before moving back to the next one to avoid mixing up parts. 
 The first picture shows a decent starter tool set. 


Ready for a new project!

There is a fine balance between excessively tidy and excessively messy, and you will want to find your own comfort zone.

That's about it for now; I'll add to this as I think of things.

Friday, July 16, 2021

Unimog 401: Complete (#11 for 2021)

What a cute little thing! Cutest 4X4 ever, I'll wager. 

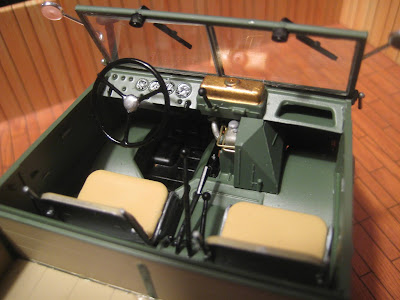
A forest of shift levers. One for 6 forward speeds, another for two engaging the reverse system (6 reverse gears were also possible); possibly a third for the optional rock-crawler gear set; and two for the forward and rear power takeoffs.

The bed sides are wood; and while the instructions has them painted green, I found an article (in German) in Auto Motor und Sport showcasing a rebuilt one where the wood had been simply varnished.

Canvas tent for a roof... 


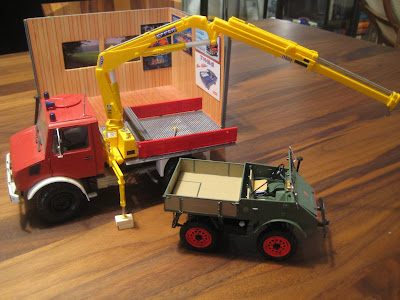
Posing with Big Brother Model 406.


Stay tuned! More to come.
Sunday, July 11, 2021

Unimog 401: Engine and chassis

 The Revell Unimog kit is well known and is available in several different versions (fire truck, canvas covered box, etc). This version is relatively civilised, with 130 hp Diesel motor and the ability to keep up with traffic. I built one up as a crane base, using Italeri's truck accessory kit.


But the first Unimog, the 401, was only modeled once, in 2000, by a German or Dutch company called Lassen Project, and was the company's only kit. (Instructions are in German only).


So I found out about this kit only when I saw one for sale on the Interwb, and had to have it as part of my "oddball" collection. I was also interested because when I worked at the Mercedes Benz dealer in 1975-76, we had a Mog for clearing snow and hauling cars in off the lot. (It got replaced by a CJ-5). It was essentially a tractor decked out for the street (if not the highway): 25 hp 1.8 litre Diesel, 6 forward and 2 reverse gears, and so-called portal axles with the drive axle well above the wheel centreline and driving the wheels through reduction gear sets. This provides tremendous ground clearance as the diffs are not on the same centreline as the wheels. 


Power takeoffs were standard front and rear and you can find online pictures of Mogs with haybalers, snowblowers and hedge trimmers mounted to the bumpers. All of this means there are about 5 gearshift levers in the cab... Finally the ground clearance, torque-tube drives and zero overhang meant it could crawl up and over just about anything, as long as you didn't try to exceed 50 km/h. 


The kit is very detailed. I added plumbing for the injector pump, otherwise it's out of box. Sadly most of this will be hidden once the cab is on. 


From the sublime to the ridiculous... all in all this is clearly agricultural. On the to the bodywork, such as it is. Stay tuned!