Friday, September 14, 2018

Alfa Romeo TZ1: First steps

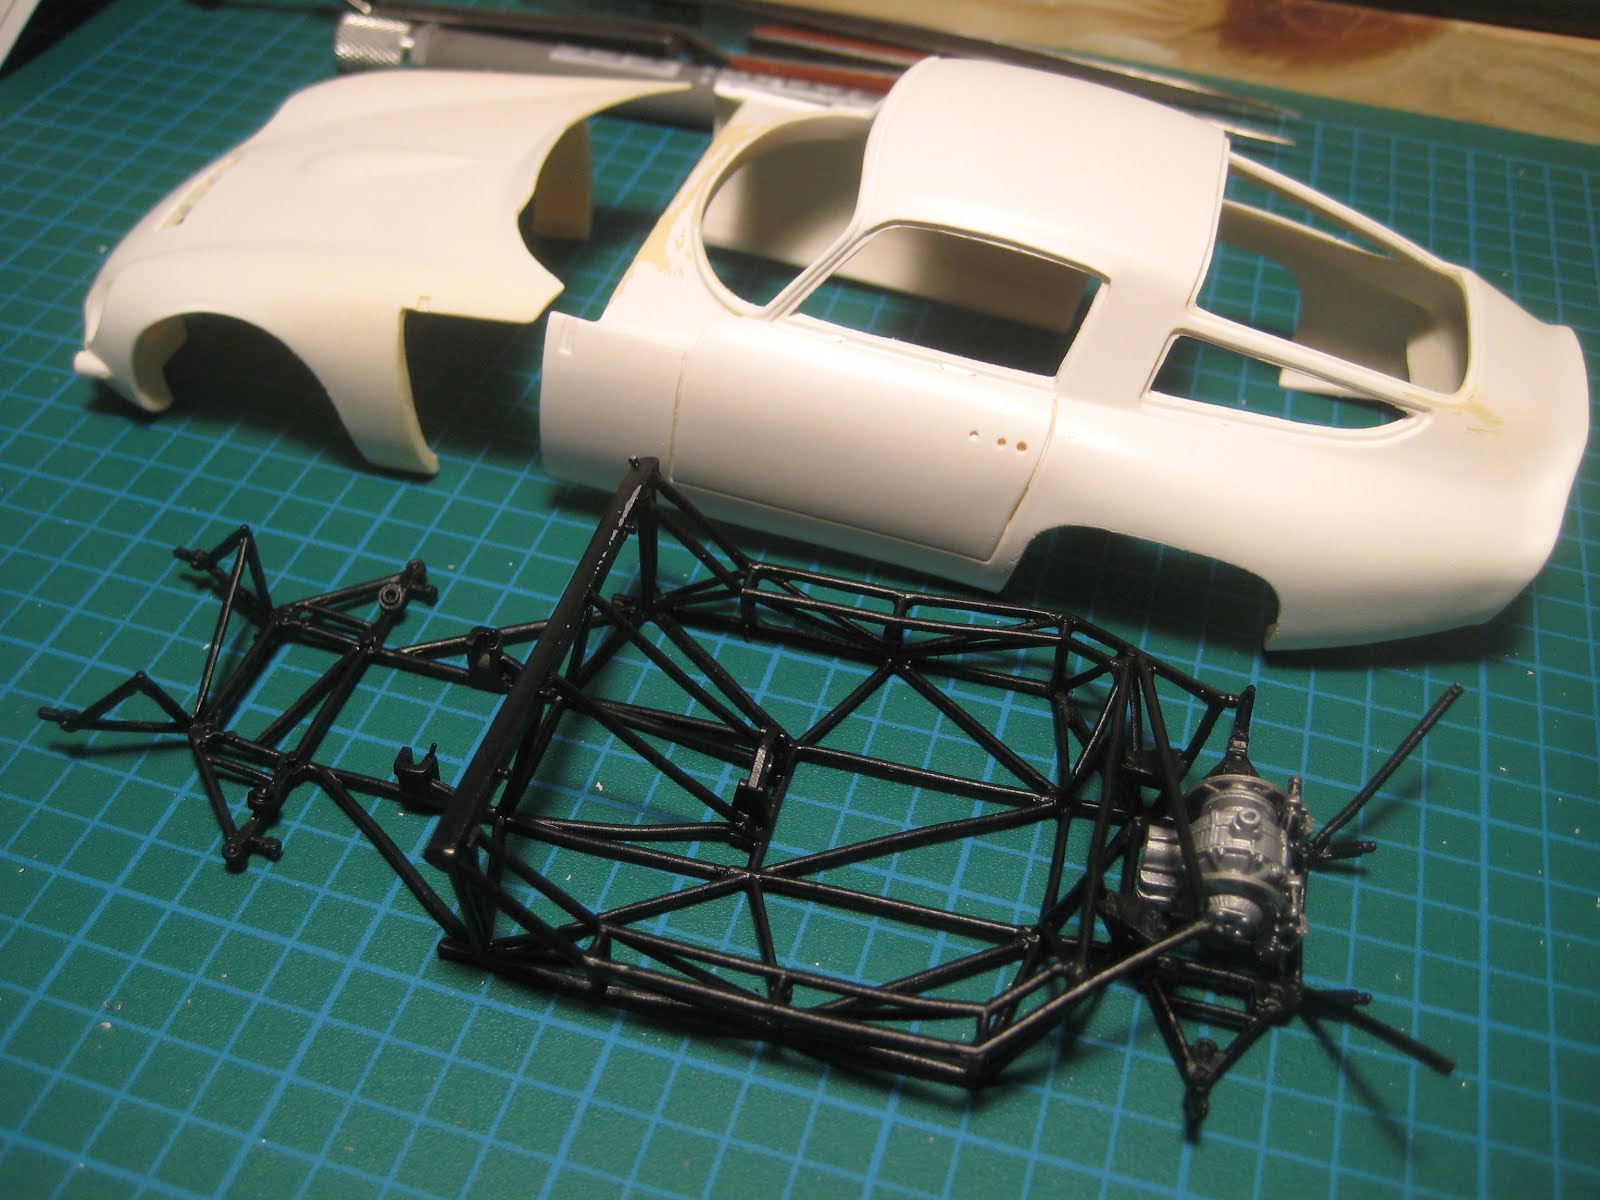
I've actually made a fair bit of progress. The chassis, made of 6 easily-bent spun cast bits, went together well and looks great. (At least two more large chassis components remain, one supporting the gas tank and the other the radiators and hood hinge). It is too bad this lovely tubular frame, much like Tamiya's 300SL, will largely be hidden once the floor pan goes in.


The rear axle, with inboard discs, is very detailed. Discs consist of a couple of photo-etched discs, and the little levers for the handbrake are also made of PE sheet.


Painted, it all looks very nice. I am hoping I won't damage the paint too badly as I force fit all the other bits that will attach to it...


Many other bits are also quite complex. The radiator consists of a hollow white metal shell, two PE grilles, and two little brackets made by folding small PE pieces.


The engine went together well. I decided not to put in the head gasket (!), although the flywheel and starter ring are installed and permanently hidden.


The head includes 10 little rivets with domed heads, mimicking the acorn nuts used to tie the head to the crankcase, sandwiching the wet liners. All went in and none got lost -- I am making progress! Of course clearance holes of 0.020" had to be drilled to accept the rivets. 

Most references state that the TZs all came with the twin-plug head. However, there are pictures on the Interweb of TZs with the single plug head; while these all appear to be modern post-restoration pictures which may have used this engine as a substitute for unavailable twin-plug engines, it is possible, reading between the lines on the Zagato site, that at least one TZ was delivered with a single plug head. The Zagato site, which one would expect to be fairly authoritative, states that car number 750 011, which won the GT 1600 class in 1964 as car 57, was delivered with the twin-plug head. Nonetheless the kit comes with a single plug head and 4-plug distributor, so this is how I have built it.
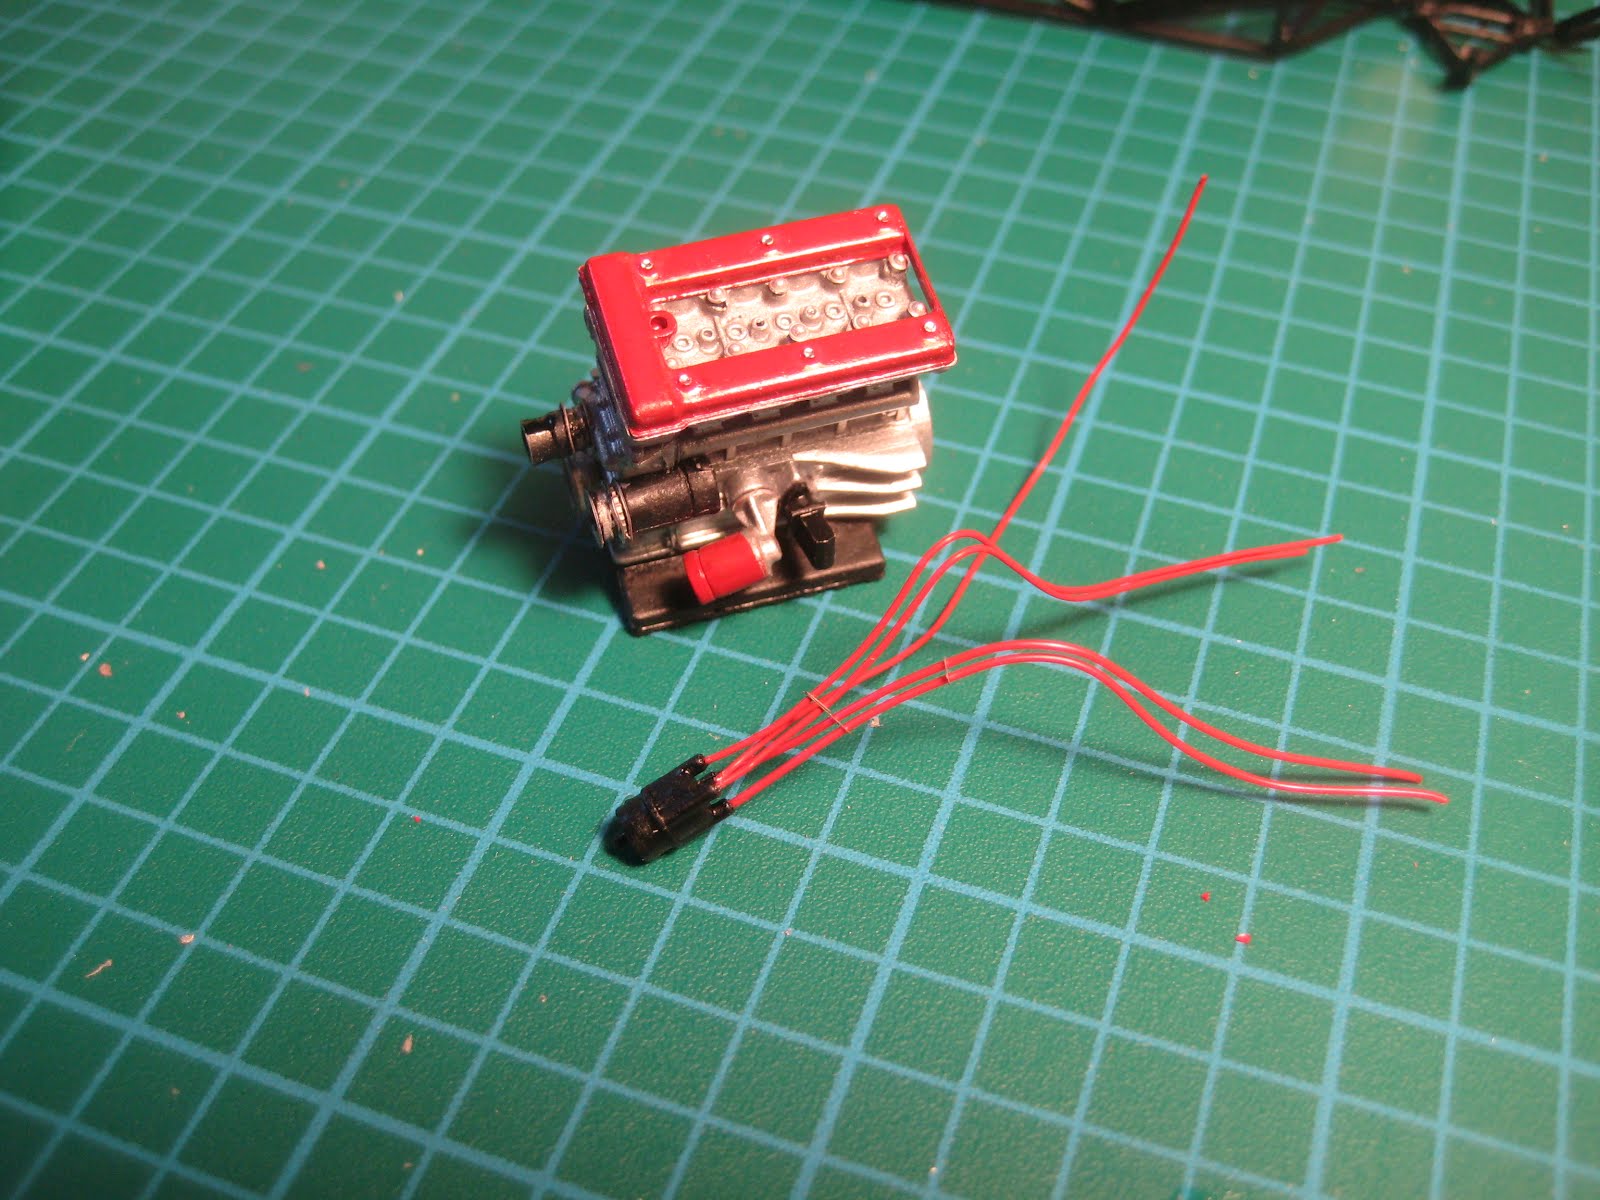


The PE Alfa Romeo script on the valve cover is held on with some Tamiya clear paint, X-22. This is far cleaner than trying to get it in place with CA glue. I am quite pleased with the result, even though I need to sort out some of the plug wires which detached from the distributor as I was handling the engine. The wire loom guides came from the parts bin (Model Car Garage or equivalent).


Separately I put on multiple coats of Tamiya TS-8, Italian Red, starting with light mists and moving to wet coats. An entire can of TS-8 and then some was used. This went on over several coats of Tamiya's fine white primer. There are no runs and minimal orange peel; it should polish up well. As I will be unable to fiddle with it for at least a week, this is a good thing.


Overall a very detailed kit, and a welcome step up from the 250 GT Lusso I just finished. Clearly the MFH folks have at least two levels of detail, and this is important to understand given the horrendous prices these things trade for on eBay. The PE sheets are a case in point; two of the three are backed by a sticky clear red sheet, so the parts have no little 'sprue' connections to the sheet. Peel the piece out with a blade, and voilĂ ! Very nice.


There are twelve other contestants in the contest run by the online Model Factory Hiro Builders Facebook group, building mostly F1 kits in scales ranging from 1/43 up to 1/12. My chances of winning anything are poor given the cosmic level at which some of these guys are working, but as there is nothing like a challenge to get one going, I intend it to be the best I can possibly make it. And there are three prizes (actual MFH kits), so 3/13 = 23%. So stay tuned!

Thursday, September 13, 2018

Ferrari 250 GT Lusso: Complete (#12 for 2018)

Another one hits the display cabinet. And it was a frustrating mix of crude and detailed, some of which I have already discussed.

For instance the dash was very detailed, with lovely decals, photo etched rings around the gauges, and a string of minute toggle switches. But the door panels are pretty non-descript compared to, for instance, Fujimi's 356 that I recently completed.


The next picture shows the Model Car Garage front discs that I substituted for the originals, which were pretty poor in terms of detail -- they consist of a slab that attaches to the disc on one side but that does not reach around the disc to the other side. I kept the rear calipers, because they include a parking lever, and because they are only visible through the gorgeous wire wheels.


The body itself is not my best work. More polishing would have been a good idea, but I was getting through the paint in places and would have had to start over. Inertia took over.


As well the glue around the glass is not the best. My excuse is the kit is not up to expectations, and as a result I was hurrying to finish it; a poor excuse, perhaps, but it will have to do.


What a gorgeous shape! Road & Track, rightfully, called it the most beautiful car in the world when it was introduced in the early '60s. The kit will definitely look good on the shelf with the other Italian coupes.


The shot below is the one that magazine photographers love so much, showing the simple grille, subtle fender line and thin roof pillars. It actually looks better without the 'bumper', but the goal was an accurate replica of a factory car.


I replaced the side marker lights and wipers with bits from the parts bin, because they were just too difficult. So overall a flawed kit of one of the cars on my list to buy at 1:1 if I ever won a million dollars. OK, many millions of dollars ...


Next up: the Alfa Romeo TZ1, also by MFH. Stay tuned!

Wednesday, September 12, 2018

Ferrari 250 GT Lusso: Engine compartment

The engine is installed, missing just the air filter. There is a lot of underhood detail, but a lot of vague guesswork as well.


The twin air horns are a nice touch.


The steering column and box went in where they should go, in spite of a lack of any locating pins. The brake booster doesn't fit where it should go, but sits a little high; hopefully this will not interfere with the body installation.


The engine went in OK, but the fuel pump, which I had attached to a fuel line and fed in with the engine, also interferes with the steering box.


View from the front shows the dual coils on the firewall and the wiring and plumbing.


The battery and heater air supply tube are nicely done and fit well.


I know, it sounds like a lot of griping. But these are expensive kits, and the good ones are really very nice. It's almost as if there are two levels of detail within the MFH catalog. The 250 GT Lusso, as well as the 250 GT SWB I have on the shelf, are good kits but require a lot of work to do well, because you are fixing sloppy instructions and poor fit. In retrospect the Abarth 1300 I built some time ago (below) is in the same boat.


On the other end of the scale, there are the Porsches (908/03 and 917), the TZ1 described recently, and the 250 LM I have in the stash. These also require a lot of work to do well, but this is due to the extraordinary level of detail and fit, and the effort is therefore far more rewarding.

So there you have it: two tiers in the MFH range, and it helps to understand this when deciding what to shell out for.

908/03 chassis


TZ1 chassis

Alfa Romeo TZ1: Introduction

I was encouraged to tackle a new Model Factory Hiro kit, even though I already have two in progress, because the Model Factory Hiro Group on Facebook is running a competition for best build which starts now and runs to end of December. So I went through the stash and picked one that seemed like it would provide a challenge without being too difficult. The 917K is too reminiscent of the stalled 908/03; and while I have a couple of nice Ferraris, they are all variations on the 3-litre 250 GT Lusso which is underway, and so don't present any new challenges. So the Alfa won out.


This being a competition with real prizes, I figured I should do some research, as historical accuracy will be part of the judging process.

The kit comes with decals for three 1964 Le Mans cars, including car #57, the winner of the GT 1600 class (13th overall). In fact the only entrants in the GT 1600 class that year were three TZ1s, of which two finished, and a Lotus Elan, which quit due to overheating after only 7 laps. Car #57, serial 750 011, is now in the hands of the famous collector (and drummer for Pink Floyd) Nick Mason. It rolled out of the factory on April 30, 1964 (click here) just in time for Le Mans practice, sporting a twin-plug head.


Unfortunately, the Zagato website, which appears to be authoritative, shows period pictures of the car running at Le Mans in 1964, but no period underhood shots. At least one other online reference mentions the twin-plug head, and the British specialists Alfaholics have posted pictures of rebuilds and restoration jobs on TZ1s which all show the twin-plug head. However, photos of car 750-045, posted by an auction house which emphasised the historical accuracy of the car, show a single plug head. As well, the Zagato website does show newer pictures of other TZ1s, post-restoration, with single plug heads. Why does this matter? Because the kit comes with a single-plug head ... so some uncertainty here; I am guessing that retrofitting a cheaper single-plug motor was a common swap as twin-plug heads wore out or blew up. I suppose I could swap in an 8-cylinder aftermarket distributor and a second coil if needed, but the head would still be wrong. 


So on to the kit: the body is quite simple, made up of two parts, and is up to the usual MFH resin standards. The engine and drive train look like typical MFH builds. The chassis, which was my greatest concern, consists of one large casting and about six or seven smaller ones, all designed to model the tubular space frame.


Maybe I am getting better at this; the frame went together OK, so far, and I only had to cleanup and reglue one of the frame sides. Thank goodness for acetone, which dissolves CA glue. So on to the primer for the chassis.


Stay tuned!

Saturday, September 8, 2018

Ferrari 250 GT Lusso: Front hubs

The front hubs are meant to be attached to the arms with a pair of M1 screws. Unfortunately the screws, which are the little black ones in the picture below, are too short, especially given the fact the suspension actually includes real springs and that they are trying to pull the arms away from the hub.


So Plan B: I bought an assortment of 00-90 screws and nuts, along with a tap to make threads if needed. One of the screws, a long brass one, is shown in the picture above.


In the end I drilled all the way through the hub with the appropriate tap drill, threaded the hub from top to bottom, and put a 00-90 screw, 1/2" long, right through both arms and the hub. I locked it with a nut and a drop of CA glue. No way that's going anywhere.


Bonus: the front wheels will be posable, even if there is no tie-rod.


All in all a pretty good rescue, in my opinion, although you'd think a rescue wouldn't be needed in a kit this expensive!

Wednesday, September 5, 2018

Ferrari 250 GT Lusso: Wheels & things

A 'typical' MFH kit involves obsessional levels of detail in some instances, and very coarse detail elsewhere. As an example of obsessional detail: Each wheel consists of eleven pieces: an inner rim, a spacer, an outer rim and a hub, all turned; six photo-etched pieces modeling the spokes; and a spun-cast spinner which is identified, correctly, as either left or right. Compressing all this causes the hub to stretch the spokes, with assembly requiring something like 20 minutes per wheel. But the result is very nice indeed.


The body is pretty well finished, which is one big stressor out of the way. The last coat of clear is drying, then the glass, including lights, will go in tomorrow. Paint is decent if not show-stopping. Chrome is polished spun-cast bits with a coat of Model Master Silver Chrome Trim, followed by some clear; not as bright as a 100 point restoration job at 1:1, but probably a pretty decent reproduction of a new car in 1963.


What a gorgeous car, too bad this is the closest I'll ever get to owning one.


Next is the front suspension which, at first glance, is going to require some modification. Stay tuned.

Tuesday, September 4, 2018

Ferrari 250 GT Lusso: Body

Last September I documented the Lusso engine assembly. I subsequently ran into problems with the magnetos, and ordered replacement magnetos from Morgan Automotive Detail. The Lusso went back on the shelf, and while waiting for the parts to turn up I got on with other stuff.


I dug it all back out recently, and rather than tackle the mechanical bits again, I decided to have a crack at the body first. I've had good luck with the bodywork in the recent 356 and Alfa Giulia kits, so I was feeling pretty good about this.


I picked green for the colour. There are too many red Ferraris, in my view; and there are lots of photos of Ferraris in other colours such as green. I'll paint the Fujimi kit of the GTO red when I get around to it. The interior is not right in the shot above; a nice pale leather colour is the goal. Tamiya Racing White is actually quite creamy and may be a better choice.


The paint is Tamiya British Green (TS-9). The drip rails and window surrounds are the Testor's pen that I described recently, and which I really like. Unlike Bare Metal Foil, it is a paint, and so you have to be careful, but with enamel going on top of lacquer, it is possible to remove excess enamel without damaging the underlying lacquer if you get right on it with the thinner.

The paint came out with a bit of orange peel, so I wet sanded using 2000 to 12,000 grit followed by polishing cream. It's better than it was but not perfect; however I was starting to take off the green in places, so I decided it was good enough. Next will be the only exterior decal, a Ferrari badge on the nose, then a few coats of clear.


What a classic shape! The subtle coke bottle profile, so much less blatant than a Corvette from the same period, the thin pillars giving it all a light airy feeling, the subtle lip on the trunklid and the shark-like eggcrate grille, the lack of fussy trim ... the GTO is much better known but is so much more aggressive looking.


The rest of the kit looks relatively simple, especially compared to the 908/03; there will be the usual trial fitting and cleanup of spun-cast metal to be dealt with. The biggest challenge will, in fact, be the classic egg carton grille: this will require fitting five horizontal photo-etched bars (E16 to E20) to a dozen vertical bars (E4 to E15 in the instruction sheet above), all inside the spun-cast grille surround (M64).


I made up a jig to line up the 5 horizontal bars so I can fit the vertical ones in. This involved cutting short slots in a piece of styrene rod using a jeweller's saw with a kerf of 0.008", slightly larger than the thickness of the photo-etched sheet at 0.006". Spacing is approximately the spacing on the vertical bars, about 0.060", which looks a bit big. I bent two of the long horizontal bars in trying to clamp it all in place, but not so badly that it won't all work, and the first two vertical bars are in and glued, all without anything pinging off into outer space. Yet. The potential for a screwup remains exceedingly high. While waiting for the glue to set on the first vertical bar, I had a look at the other two MFH 3-litre Ferrari kits in my stash, and discovered that the 250 GT SWB has exactly the same grille setup, which makes sense as the SWB and Lusso are essentially race and road versions of the same car; the 250 LM just has a piece of mesh.

Update: here is the result of a continuous 5 hours of work. Looks good from a distance... but it looks a lot better than a molded styrene grille.