Tuesday, March 12, 2019

S800 Rat Rod: Complete (#7 for 2019)

Calling this one done. The scratch built bodywork mimics typical rat rod 'who cares' approaches; the rest of it is scrounged from the parts bin.


The straight 8, of 1.6 litres displacement and making 140 hp, justifies dual rear wheels, maybe. In any case it looks cool.


The headlights are pretty exposed, and I suppose some kind of nerf bar wouldn't be a bad idea. However I think I'll pass.


Taillights are lovely bullet items mounted on the roll bars.


The exhaust involved some fabrication with brass tube.


Overall I'm happy with this one.


Time for a drive!


What's next? Who knows! Stay tuned!

Sunday, March 10, 2019

DB4 GT Zagato: Opening up the box

I have always loved the look of this car, and when I realised Model Factory Hiro made a kit of it in 1/24, I had to have it. It took me a few years to track one down, but I finally found one courtesy of a member of the Facebook page run by a group of Model Factory Hiro builders. This is full of world-class pro modellers building jewel-like 1/12 scale F1 cars; the skill levels are way out of my league, and the results can be depressing compared to my efforts, but it is a good place to lurk and quietly learn things.


At first glance it is among the simpler kits from MFH: A resin floor pan and body will ensure everything lines up, and there aren't any itsy-bitsy white metal chassis tubes to bend.


So it appears there are two levels of difficulty in MFH kits, at least at the 1/24 scale: Those with a solid floor pan and not much in the way of space frames are simpler to get straight (various 250 GTs and GTOs) while the complex ones involving lots of structural white metal framework (908, 917, the Lancia 037) need lots of trial fitting and care. The 250 LM, the Alfa TZ1, and presumably the TZ2, fall somewhere in the middle.


Some nice touches include a head gasket and six pistons which presumably fit nicely in the cast bores of the block. If I had a mini-lathe, I might be tempted to make a crank and six rods ...


This version (MFH stock #123) replicates the car that DNFed at Le Mans in 1961 (in typical British fashion, it was done in by the battery in the 24th hour). It was also run at a Japanese GP in 1963. The car was painted white for both events. I'll build it for the street, likely in a more appropriate BRG. And the aggressive fender lips may get shaved off if I can find online photos to show this was standard fare for the street versions.

So I'm not adding it to the WIP pile just yet, but contemplating my next move. Stay tuned!

Saturday, March 9, 2019

Rover 2000 TC: Complete (#6 for 2019)

OK, not one of my better efforts, although to be fair the camera picks up lots of flaws, especially in 1/43, that aren't visible unless you get out a magnifying glass ... still.


The glass is especially bad, and I may take it apart to redo at least the side glass in sheet acetate. I'll have to find some 0.005" as the 0.010" I have on hand is too thick.


The door handles are nowhere near scale items. Sad, because the door push buttons are close to scale.


Looks like the driver bashed a snowbank and bent the lower fog lamp brackets ... which is probably period correct, but is not built into the kit.


Next are a few pictures of the entire 1/43 fleet. The BRM H16 from Model Factory Hiro is much more detailed, and I did a better job of it, too.


Well, that's enough of the 1/43 scale for now. It's hard on the eyes, and finishing one up doesn't clear up a lot of shelf space in the stash.


So these K&R kits are crude and will benefit from a lot of rework, which I didn't invest here. Furthermore there were a couple of inaccuracies; the model is LHD where the original car was RHD, and the race numbers on the doors are much smaller than the small number of period photos I was able to find. Nonetheless it reproduces an oddball car I once owned, so that is a benefit.


What's next, you say? Stay tuned!

Wednesday, February 27, 2019

S800 Rat Rod: Body

There are two options for the body: One is to cut up the S2000 body, using either the nose or the entire body, but the other is to build a proper old school roadster body from sheet stock.


So the roadster started off with the S600 dashboard supported by a bit of brass tube.


Next was the cowl from the S600 and some sheet stock.


Strategic trimming uncovered the electrical relays and hydraulic cylinders on the firewall. Whether this is good or bad remains to be decided.


Quarter round stock contributed to the curved body panels. Single compound curves are actually relatively easy; it's the compound curves that are challenging.


Next will be some putty and sanding, followed by primer. Stealing the headrests from the S2000 was an easy decision.


The issue of identifying a decent nose cone remains to be dealt with. With the radiator to one side and the battery on the other, something asymmetric makes sense. Stay tuned! 

Thursday, February 21, 2019

S800 Rat Rod: Chassis complete

A decent stance, not as low as some rat rods, but realistic given the exhaust pipes under the transmission tunnel.


The oddball rear suspension, consisting of two chain cases acting as trailing arms hanging off a chassis-mounted final drive unit, is visible in this photo. The floor pan at the rear may get cut away, to make room for a small Moon-type fuel tank, which will leave the suspension visible.


Dual rear wheels will cope with the extra torque of the 1.6 litre straight eight compared to the 800 cc four.


The wheels and rims are sourced from the Hasegawa VW van, and represent 25.5" diameter tires versus 22.5" for the tires in the S800 kit. This required lowering the suspension substantially, in order to not only keep the body at the original height but to lower it further. This was done by moving the brake drum backing plates upwards on the corresponding uprights or chain cases. While technically not quite feasible, the approach works in styrene. A modified upright at the front, and a different coil-over in the rear, would do this at 1:1.


Hubcaps came from an unknown donor to the parts bin.


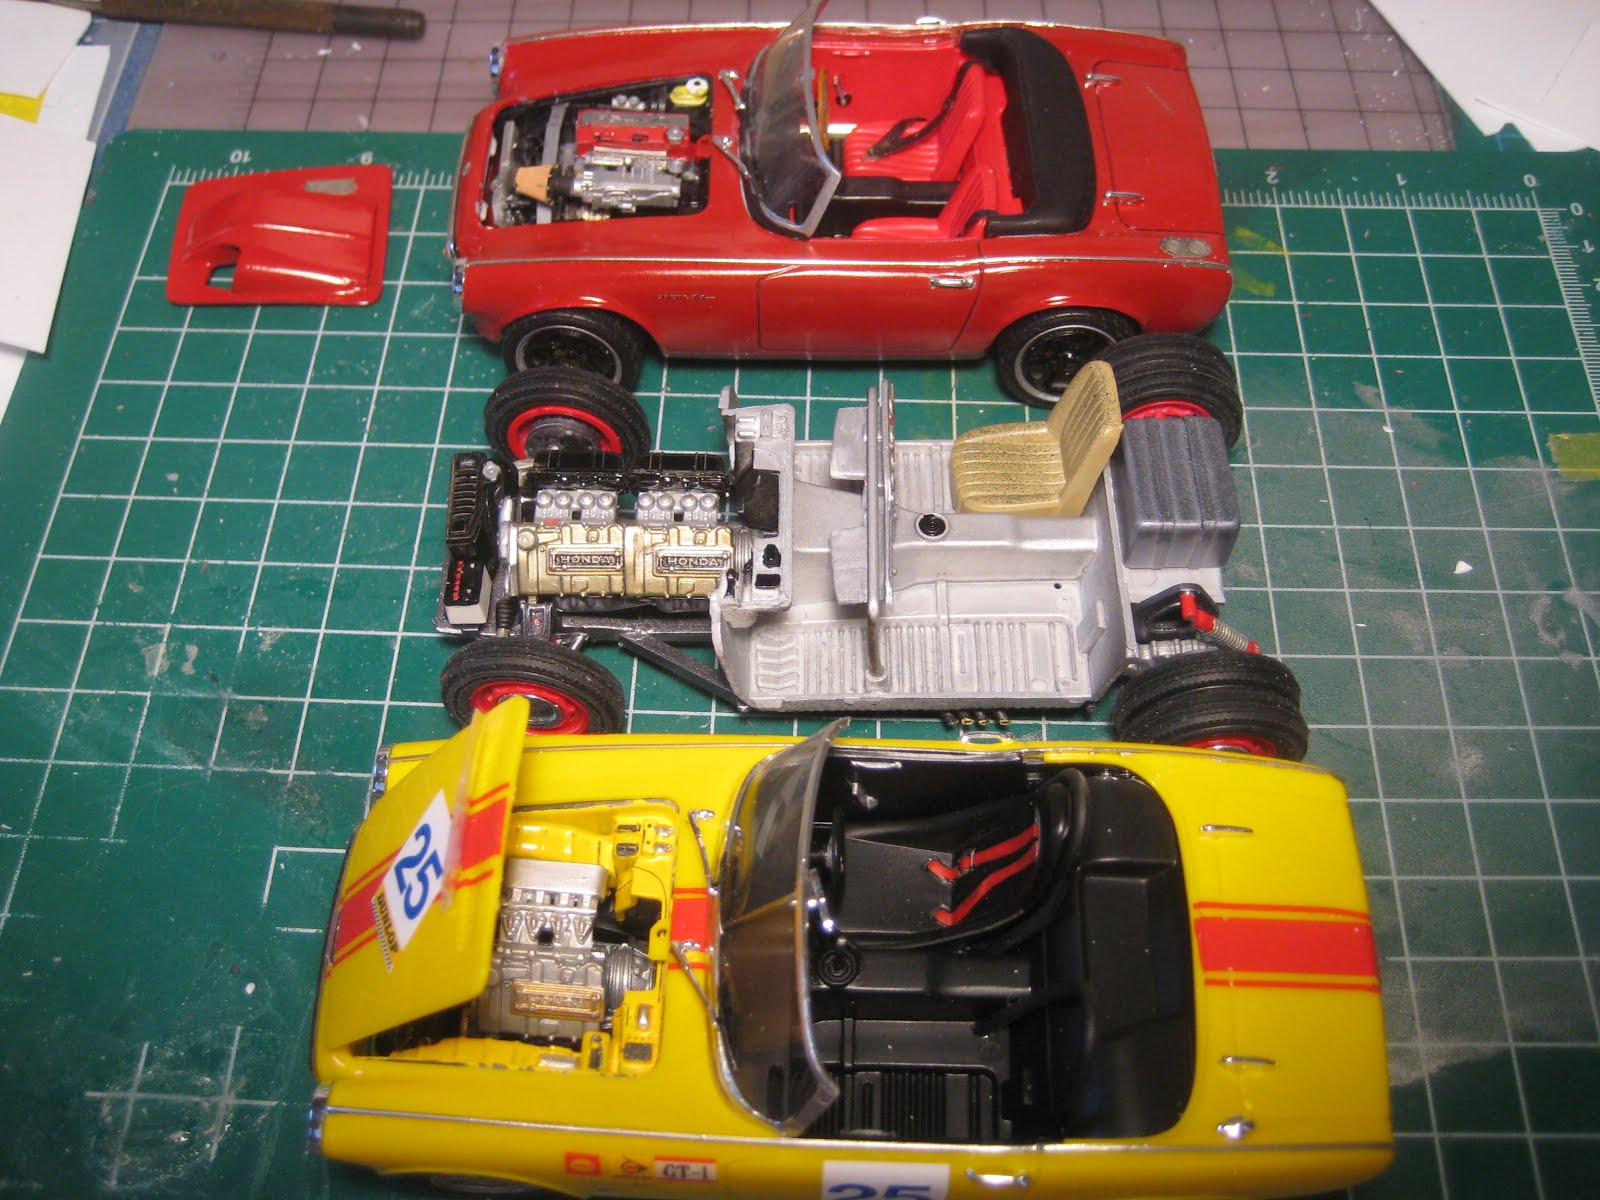
The other two Honda roadsters: S800 in competition trim, and S600 modified to take the S2000 drivetrain. The rat rod is the same length, with longer wheelbase offset by reduced rear overhang.


Next: body work. Stay tuned!

Wednesday, February 20, 2019

S800 Rat Rod: Chassis and scratch-built exhaust

The engine is assembled and installed in the chassis. The added length corresponds to the length of the short block, only 15" at 1:1. 


The exhaust consists of two manifolds and collectors from the S800 kits, joined to brass side pipes. 


K&S brass thinwall tubing is lovely: the 0.5 mm rod is a snug fit inside the 1.0 mm tube, which in turn is a snug fit inside the 1.5 mm tube, and so on. 


So the collectors were drilled out 0.020" for a 0.5 mm pin; this was inserted into 1.5 mm tube with a short bit of 1.0 mm tube inserted to space it out.


Tube bending is made easy with the spring-type tube bender, which I have managed to bend permanently.


Stay tuned! More to come. 

Rover 2000 TC: Paint, decals, stance

After some minor problems with tape, the red went on OK.


The orange peel, which is quite evident in the photo below, was mostly wet sanded out with grits ranging from 3200 to 12,000, followed by LMG and Tamiya polishing compounds.


The stance looks good, although the interior door panels are too high and show above the door sills. (The colours in all photos are the same, just the lighting conditions have changed). 


Upper edges of the door panels, visible in the photo above as a white line just above the window sill, will need to be cut back. Time to get out the Dremel.


Decals are on as well, and the stainless steel trim has been painted with an enamel pen from Testor's. Once dry, a couple of coats of clear will go on over it all.


There are a couple of aspects of the build that are not quite correct. First, the interior of the kit is LHD where 4 KUE was RHD.


Another problem is the size of the numbers on the doors.


Period pictures, including Rover advertisements, show the numbers to be the size of the doors and extending slightly into the front fenders. The kit's decals are much too small.


All in all a relatively easy build so far, even given the small scale, with the majority of the problems being due, as is frequently the case, to my own impatience or sloppiness. The kit has its flaws but it is worth it to have a model of my own sadly deceased TC.


Next up: Final assembly, including lights, bumpers and glass. Stay tuned!