Saturday, June 8, 2019

Lotus Elan S3: Body, floorpan, dashboard

The donor chassis from the curbside kit has a blank bit closing off the chassis and mimicking the underside of the motor. In order for it to be worthwhile detailing the underhood area of the new Elan, I decided to cut out the fake engine and tidy up the chassis so it will look good when seen through an open hood, if not from underneath -- the car will be posed with the engine removed. Minor damage to the chassis will be fixed.


Next was paint: Tamiya TS-16 Yellow and TS-9 British Green over white Tamiya primer did the trick. The roof and windows are molded in one part, made of clear plastic, so there was some trepidation here, but quick shots of TS-13 Clear before putting the yellow on the roof, and before moving to the green, minimised bleed through and the glass, while a bit scratched, is fine.


I used the same technique as outlined in the rattle can primer click here and here), and I am happy with the level of gloss. There are some photoetched script and trim pieces to put on once it all hardens, then I'll put on some clear before polishing.


Finally the dash is made up of two photo-etched bits. The dials are very well done and a thinned Testor's flat black settled nicely into the background, leaving the raised needles and markers nice and clean. Cleaning up required only a light sanding with 4000 grit. I need to work at making the redline on the tach a little tidier... it is too bad this is a FHC because a lot of this will not be visible.


You can almost read the mileage on the odometer... The outer piece of the dash is painted in Tamiya NATO brown, XF-68, as a proxy for wood. Here again a light sanding brought out the raised nuts around the toggle switches and the bezels around the dials.


The raised square panel in the middle of the console needs cleaning up, then it will be time to put in the teensie-weensie toggle switches. This could be challenging. The instructions suggest inserting a thin layer of clear acetate between the two PE pieces, which I intend to do.

Stay tuned!

Wednesday, June 5, 2019

Lotus Elan S3: Body

Given the desire to exhibit Chapman's gem of a chassis, and given I put on the carbs too soon so the chassis can't be installed even if I wanted to, the chassis from this glue-bomb, curbside S3 (also from Gunze Sangyo) has been recovered with only minimal damage and will be used for the new body.


The body in turn will have a yellow stripe on BRG background. The yellow went on nicely and I hope the paint doesn't bleed under the tape and onto the glass, which is of a piece with the roof and window frame. There is no real way to find out without waiting for the yellow to set properly, a week at least, before taping up the stripe for the green. Hopefully the quick coat of clear did the trick.


Stay tuned! Other projects are percolating in the background.

Monday, June 3, 2019

Lotus Elan S3: Engine

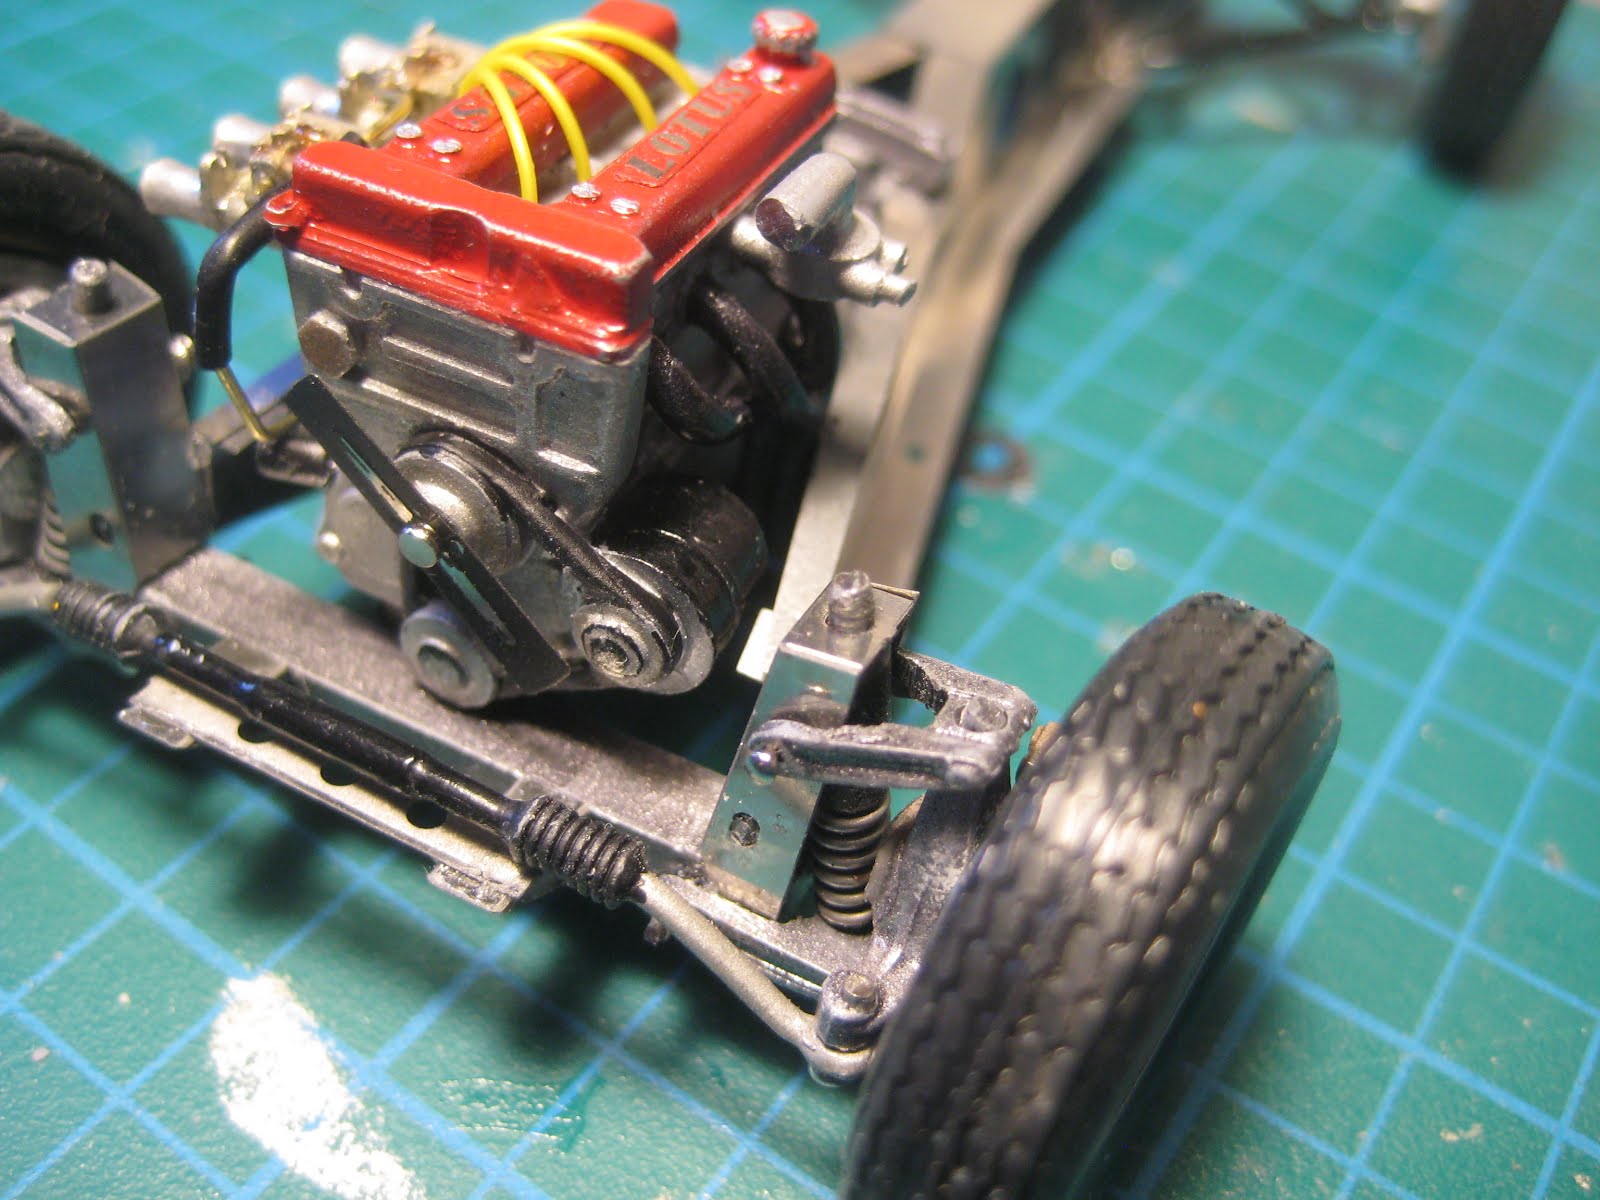
The engine is in, and it's a squeeze. It just needs a bit of touch-up paint and the radiator, and it's done.


On the left side, the generator and exhaust system are tight fits, and the exhaust needs to be hard up against the engine block in order for it all to fit. Be sure to trial fit this before gluing the header in.


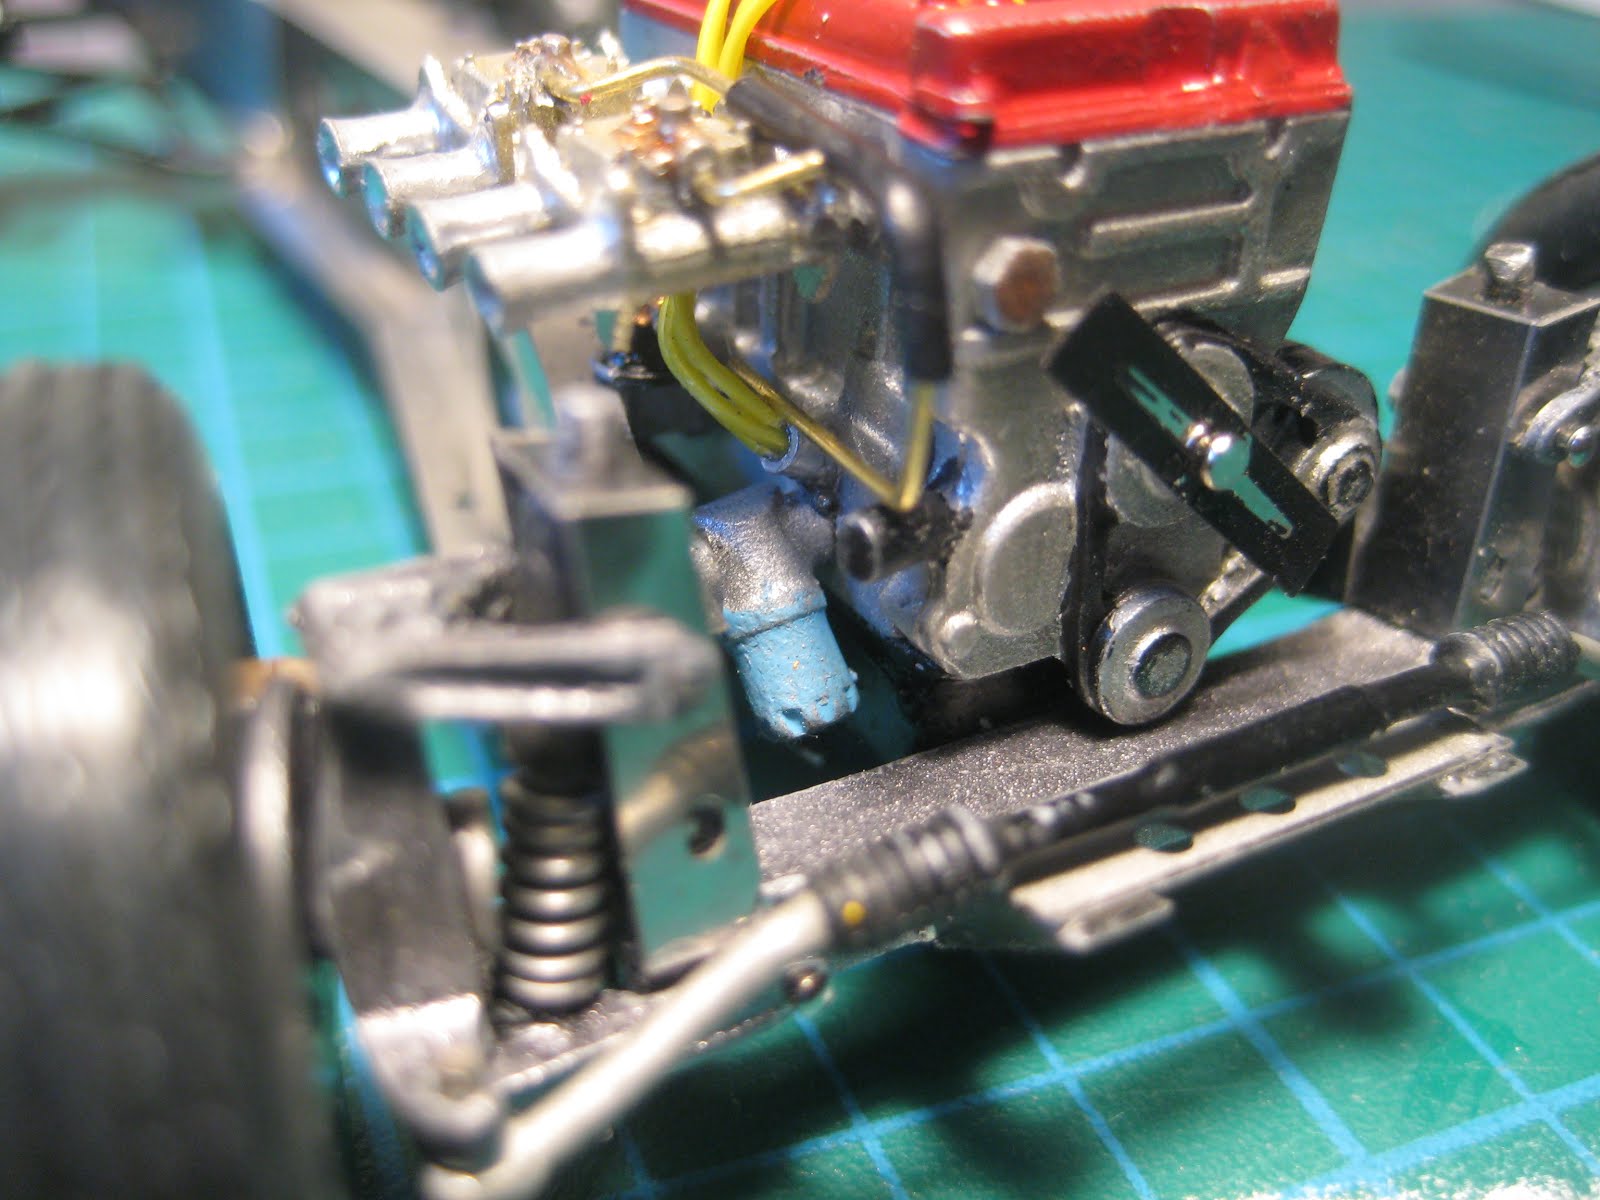
Here is the oil filter and "distributor", with the fuel pump barely visible behind, all lurking below the carbs. (A bit of touch-up paint is needed, then it's done).


The Twin Cam is a converted Cortina pushrod engine, and the old cam is still in the side of the block running oil and fuel pumps as well as the distributor. This was not a problem in the original engine which had the carb and exhaust on the same side (as in Tamiya's Seven), but I well recall the challenges in changing points and setting timing on Elans since the distributor is essentially buried under the carbs.


The distributor is simply a piece of brass tube with four wires stuck in it, and pushed into a hole drilled in the block. There is no coil wire, but if you don't tell anyone, I won't either.


And now the problem: The instructions didn't actually say to put the carbs on now ... because they won't fit through the chassis, and need to be put on once the chassis is in the car. This is not really a problem as I was planning to exhibit the chassis separately, and steal a chassis out of a glue-bomb curbside Elan (also from Gunze Sangyo) for the body; but be aware of this step if you plan on assembling chassis to body.


This photo compares the backbone chassis from Monogram's Esprit 300, with the newer turbocharged twin-cam four that Lotus developed with Vauxhall. This mid-engine chassis was developed from the Europa, and was further modified to take the rear-mounted Peugeot/Renault/Volvo 2.7 litre V6 in the Delorean. The Delorean, by the way, was a real piece of crap, with lots of flaws that should have been sorted out in the pre-production stage; I remember a colleague commenting at the time that perhaps they would have fixed all the issues if Delorean had actually managed to allegedly complete the alleged drug deal he was allegedly pursuing (yes, I am watching over my shoulder for lawyers). But I digress.


Overall it is a lovely little kit of a lovely little car! Stay tuned as I move on to paint. BRG with a yellow stripe, I think.

Sunday, June 2, 2019

Lotus Elan S3: Chassis complete

The rear suspension went together reasonably well. The cross member/shock towers, made of white metal, attaches to the PE frame with 1 mm rivets. These appear to be tapered as they start easily but require a good push from a pair of pliers to get them seated, so be sure you have this right before putting them in, you might not get it apart afterwards.


The hand brake cables and the two diagonal rods from the A-arm platform to the crossmember are bent from 0.6 and 1.0 nickel steel rod, respectively. The instructions suggest using more 0.6 mm rod for the hydraulic brake lines, but as this is 0.567" at scale, it's really too big. I've got some 0.020" brass (0.472"), which is still too big but is workable and this might serve.


Classic simplicity! There are lots of replacement chassis available today that are made of welded tube, and are probably stronger; the main reason for doing this is if you were going to put in a much more powerful motor. Chapman balanced things very carefully and the chassis was no doubt well matched to the 1600 cc Twin Cam, but never intended to take much more power.


On to the front which includes photo-etched shock towers and rack mounts, all attached with rivets.


This was considerably more fiddly, and I discovered that the rivets will indeed pull out if you work them back and forth enough, after which they will be loose. CA glue to the rescue, and overall it is possible to get this to look OK, but the issue is that the pieces are really too small.


The PE structure makes it accurate in terms of scale but requires careful fiddling.


Complete! the big pins pushed through the uprights serve as axles, and the backs had to be ground down so they wouldn't interfere with the springs. The tie rod ends are pinned into the uprights with rivets and this is a bit scary given how thin the walls around the holes in the uprights are.


Just missing the disk brakes. The A-arms are pinned to the shock towers with long, 0.6 mm diameter pins with very sharp ends, which are cut off short once inserted; fortunately this step only led to minor injuries and blood loss was minimal.


On to the Twin Cam. Stay tuned!

Friday, May 31, 2019

Lotus Elan S3: overview

After clearing away a couple of WIPs, an empty bench attracts new projects ...


The Elan has always been a favourite of mine, even if at 6'0" I have a hard time getting into one. (The Miata is a better fit but just doesn't have the cachet of something designed by the master himself, Colin Chapman). Years ago I built a Gunze Sangyo kit, which was disappointing as it was a curbside kit without that lovely little twincam motor. This kit, also by Gunze Sangyo, is one of their so-called High-Tech kits, and so has a lot of detail.


First is the chassis which is made of a fairly thick photo-etched sheet and spun-cast white metal parts packaged in a large number of very small baggies. The PE sheet is very thick, and the scoring for the folds is not very deep, so some care has to be taken to get it straight.


Once folded, though, the classic sheet metal backbone is very well done and looks the part. The white metal crossmember and lower A-arms will require some cleaning and paint.


The first pass at primer, using Tamiya's fine surface primer, was not successful, with the paint pooling in creases rather than sticking. Perhaps I hadn't cleaned up the white metal properly, so it all went into an acetone bath; this was followed by two coats of Dupli-Color Sandable Primer, which I have used successfully for white metal in the past.


Now I just have to keep my grubby mitts off it while it dries. Stay tuned!

Thursday, May 30, 2019

Honda N360: Complete (#11 for 2019)

It's easy to finish a couple of kits a week, when they've all been sitting, almost completed, on the Shelf of Doom for months if not years. The latest is the N360, with the 360 cc aircooled twin removed and replaced with the 1.8 litre VTEC from Revell's Integra Type R. Of course it would never fit at 1:1 but, hey, that's why I work at 1/24.


The Hasegawa kit may be poor on engine detail but has lots of well-done, fiddly little bits, like door and trunk handles. There were two versions of the N360, the Super Deluxe and the sportier S, and the kit has the appropriate bits for both, right down to different headrests. So there is a lot that would be of interest to someone building it OOB.


I went for the club racer look, even though it probably won't pass the rules for any club race you might care to identify.


The engine was a real squeeze but looks good in the bay. There is a small advantage due to the fact the engine is 1/25 but the body is 1/24, but really, kids, don't try this at home.


Honda rods rule! The S600 (widened to take the S2000 drivetrain) shows how the N360 could have been made more realistic, by splicing in 6" at scale. The S1600 rat rod is pure fiction.


Next will be to finish up the Mitsubishi Delica carrier.


Stay tuned!

Wednesday, May 29, 2019

Subaru BRZ: Complete (#10 for 2019)

Having been away from the bench for almost 8 weeks due to travel and work, there was a bit of a slump to get over. I knuckled down and finished the BRZ, which mainly required glass and final assembly. It was a birthday gift from a good friend and I am glad to have had the opportunity to build something I might not have bought on my own.


It's a decent kit, and Tamiya fit just gets better. Glass in particular is very easy to put in with styrene glue. I also tried the masks for painting the black window surrounds, and these worked well; a coat of clear before hand-painting the black worked well and the only tip I might have is to brush away from the mask.


Perhaps the only complaint is that while there is enough of an engine to avoid calling it a 'curbside' kit, the amount of detail is pretty poor, and there is only so much an experienced builder can do to improve it. As with the WRC, I assume the keener can find detailed engines from aftermarket outfits like Hobby Design.


Paint consists of Tamiya's Pearl Clear over the polished blue plastic that it came molded in. I didn't feel that trying to reproduce the Subaru blue was going to be any better.


A worthy addition to the Japanese shelf, which will eventually include some more factory hot rods from the stash, such as the RX-7 and 240Z. Stay tuned!