When I bought the kit of the DB3S, the vendor kindly included a bottle of ZP-1406, the pre-thinned airbrush paint from Zero Paints that allegedly reproduces the exact colour of the 1955 Le Mans car. This left me in a quandary. On the one hand, there are no rattle cans anywhere near this particular metallic green; it is nowhere near British Racing Green.


On the other hand, you need an airbrush for this, something I have resisted so far. Is this turning into a slippery slope? In a word, yes.
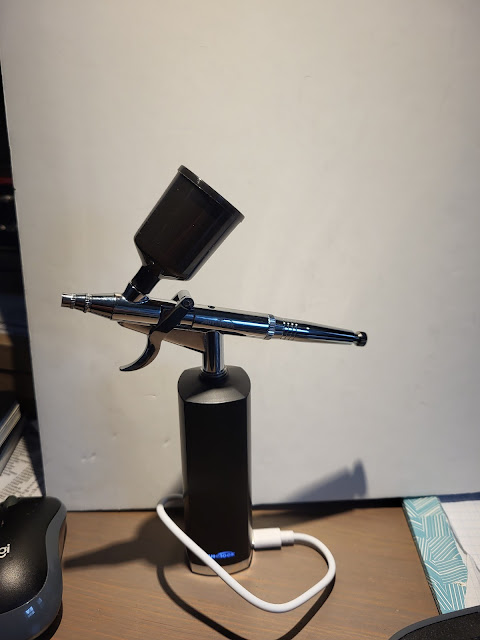

Following on discussions with several people, I purchased a handheld airbrush, consisting of a small compressor and a battery pack with USB-C charging port. No compressor, no fancy airbrush, no hoses, just a double action brush.
Next was to source Zero Paints primer and a clearcoat pack, the former from a local hobby shop with some limited supply, the latter from a friend who doesn't use it. (More on this later). The primer went on well; and Testor's 1108C Light Blue (thinned with Canadian Tire paint thinner) went on the Porsche 917K with no problems. Of course cleaning the airbrush is a pain but I am getting better at it.

So the time came to tackle the DB3S. The first coats of green involved some learning around how far back to pull the trigger (the adjustable stop is a help once you know how to use it). After putting on about 15 mL, the surface was noticeably rough to the touch. I waited 24 hours, then went over it very lightly with 4000 grit paper wetted in water and a little Dawn dish soap. This improved things, and an additional 5-10 mL paint didn't hurt. These paints, however, go on matte; and you have to clear coat.

A few days later I decided to tackle the clear pack. While Zero Paints says Tamiya TS clears work fine, I decided to tackle the 2K pack. This consists of one bottle each of a clear paint, a hardener, and a thinner. Recommended ratios are 2 parts paint to one of hardener, and an additional 10% thinner. So 10 mL paint + 5 mL hardener makes 15 mL, and an additional 10% is 1.5 mL. (I'm going to need to pick up more eye droppers at the pharmacy). One issue is that the presence of hardener means you have about 30 minutes before it clogs up your airbrush. I mixed 6 mL paint + 3 mL hardener + 1.5 mL thinner, the higher dilution rate for thinner recommended by someone who does this regularly. The result of three coats over 30 minutes is shiny but looks like there is a bit of orange peel. I now see the hardener has a shelf life of 6 months once opened, and I don't know how long my friend had it; this could be part of the problem. I'll let it set and try polishing to see what happens.

By the time I was done, the airbrush was well and truly clogged with hardening clear coat. Lacquer thinner did the trick and I am learning to do this in the fume hood/paint booth with the fan on high.
Separately I have ordered (from England) the Alfa Corso red needed for the Alfa 8C 2900B and a couple of other prewar Alfas, as well as some metallic colours. (The snowball is gathering momentum down the slippery slope...) One advantage of an airbrush is the possibility of mixing custom colours... The paint seems to go on fine, and I can use Tamiya primer and clears according to Zero Paints. Stay tuned!
No comments:
Post a Comment