Friday, March 29, 2019

Mitsubishi Delica: Body and interior

I while back I looked at the stash, including all the boxes of incomplete projects. My bank account and I agreed that there is plenty to build, and I don't need to buy anymore kits, for now anyway. So I dug out this pair of Mitsubishi Delica Star Wagon 4WD Super Exceed 7-seater microvans from Aoshima, converted into a single 5-seater 8X8 race car transporter and a bunch of residual body parts. Initial body and chassis work dates to January 2017 (click here). 


After some putty and sanding, the Testor's yellow went on well. There are a couple of runs to sand down, then I think it needs a stripe of some sort, at least along the waistline if not over the roof. Red, or maybe blue would be proper match with the bold yellow.  


A decision was made to use the rearmost engine, so there is a big hump in the rear compartment between the two rear-facing seats.


The three-seat bench got cut up and put in front over where the forward engine would have resided. The middle passenger interferes significantly with the gear shift and 4WD lever; in retrospect it would have been smarter to use the forward engine, and go to 2 + 3 seating. 


Sadly the Testor's yellow is not the same as the Tamiya yellow on the Honda, so I may need to build up a different race car. 


One option is this Honda N360 which has a moderately well detailed 360 cc aircooled twin. I've also got a small turbocharger kit with intercooler, and some fat little Minilites ... could be interesting. 


Final assembly beckons. Stay tuned!

Friday, March 22, 2019

1956 Lincoln Futura: Complete (#9 for 2019)

What a blast from the past! And a real quick build, too.


Lots of Zoom here.


I love the antenna, straight out of Dock Dodgers in the 24 1/2th Century.


All that is left is to paint the figures, which need to go in before the steering wheel.


Some details of the build follow. The chassis was lowered by gluing in a pair of 3 mm brass rods on top of the existing structure where the axles would snap in.


The wheels are Chrysler 300 units, and the tires are from the parts bin. They are reduced in diameter compared to the big fat wide walls I had on it in the last post, which was needed to allow it to sit this low.


Looking good -- the wheels disappear up under the fenders this way.


Stay tuned! I'll get back to more conventional stuff soon enough.

Thursday, March 21, 2019

1956 Lincoln Futura: An el blasto from the el pasto, baby

This predecessor to the original Batmobile was designed by Ford and built by Ghia, for the equivalent of $2.3M in today's dollars. After touring the car shows for a year, it sat out back of George Barris' shop rusting away for a decade before the call from the studios for a Batmobile turned up in the mid-'60s. Fender flares and a jet engine did the trick.


The kit is simplicity itself, with no motor, drivetrain or any chassis bits. It's a perfect candidate for a qiuck build, thus rapidly reducing the stash.


Fortunately I had a can of Tamiya Coral Blue just sitting around, and this provided the perfect '50s pastel colour.


Ride height with wide whites from the parts bin is a little high, because the tires are taller than the unpainted styrene bits in the kit, and can't be jammed up inside the body too much further.


Eagle eyes will recognise '68 Chrysler 300 wheels from the JoHan kit, because the Futura items are small for the whites. I may need to look for smaller tires to get the ride height down, and to allow the neat original wheels to be used.


The couple in the car are a hoot. I'll have to learn about painting flesh tones. The black stripe below the beltline is a mirror of the white line (on a red body) found on Interweb pictures of a recent copy; there will be a chrome strip separating this from the upper body and joining the bumpers.


A tribute to the optimistic '50s! stay tuned. 


Tuesday, March 19, 2019

Mini Sprint: Initial planning

So I picked up a partially built Mini at a meet recently. I already have a Mini, in Monte Carlo trim; now it occurs to me that a Mini Sprint would be a cool addition.


The Sprint was built in some relatively large numbers in the mid-60's, and involved both chopping the roof and sectioning the body. Total height reduction was somewhere around 5 inches; many were raced as aerodynamically the Mini is somewhat akin to a shoebox. Rob Walker famously had one, and there is a great picture (click here) of Stirling Moss and two other blokes pondering getting in and out of it.

Fortunately there is a photo showing one just about dead square from the side. It was easy enough to find a picture of a standard Mini and to use the wheelbase to scale them to the same size. From the wheelbase of 80 5/32", I was further able to scale the whole picture to 1:24 when printed on my ink jet.


This clearly shows that the roof was retained, and that the rear roof pillar was tilted forward, possibly with a cut going as low as the bumper. The A-pillars would also have been tilted back, by a small amount. Period references say the chop and the section were of equal depth (about 2 1/2 inches each) but this comparison implies a deeper section and a shallower chop; there were also a number of Minis that were chopped but not sectioned.


There is also a website (click here) documenting a recent build of a Mini Sprint by a fellow in the States. Very cool stuff, and one photo shows the cutlines just above the floor pan. I may have to cut a little higher in order to maintain some semblance of structural integrity. Working around the headlights may be the trickiest part. Finally there is a French chat site documenting building of one of these from the Revell kit; apparently Neville Trickett was making furniture in France in 2015. So lots of documentation.

Get out the saw!

Ford Fairlane: Complete (#8 for 2019)

I don't build a lot of Yank Tanks, but this one was meant to serve as a guinea pig in a rattle can paint tutorial posted on the Model Car How-To group on Facebook. The rest of it was done up in relatively straight-forward fashion, with minor deviations from Out-Of-Box.


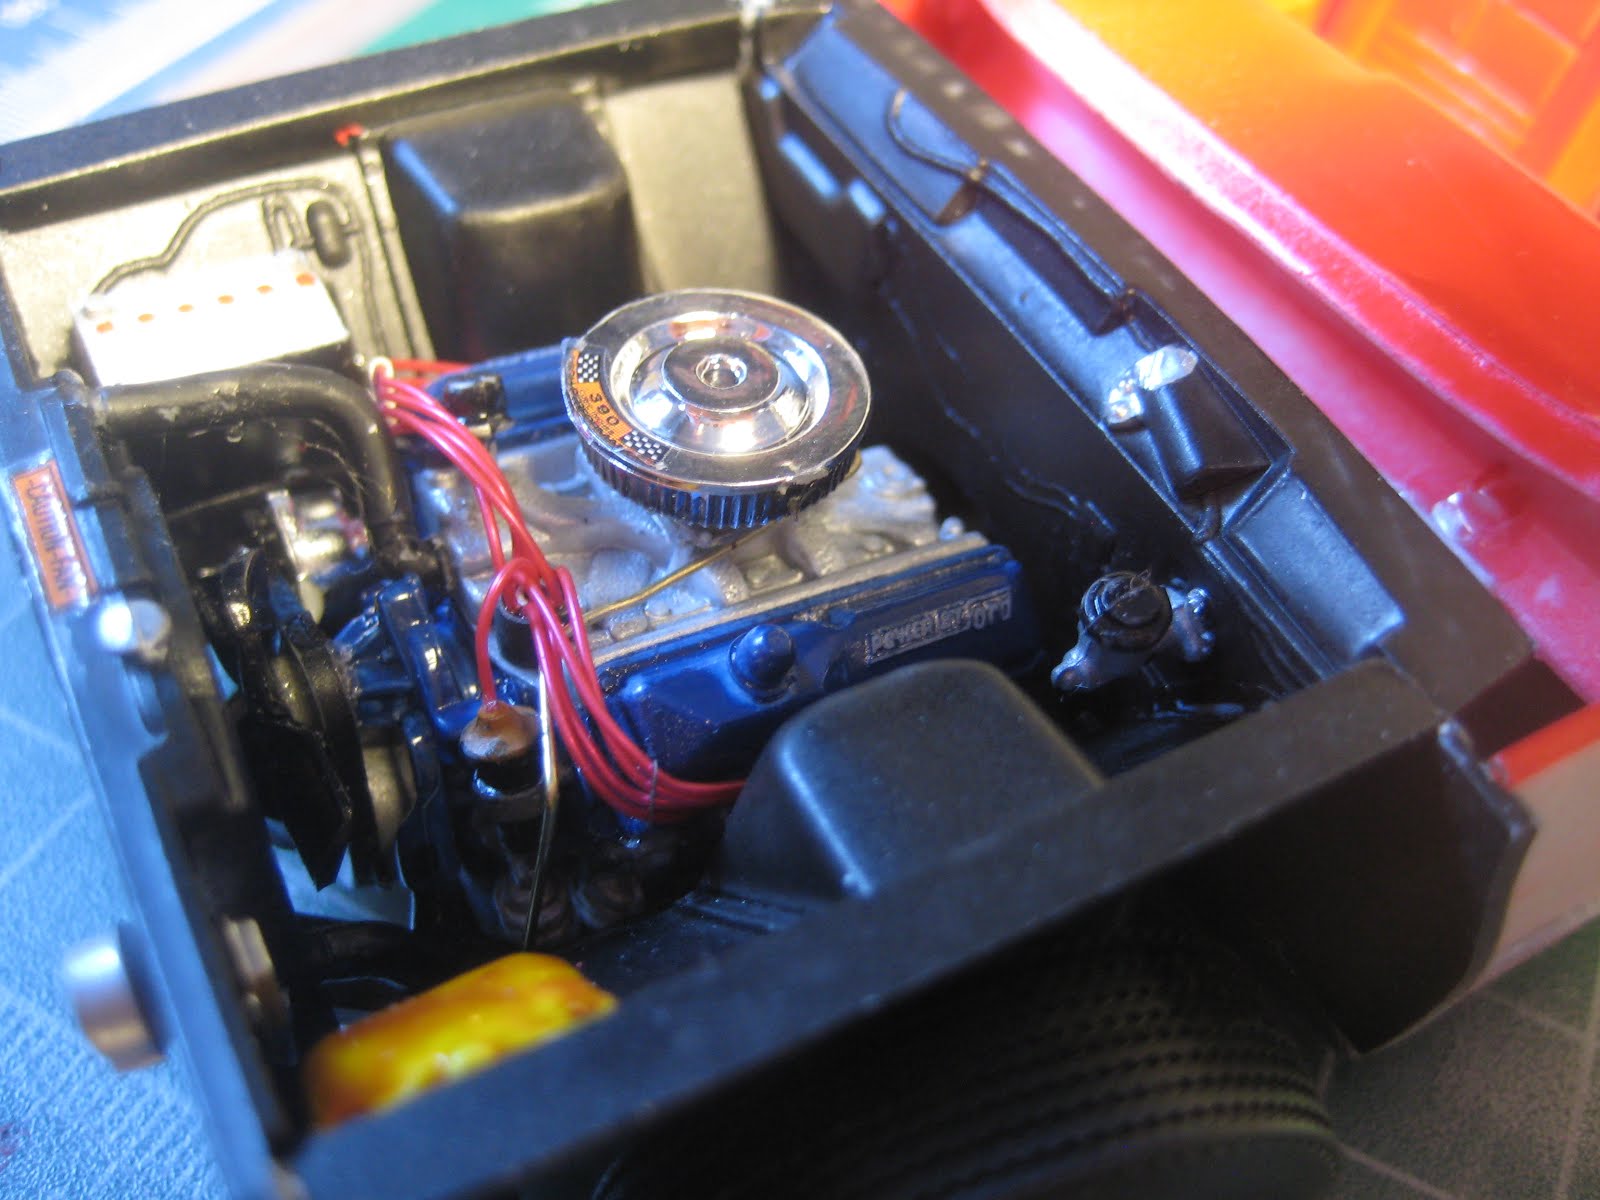
The 390 got plug wires from one of the aftermarket people, and a fuel line made of 0.020" brass rod. Wires look fat at 0.018", almost half an inch at full scale. There are thinner wires out there but as you get into 0.012" or 0.014" wires, the drill becomes increasingly fragile, and the wires lack stiffness to be able to poke them through into cylinder heads or coils.Plug Wires: The Final Frontier?


The 390 sure is a tight fit in the Fairlane bay. The coil springs, located above the upper A-arms, intrude into the bay the way a MacPherson strut would. A better fit in the Galaxie, perhaps?


The interior is pretty basic. I painted according to colour schemes found in some pictures from the Interweb. The kit included no decals for dials. The molded-in door handles and window winders were left alone. 


The chassis has been lowered by about 3 scale inches, by putting blocks under the rear leaf springs and by putting the uprights in upside down. At 1:1, these mods would both require a lot of inner fender work as the tires are jammed in there pretty tight, but at 1:25, hey it's a model. No problemo.


The only other major change was to swap in a set of Cragars from the parts box.The proper Fairlane mags are distinctive but not really that good looking, in my view. Black backing plates make the Cragars stand out nicely.


Overall it looks good. The kit had a few places where you needed to simultaneously glue three or four parts together in order to be sure it all lined up (two inner fenders, firewall and radiator, for example), but it's nothing a relatively practiced builder of AMT annuals can't handle. The lack of a functional tie rod means the two front wheels steer independently of each other.


There are a couple of scratches in the hood that are deep enough to require striping and repainting, not just sanding and polishing, so I am going to let it be. Another one done! Onwards.

Sunday, March 17, 2019

Ford Fairlane: Rattle can paint tutorial (Part 2)

After fixing a few little blemishes, I gave the Fairlane a few mist coats of Tamiya TS-71 Smoke, followed by a flood coat, all at the usual 20 minute intervals. This gave it a nice dark gray appearance. I also scraped paint off the Ford and Fairlane lettering. While not as effective as Bare Metal Foil or other approaches to highlighting emblems and lettering, it looks good, and an eventual coat of clear will highlight it further. So it is back to the drying stage for a few days before emblems and decals get put on.


The shine and mirror image is entirely without any polishing, just the paint straight out of the can. I am pretty happy with this. (Yes, there are still a few specks of dust in the roof, but I am betting they won't show without a spotlight shining on it at a sharp angle).


Meanwhile I painted and prepped the chassis, engine and other drivetrain bits. A lot of this is rattle cans, too, but small pieces like belts and pulleys get done by hand.

Subaru BRZ: Polish and clear coat (Tutorial Part 2)

As I am treating this as a bit of a learning experience, I went over the BRZ with the Tamiya compounds. They are indeed coarser than the LMG Micro Polish, leaving a fine network of scratches, so I repeated the LMG treatment which worked well. There are no photos as I couldn't get it to show up with the little point-and-shoot Canon.


Again in the context of a learning experience, I followed this with several mist coats of Tamiya TS-65 Pearl Clear at 20 minute intervals, followed by a flood coat. This variant on the standard gloss clear provides lots of sparkle, and would not be my first choice for more subtle builds.


One potential issue with the Pearl is that the nozzle, which was brand new, sounded like it was occasionally plugging, perhaps due to the flakes that give it the sparkle. So the message is to be careful to keep the nozzle clean, and don't get too close with the can.


Next is to assemble the chassis and interior. Stay tuned!