
Plug wires are poked through into the space between the footboxes and heads, but there was no way I was going to get them into the plug holes in the head, especially given the headers include a flange the length of the head. Again I am assuming that plug changes at 1:1 were a bit of a bear.
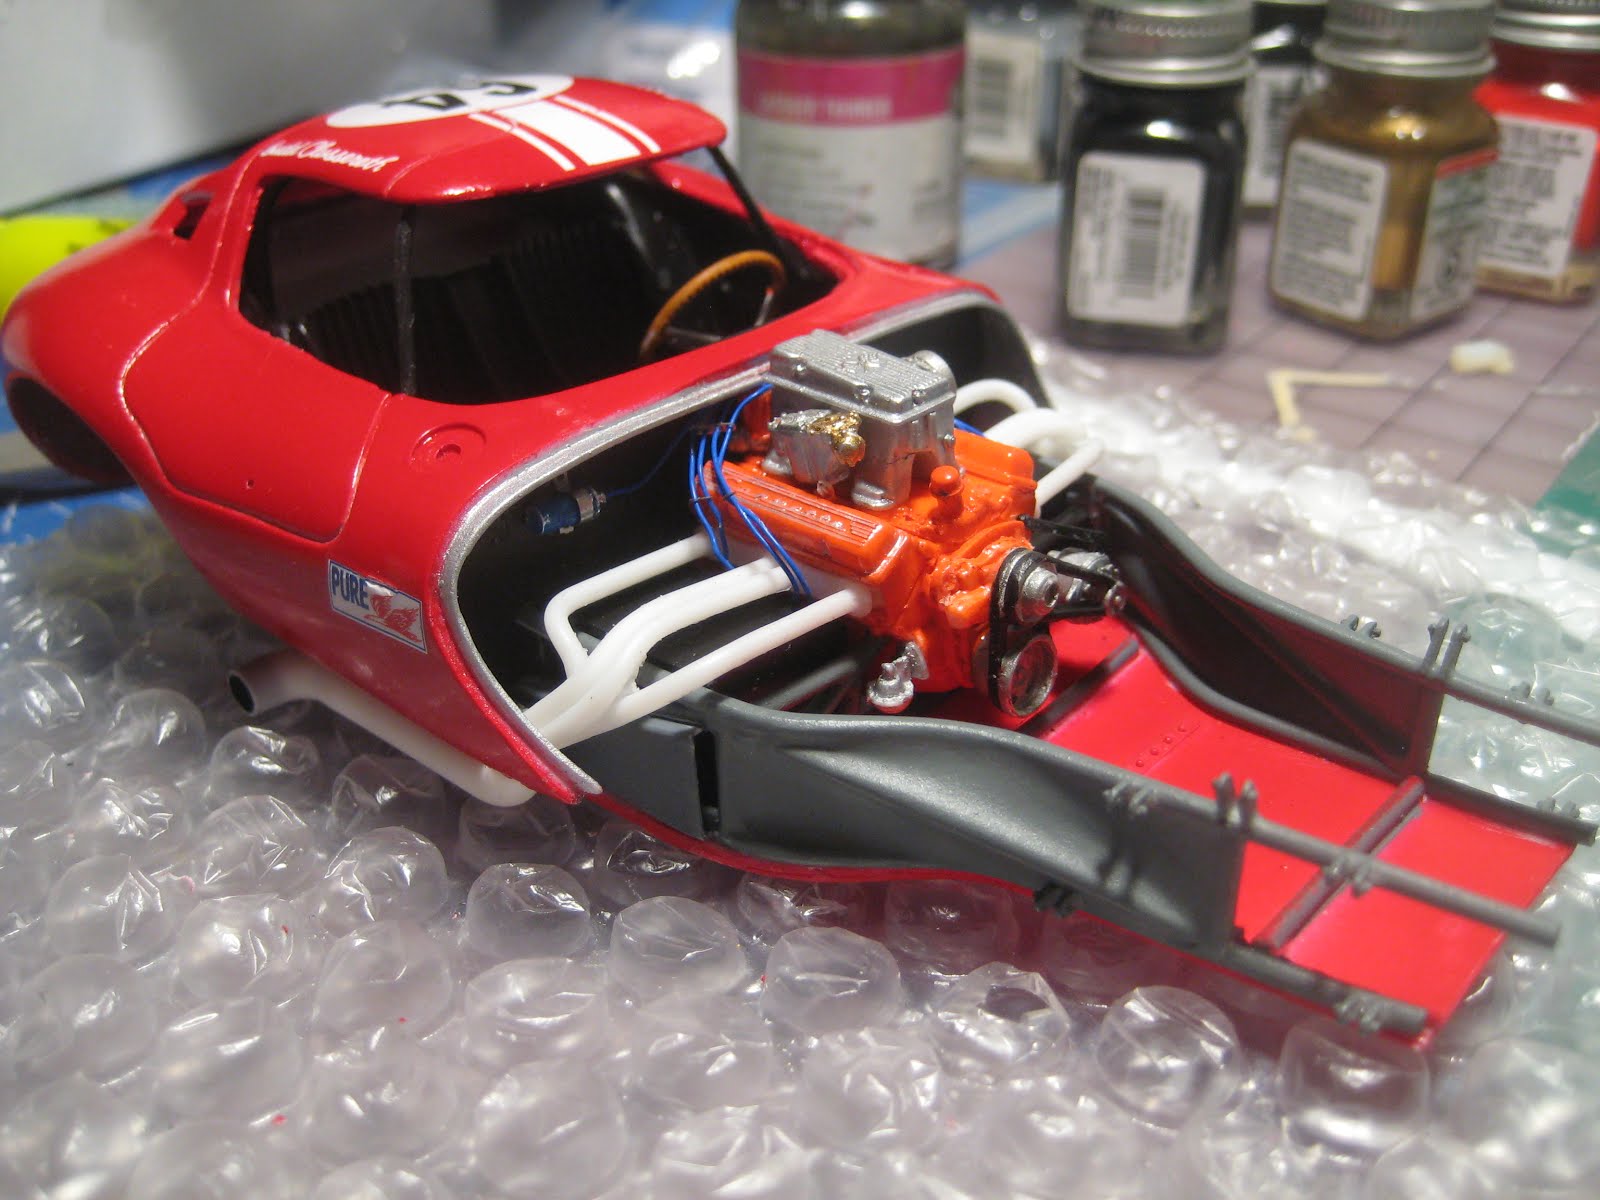
The instruction sheet mentions a few bits that I couldn't find in the well-numbered baggies provided by HRM. So the coil, for instance, came from the parts bin.

I am hoping the Rochester fuel injection unit is assembled correctly. There are no pictures in the instructions, which merely state that the engine assembly should be fairly straightforward. I used photos from the Interweb to guide me.

The 'driveshaft' consists of a U-joint. The engine simply can't go any further back without replacing gearbox and final drive with a transaxle, at which point the driver would have to move to the front.

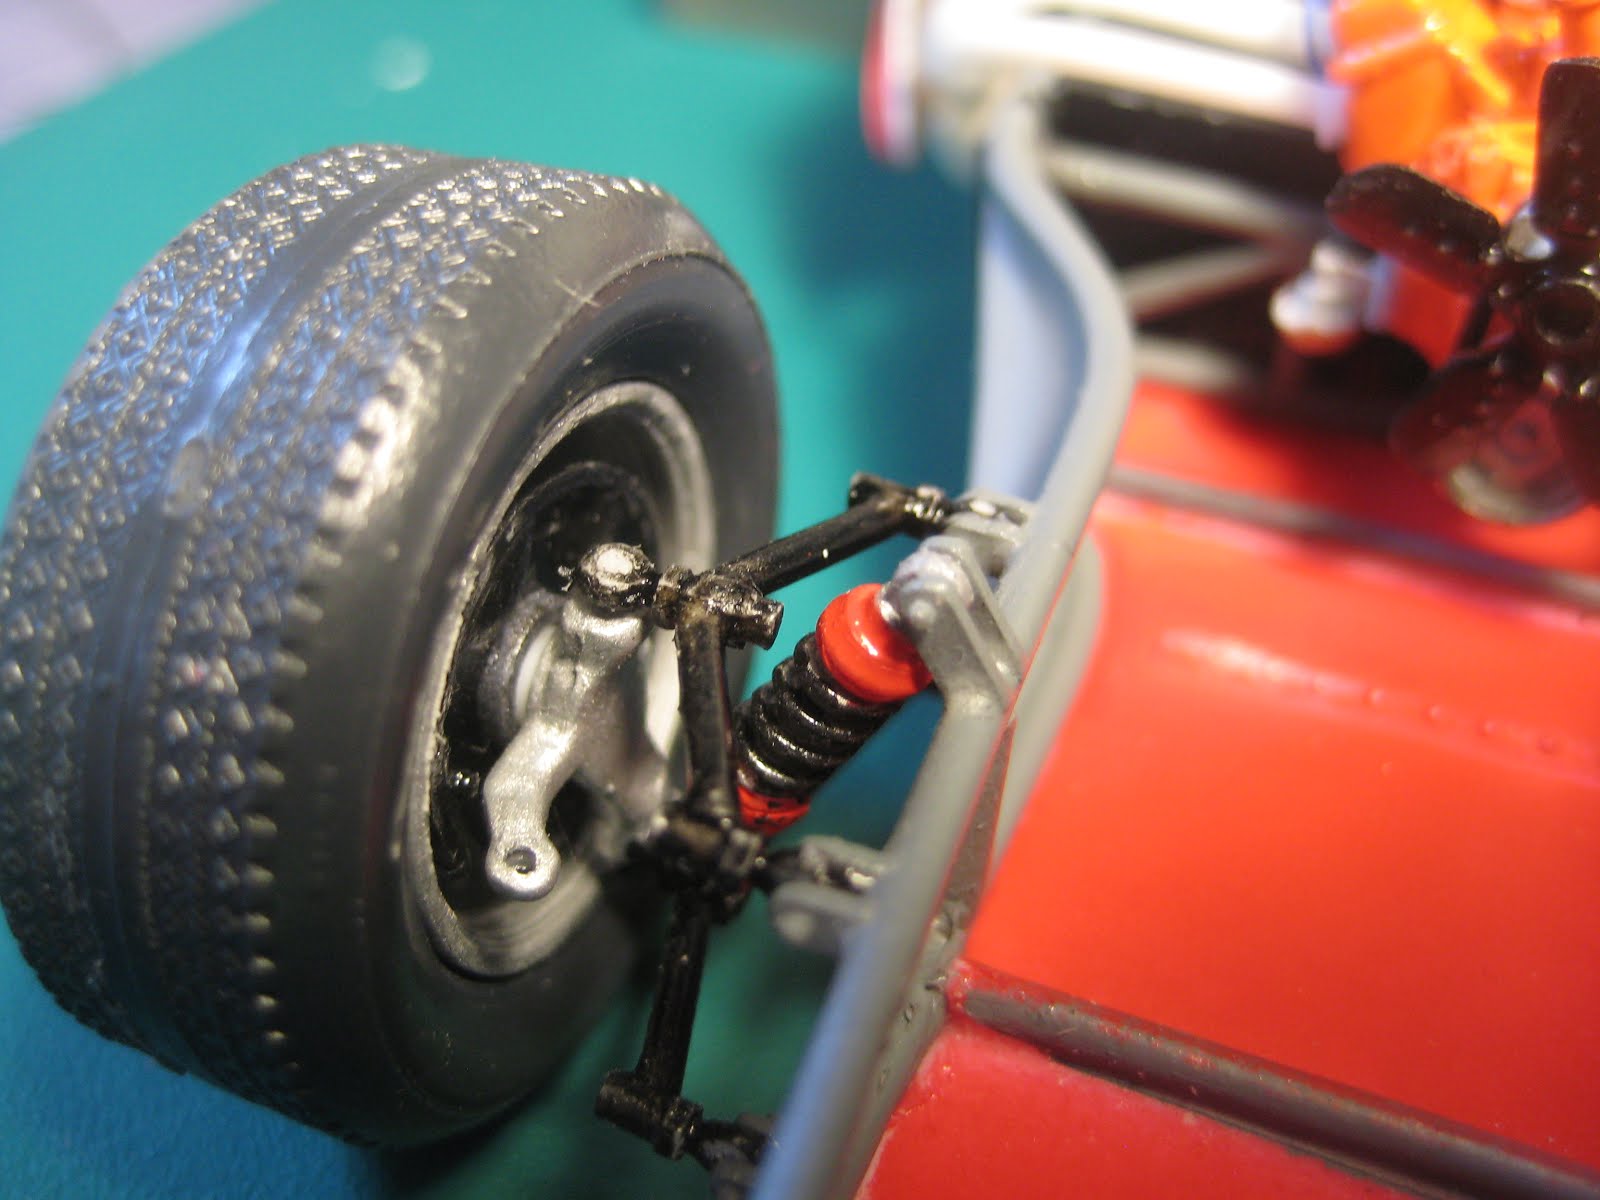
Front suspension is a pair of short A-arms. The rod ends are all threaded allowing quick alignment changes.
Lots of space ahead of the radiator.

Later versions of the same car have the radiator located well forward, in the empty space between the front wheels. This makes a lot of sense, and would have allowed hot air to be ducted out the holes in the hood.

Stance looks good! And the hood fits well. Given the flexibility of resin, and the usual vagueness about where stuff locates in these small production kits, this is very pleasant.

Slight differences in the wheelbase left to right, due to a slight error in assembly of the chassis on my part, are not obvious with the large wheel wells in the hood.

Details remain, including the radiator overflow tank, but it's looking good.

Stay tuned!
No comments:
Post a Comment