Monday, December 17, 2018

Chevy Ambulance: Interior Part II

While waiting for the paint to harden on the Volvo 240 so I can sand down the big fat run in the paint on the hood, I got the ambulance interior complete.


Outside there remain some touchups to be completed, but it's all looking reasonable.
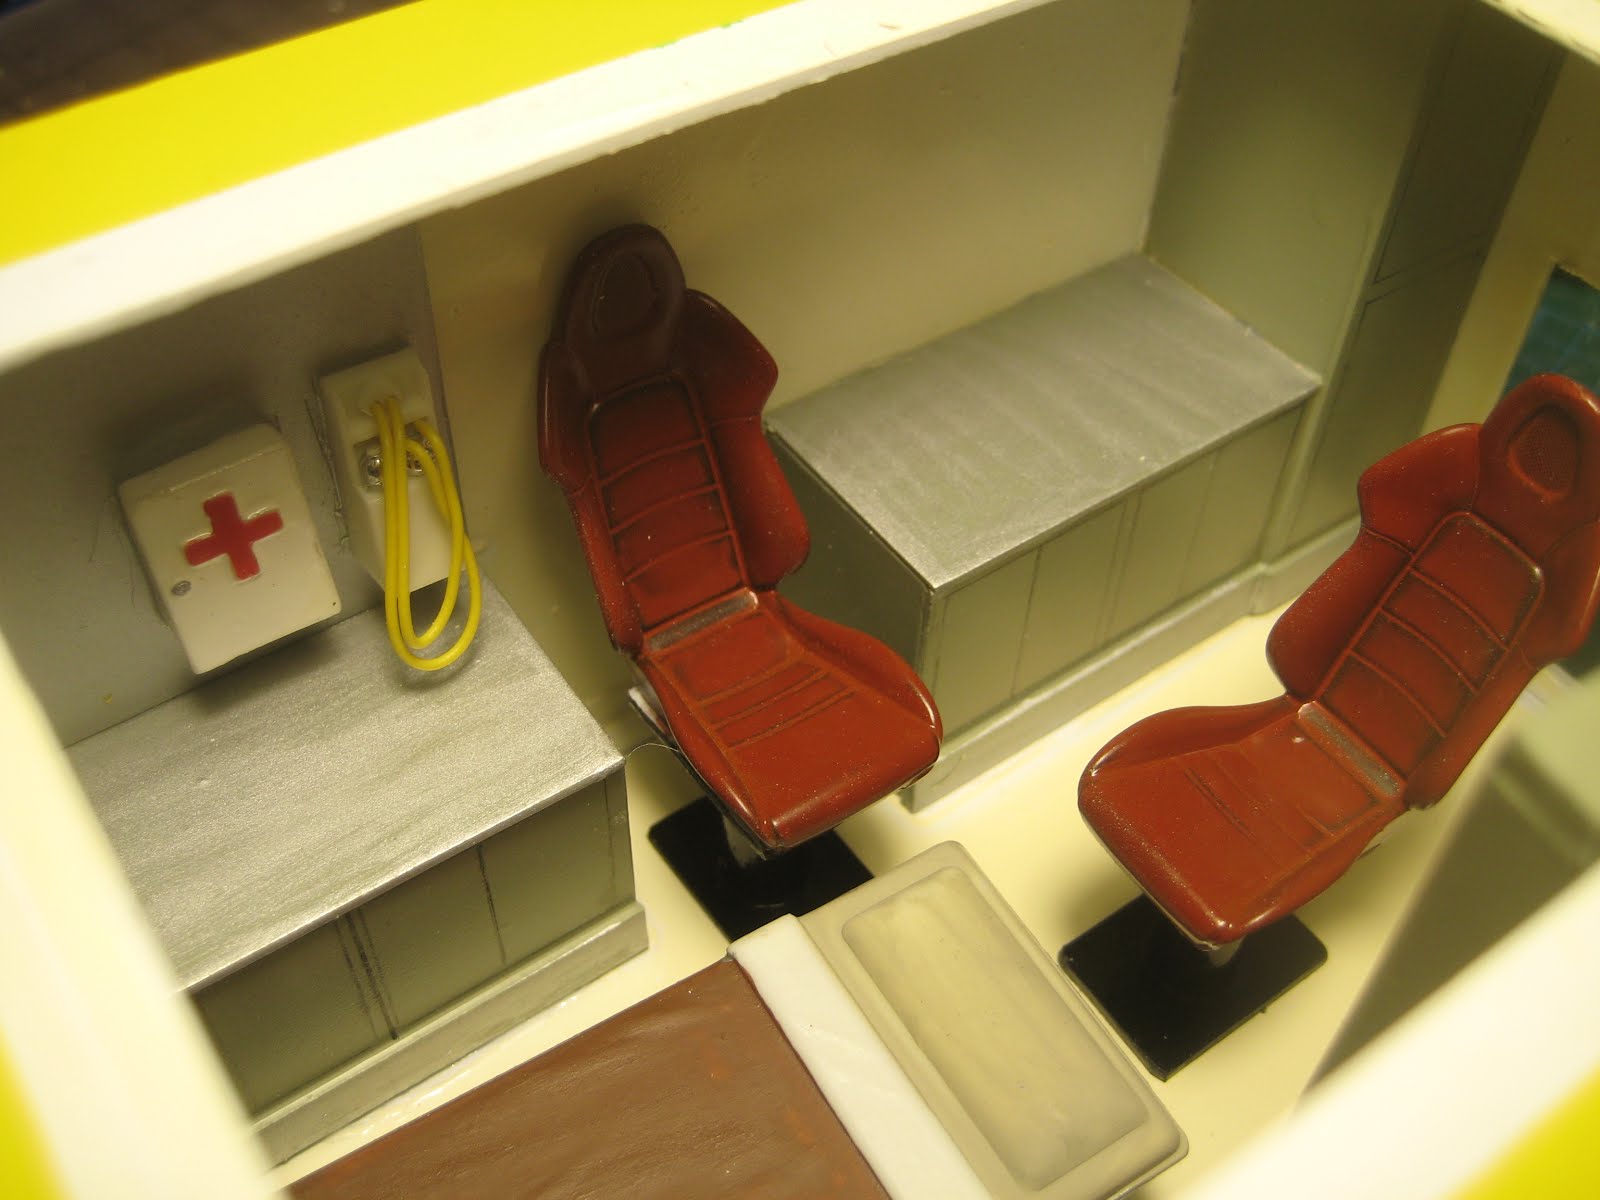


Hey, it's an ambulance. Of course it has a first aid kit. The thing next to it with the yellow hoses is meant to represent an oxygen system.


There is lots of counter space on which to put objects which will quickly become flying shrapnel when the driver is negotiating potholed city streets at speed. Having only been in an ambulance once, I based this on photos of ambulance interiors found in online manufacturer's catalogs, so accuracy is not really a strong point.


I do recall sitting on a bench seat of some kind opposite the tech seats. (I was not the patient.) The step plates on the rear bumper came from an Italeri truck accessory kit that also provided a crane, and more plate will be deployed here and there. The black rectangle on the floor just inside the door is meant to simulate a rubber mat.


The fire extinguisher is by the door, where it belongs, although I am not sure an ambulance tech would be qualified to try and put out a fire. The white stripe around the hole in the roof will be used to glue in some strip which will serve to frame a window once I am completely positive I don't need to put my big mitts in there anymore. Progress is being made. Stay tuned!

Sunday, December 16, 2018

Volvo 240 Turbo: A quick OOB?

Regular readers (if any) will know I have a fondness for Volvo wagons, having worked on 140 and 240 series cars as a mechanic in my youth. I've already got Tamiya's excellent 850 wagon, in racing trim; and when Aoshima/Beemax issued a 240 Turbo, also in racing trim, I couldn't resist picking one up along with the associated detail kit.


So while paint dries on the ambulance, and as a way of relaxing, I figured a quick OOB (Out Of Box) build of the 240 would be relaxing, especially given that, like the 850, it is a curbside model with no underhood detail.


First step: Tamiya primer followed by TS-26 Pure White. White paint on white plastic is a charm, but the wing is molded in black along with most of the other bits, so it needed lots of white primer to start with.

Wednesday, December 12, 2018

Chevy Ambulance: interior

The cab is done and includes a couple of radios from the parts bin. The driver's seat should be further outboard, centered under the wheel, but I am not going to move it at this point.


Cutting open the doors is challenging on this ambulance body as you wind up cutting into the styrene angle used to assemble the box. I guess the folks who made it (BCS Trading) weren't thinking that builders might want to open it up.


Here the angle includes a piece of the floor, as a stair will need to be built.


First was to build up a step for the side door. After I built this, I saw a bread delivery van unloading on the street, and it had two steps instead of one as I have done here, so maybe this is a big one at 14 scale inches.


With the big hole in the roof, I can now put stuff in there. I am making cabinets and counters based on photos found online from ambulance manufacturers.


The gurney and other bits came from the Chevy Rescue Van. Note the gurney is short, suitable only for people under 5'6". The padding looks pretty thin too. Seat belts or hold down straps might make a nice addition.


Looking nice and antiseptic so far! The big red thing in the corner is a fire extinguisher. Next: some taller cabinets in the corners, and captain's chairs for the seats. Not shown is a bench seat on the right side of the gurney. I'll probably draw door frames on the cabinets, or maybe print and paste.

Tuesday, December 11, 2018

Subaru Sambar: Complete (#17 for 2018)

With the Suburban out of the way, I decided to get the Subaru done as well. This was pretty quick as I didn't bother painting the body, which is molded in Subaru Rallye Blue; the panels show the flows of the molten styrene as it filled the mold but I decided it wasn't worth the trouble. Also the detail is very fine, and thin  coats of paint add up; a lot of very small holes and so on would have been obscured.


The interior is very well detailed, right down to little decals for the headlamp and washer control stalks on the steering column (which I didn't bother installing).


The cab went together well, in spite of consisting of multiple pieces; heaven help you if you get a kit with a warped main cab shell.


The fussiest bit is the little black panel below the tailgate, which hides the motor; it appears this is meant to swing down for engine access, but I mounted the hinges upside down and decided just to glue it all in. A shame as the engine is pretty cool looking.


Here it is with the box in place. There are a number of finicky little bits that need to be just right, or the box won't go on properly.


I have built better models; the quality of this kit is such that in retrospect it would have benefited from a bit more care. The photography, for instance, hides a couple of fingerprints arising from my fat thumb having got some glue on it.


The difference with the Suburban is huge, and the size differential would be worse if both were the same scale. The Subaru is 1/24; the Suburban, at 1/25, would be 4.2% bigger if it were 1/24. A small but in some cases noticeable difference.


40 versus 421 cubic inches. The tidy little 658 cc 4-cyl, lying on its side behind the rear wheels, is a miracle of packaging compared with the Suburban where a quarter of the road space occupied by the vehicle is taken up by mechanical bits. .


So that's that. No excuse now not to get back to the ambulance ...

Monday, December 10, 2018

1955 Suburban: Body and finishing touches (#16 for 2018)

The blue went on OK, with some minor issues I won't address. The drip rails were painted with an enamel pen, which also went on relatively well. Using enamel on top of Tamiya spray paints means that paint thinner can be used to quickly clean up a mistake with the enamel without damaging the underlying paint.


Stance looks good, and the 8-lug, 18" 4X4 rims from Scenes Unlimited look better in the context of a '55 Suburban than the chromed items from the Hilux.


The grille from the Cameo is pretty substantial. The choice was trying to put black paint in the gaps, or slicing off the back. I did the latter, using a jeweller's saw, and put in a piece of mesh from the parts bin.


This is much better.


Next I put on fender flares from the Toyota, and the visor from the Cameo. These, along with the wheels, grille and bumper, are all painted Tamiya TS-7 Racing White, which is a bit creamy.


Decals include the coat of arms of Seyðisfjörður, on the east coast of Iceland, and period-correct license plates for a vehicle registered in Keflavik. 


The engine compartment is fair. The engine should have been set further back, which would have entailed moving the transmission rearwards and playing with driveshaft lengths; there is a lot of room between the engine and firewall, but no room ahead of the engine for a radiator, a fact I have cleverly obscured by my choice of photographs.


Overall this was a fun build requiring lots of creativity. I will look for a spare tire to mount on the right rear door, and may one day get around to finishing off the exhaust system; meanwhile I am calling this one done.

Thursday, November 29, 2018

Subaru Sambar: Chassis

As a break from the two American trucks on the bench, I decided to tackle Aoshima's Subaru Sambar. The kit comes with a flyer for the 2011 Sambar recognising 50 years of production. Prices are listed as well, ranging from 899,000 Yen for a basic 2WD truck to 1,408,950 Yen for the fully loaded 4WD version of the van. The kit models the 4WD truck which (if I interpret the flyer properly) went for just over 1 million Yen for the 5-speed version.


What a detailed little kit! Some Aoshima kits are pretty basic but this one involves plenty of teensy weensie little bits. A certain amount of fiddling arises due to the very small dowel and socket joints.


The present version has a 658 cc inline 4 making 48 hp. It's mounted transversly and tipped over on its side, behind the rear wheels. The cam cover and spark plugs face rearwards. 


The 4WD system is well modeled. The chassis includes a large number of coolant and other pipes from front to rear.


The inevitable comparison with the Suburban shows the huge difference in size, which is actually worse in real life because the Suburban is 1/25 while the Sambar is 1/24.


The chassis is essentially done. Stay tuned!

1955 Suburban: Paint

Constant readers (if any) will know I've had my share of problems with paint on resin in the past. Typically half the problems (at least) have been self-inflicted ... anyway this time it all seems to be working out, and I am letting it all sit for a few days before touching it again.


I am debating painting the remaining metal bits (fender flares from the Toyota; visor, bumpers and grille from the Cameo) in contrasting white, or in red to match the window surround. To be continued.